

This post may contain affiliate links. Please read my disclosure policy.
In This Article Show
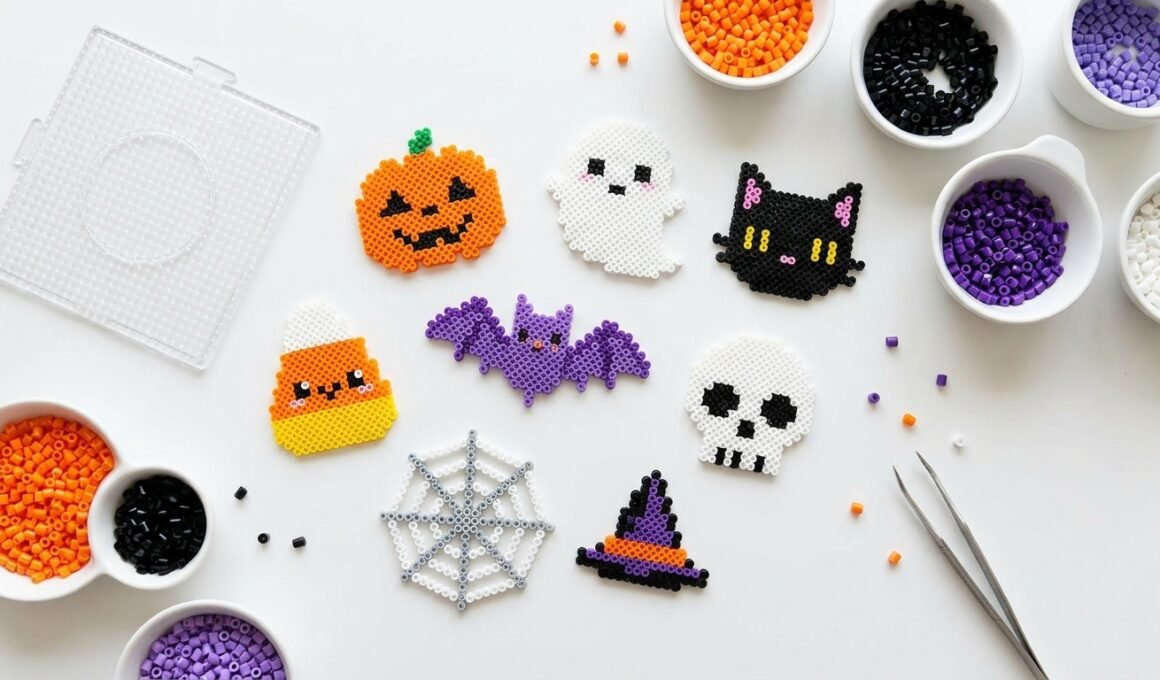
Halloween is the perfect time to turn colorful fuse beads into tiny ghosts, smiling pumpkins, spooky cats, and playful monsters. Whether you prefer adorable decorations or classic spooky designs, these halloween perler bead patterns offer plenty of inspiration for your next crafting session. You can make simple projects for beginners, tiny accessories, colorful seasonal gifts, and larger decorations for your home. Perler beads are especially fun because you can customize almost every design with different colors, expressions, and details. Make a cute ghost for your desk, a pumpkin coaster for your Halloween party, or a little black cat keychain to carry throughout the season. Get your beads and pegboards ready, and explore these creative ideas.
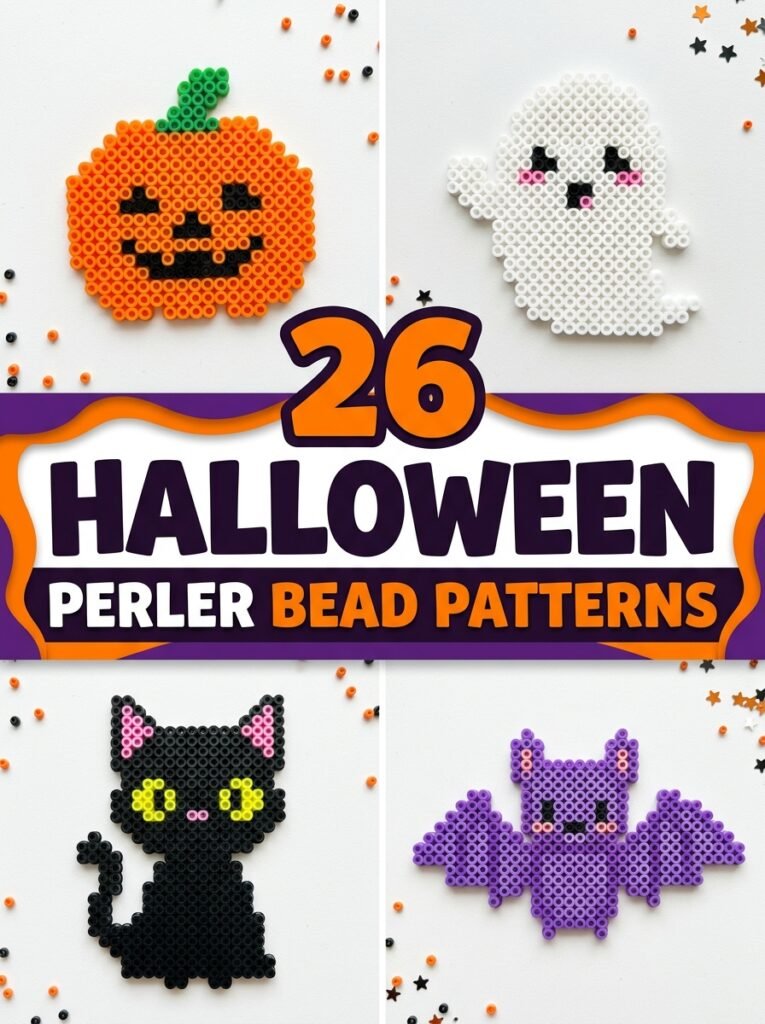
1. Easy Smiling Pumpkin
A smiling pumpkin is one of the best beginner projects because its round shape and familiar features are easy to recreate. Use orange beads for the pumpkin, green beads for the stem, and black beads for the eyes and mouth. You can make a classic jack-o’-lantern face or give it a friendly smile for a cute Halloween look. Add a few darker orange beads around the edges to suggest the pumpkin’s natural sections. This design works well as a small decoration, fridge magnet, or part of a larger Halloween collection.
2. Cute Little Ghost
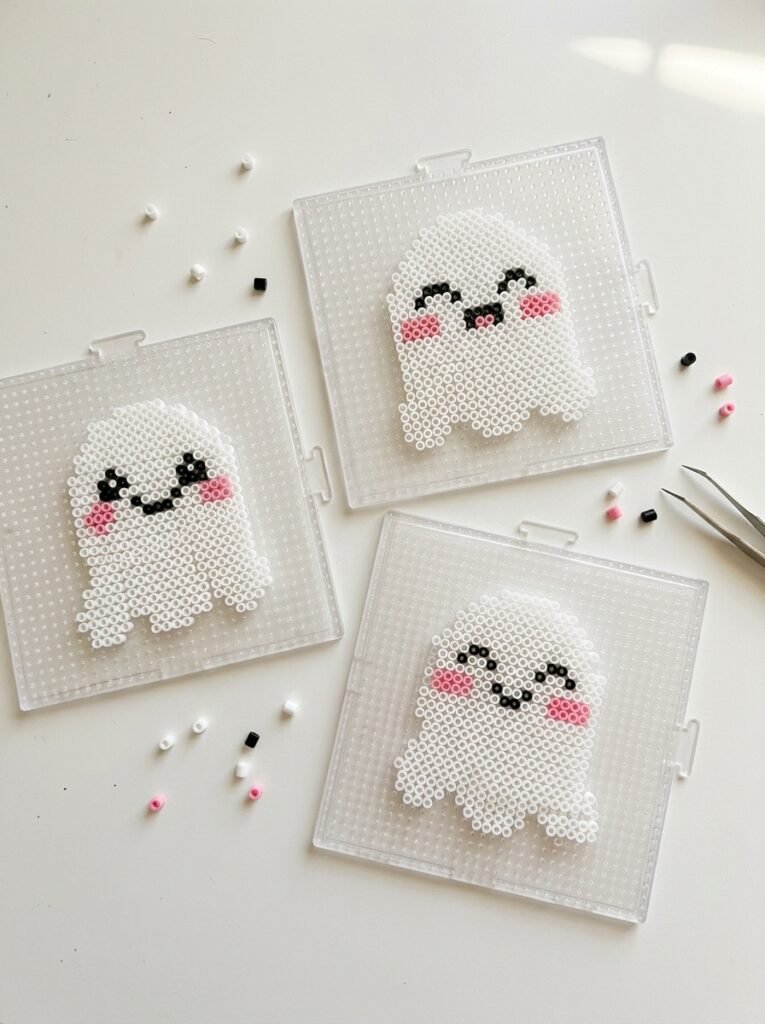
A tiny ghost is a classic Halloween design that can look spooky or adorable depending on its expression. Use white beads to create a rounded head and a wavy lower edge, then add black eyes and a small mouth. Pink cheeks can make the ghost look extra sweet, while a surprised expression adds a funny touch. For a simple version, keep the silhouette compact and avoid too many details. Make several ghosts with different faces to create a charming little collection for shelves, party decorations, or handmade gifts.
3. Tiny Halloween Perler Bead Patterns
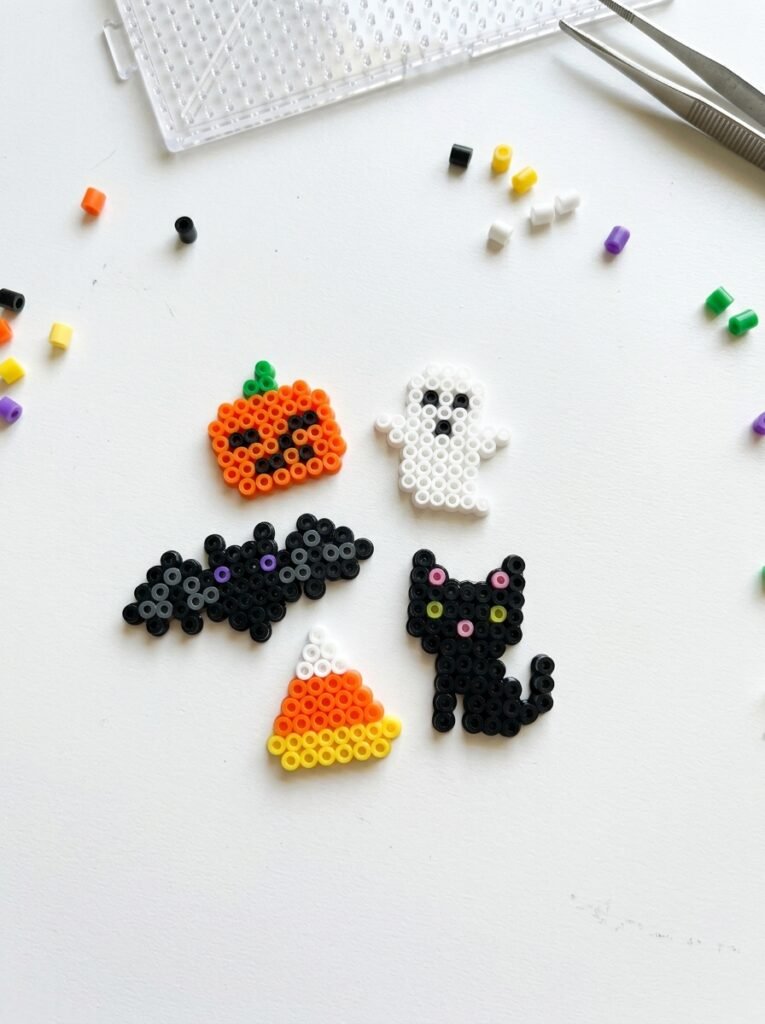
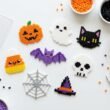
Tiny designs are ideal when you want to finish a project quickly or use leftover beads. Create miniature pumpkins, ghosts, bats, candy corn, and little black cats using compact pixel-art shapes. Because the pieces are small, choose strong color contrasts and simple facial features that remain recognizable. You can make a coordinated set of five or six designs for a miniature Halloween display. These tiny projects are also useful for experimenting with patterns before making larger versions, although small finished pieces should be kept away from young children because they can pose a choking hazard.
4. Black Cat with Glowing Eyes
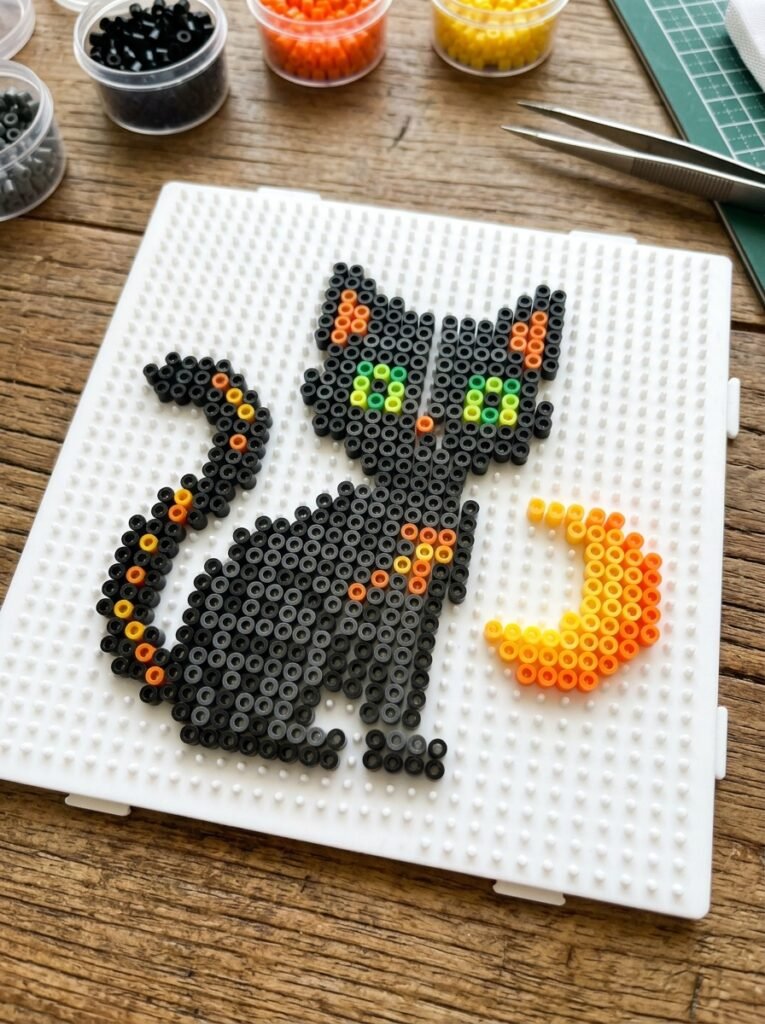
A black cat adds a mysterious touch to any Halloween craft collection. Build a simple cat silhouette with pointed ears, a curved tail, and bright yellow or green eyes. Add a tiny orange nose or a small crescent moon beside the cat to strengthen the seasonal theme. You can create a sitting cat for a balanced shape or an arched-back cat for a spookier appearance. The strong contrast between black beads and bright details makes this design stand out, even when you use a relatively small pegboard.
5. Spooky Spider
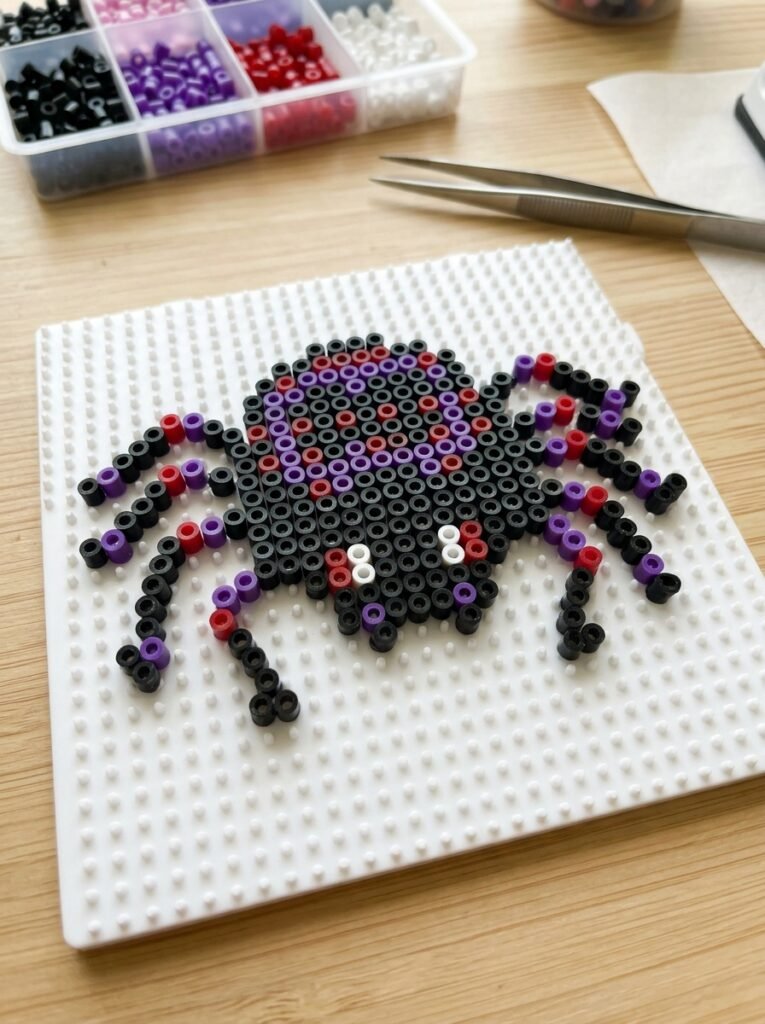
A spider pattern is a fun way to add a little spooky detail without making the project too complicated. Use a black or purple round body with eight clearly separated legs, and add tiny white or red eyes for personality. A smiling spider looks friendly, while narrow red eyes give it a more mysterious appearance. Keep the legs thick enough to stay connected after fusing. You can also create a smaller spider to pair with a larger web design, making the two pieces look like part of the same Halloween scene.
6. Classic Candy Corn
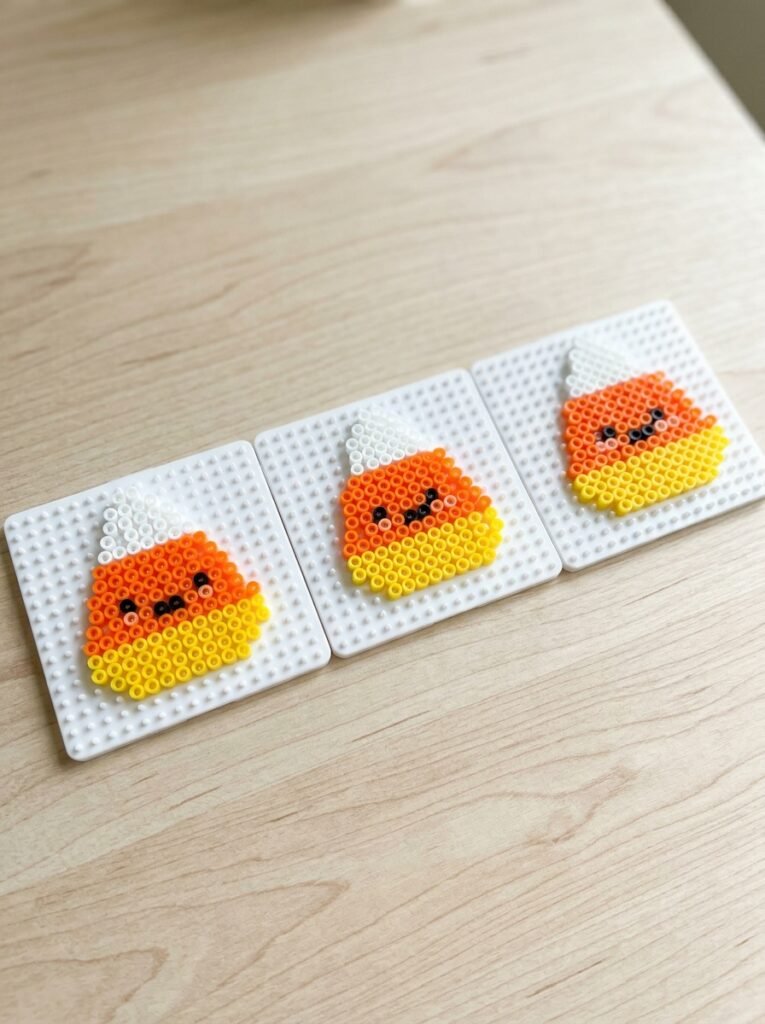
Candy corn is a recognizable Halloween treat with a simple three-color pattern. Build a small triangular shape using white beads at the top, orange beads in the middle, and yellow beads at the bottom. Add tiny black eyes and a smile if you want to turn it into a cute character. The design is easy to customize and works especially well alongside pumpkins, ghosts, and other tiny seasonal decorations. Make a few pieces in different sizes to create a coordinated collection for a party table or craft display.
7. Halloween Bat
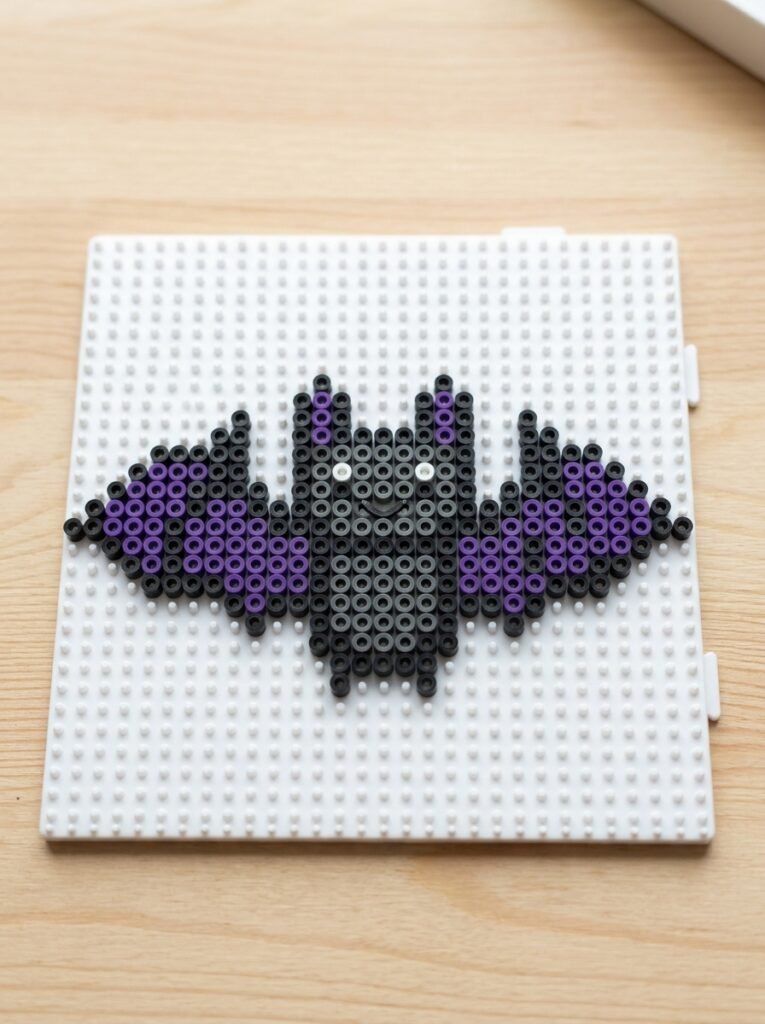
A bat is a great project for practicing symmetrical shapes. Start with a small central body, then extend the wings outward using stepped rows of black or dark purple beads. Add tiny white eyes or a small smiling mouth to make the bat less intimidating. For a more dramatic design, use dark blue and purple beads with a few contrasting highlights. This pattern can become a hanging decoration, a small keychain, or part of a larger Halloween scene featuring a moon and stars.
8. Mini Skeleton
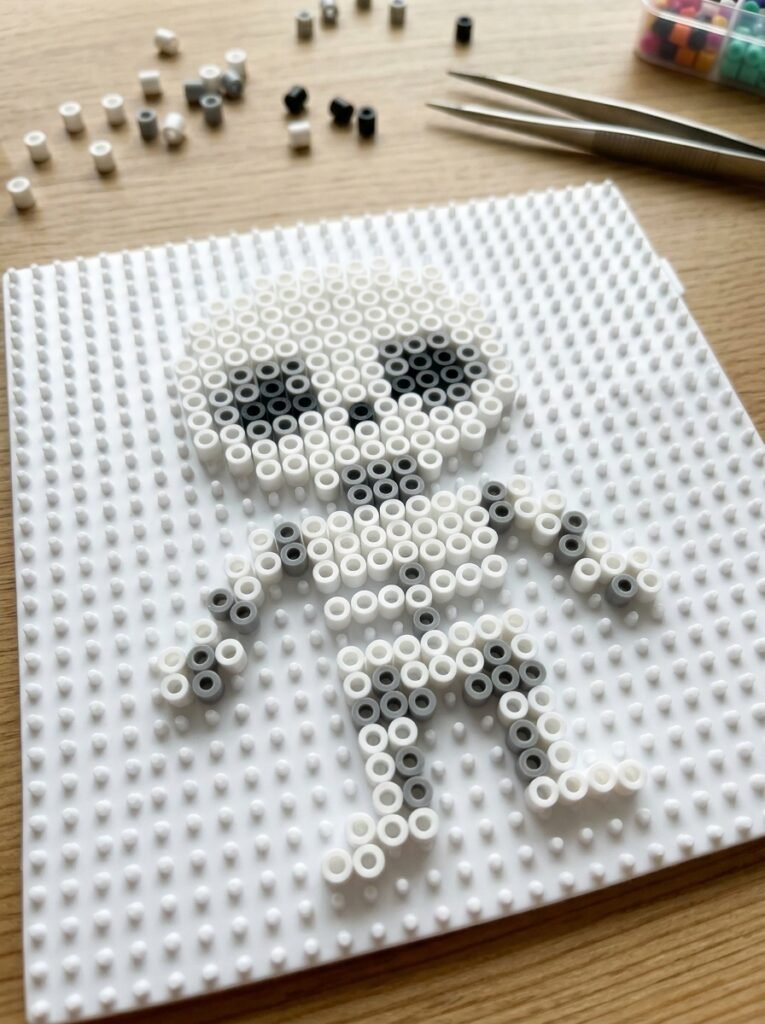
A mini skeleton brings a classic spooky character into a compact bead design. Use white beads for the skull and bones, black beads for the eye sockets and mouth, and a few dark gray beads to create separation between the body parts. A simplified standing skeleton is easier to make than a detailed anatomical design, so keep the arms and legs short and sturdy. You can also make just a skull and crossbones for an even simpler project. This design pairs well with ghosts and bats in a themed Halloween display.
9. Skull with a Cute Expression
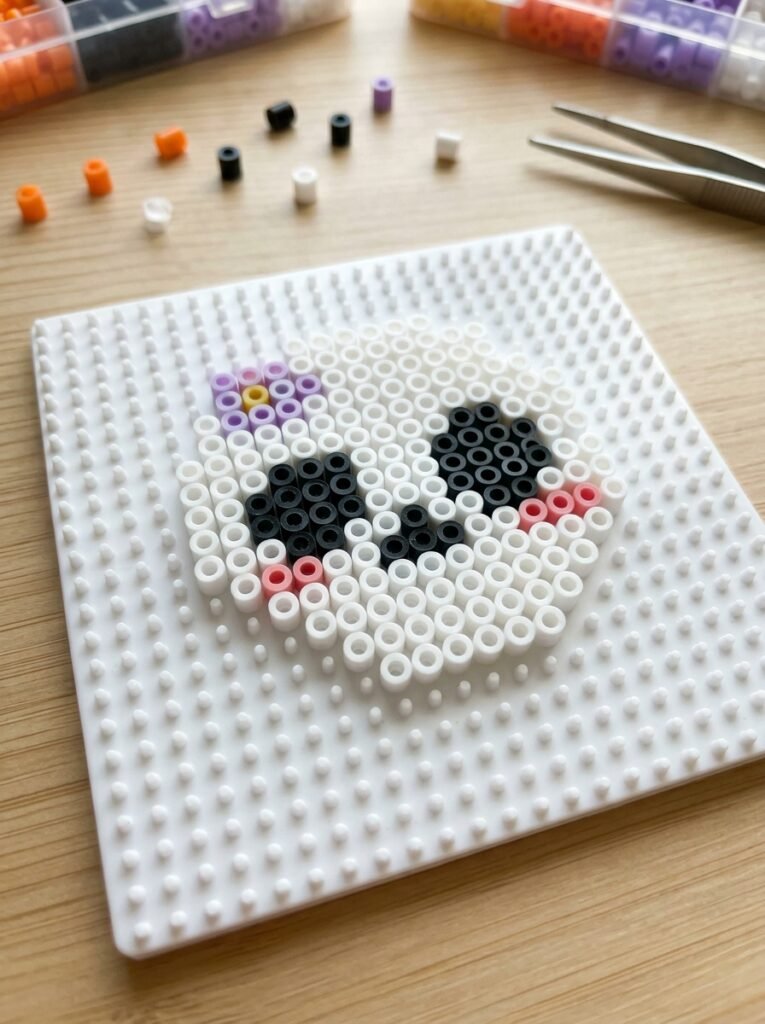
A skull design can be spooky without looking frightening. Use white or cream beads to build a rounded skull, black beads for the eye sockets and nose, and a short dark line for the mouth. For a cute twist, add pink cheeks, a small bow, or a tiny flower beside one eye. You can also use lavender or mint beads for a colorful, playful version. The simple face makes this project suitable for beginners, while extra decorative details give more experienced crafters room to personalize the pattern.
10. Small Witch Hat
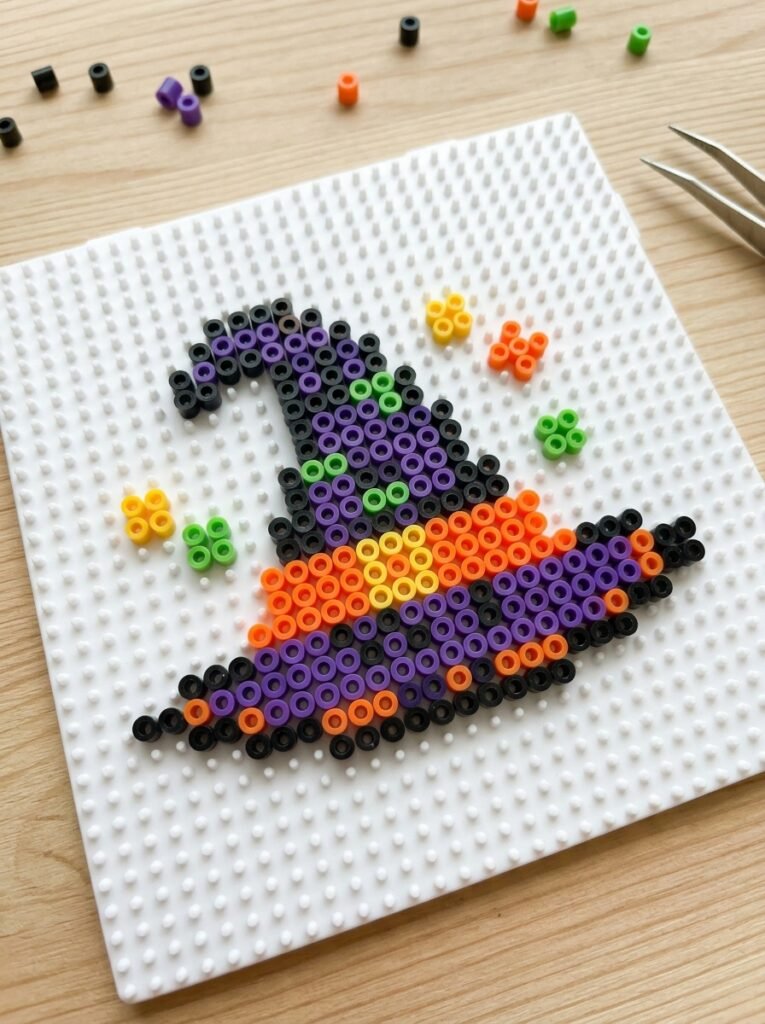
A little witch hat is an easy way to add a magical touch to your Halloween collection. Use black or deep purple beads for the pointed hat, then add a bright orange band and a small yellow buckle. You can make the brim wider than the top to create a recognizable silhouette. For a more colorful version, try a purple hat with green accents or a black hat decorated with tiny stars. This design works well on its own or as an accessory for a ghost, cat, or pumpkin character.
11. Spider Web Circle
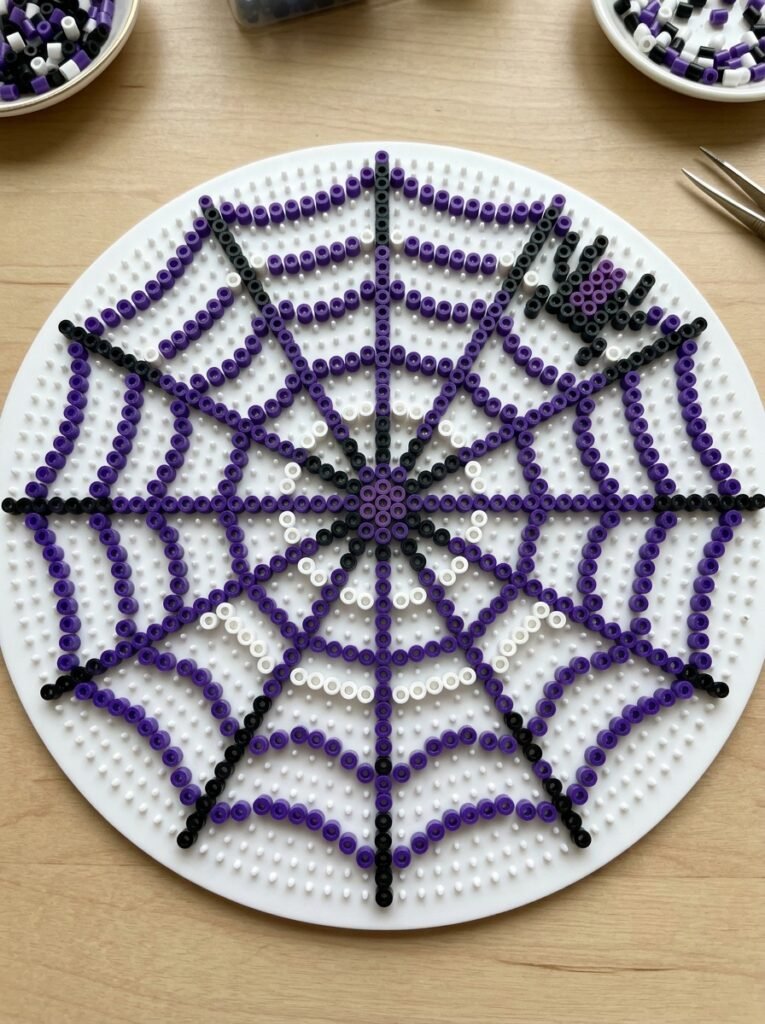
A circular spider web creates a striking decoration because of its geometric symmetry. Use black beads to form the outer ring and radial lines, then connect the lines with smaller stepped sections to suggest a web. A white or purple background can make the web more visible, while a tiny spider in one corner adds a fun finishing detail. Work outward from the center and keep the spacing as even as possible. This pattern can be displayed on a wall or paired with other spooky designs for a coordinated Halloween setup.
12. Halloween Earrings
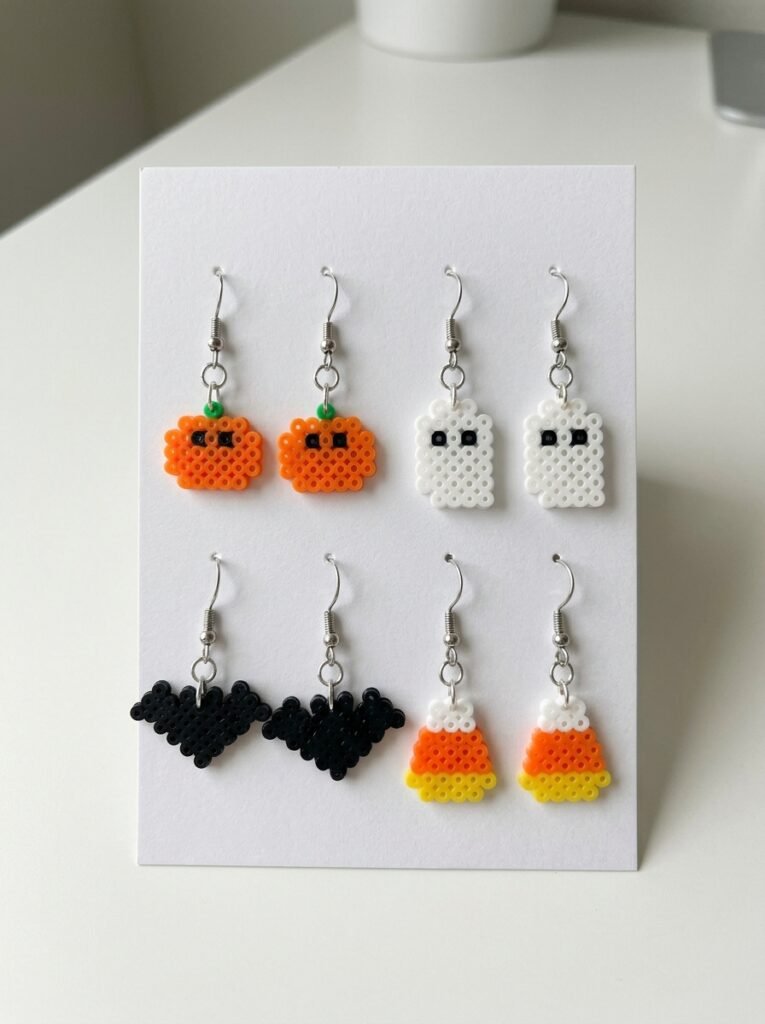
Small Halloween earrings are a fun way to turn fuse-bead art into wearable accessories. Make miniature pumpkins, ghosts, bats, or candy corn designs, keeping each piece light and compact. Create matching pairs with the same shape and color arrangement so they look coordinated when worn. Once the beads have been fused and cooled, use suitable jewelry findings and secure attachment points. Make sure the finished edges are smooth and the hardware is appropriate for earrings. These accessories are best made with adult help when cutting, attaching, or handling small components.
13. Halloween Keychain Collection
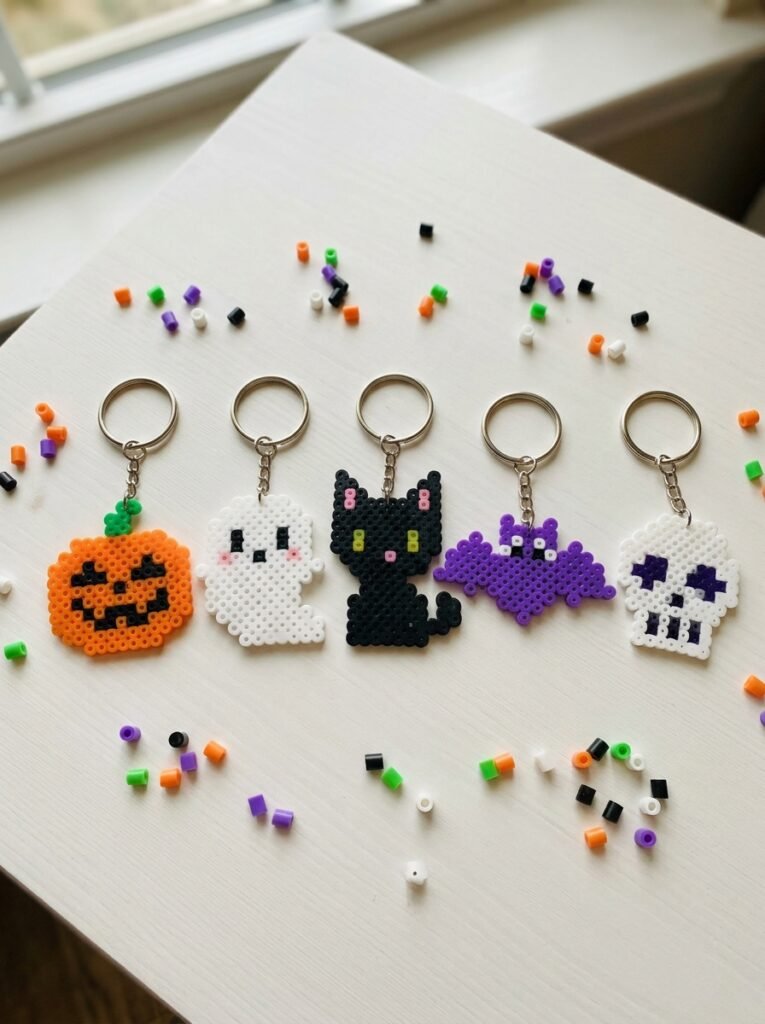
Keychains are excellent for small Halloween designs because they let you carry your favorite seasonal character everywhere. Choose a compact pumpkin, ghost, bat, skull, or black cat and create a sturdy outline with a suitable attachment point. Use bold colors and simple features so the design stays recognizable at a small size. You can make matching keychains for friends or family members, giving each person a different character. After fusing and cooling, attach suitable hardware and check that the piece is secure before everyday use.
14. Cute Halloween Coasters
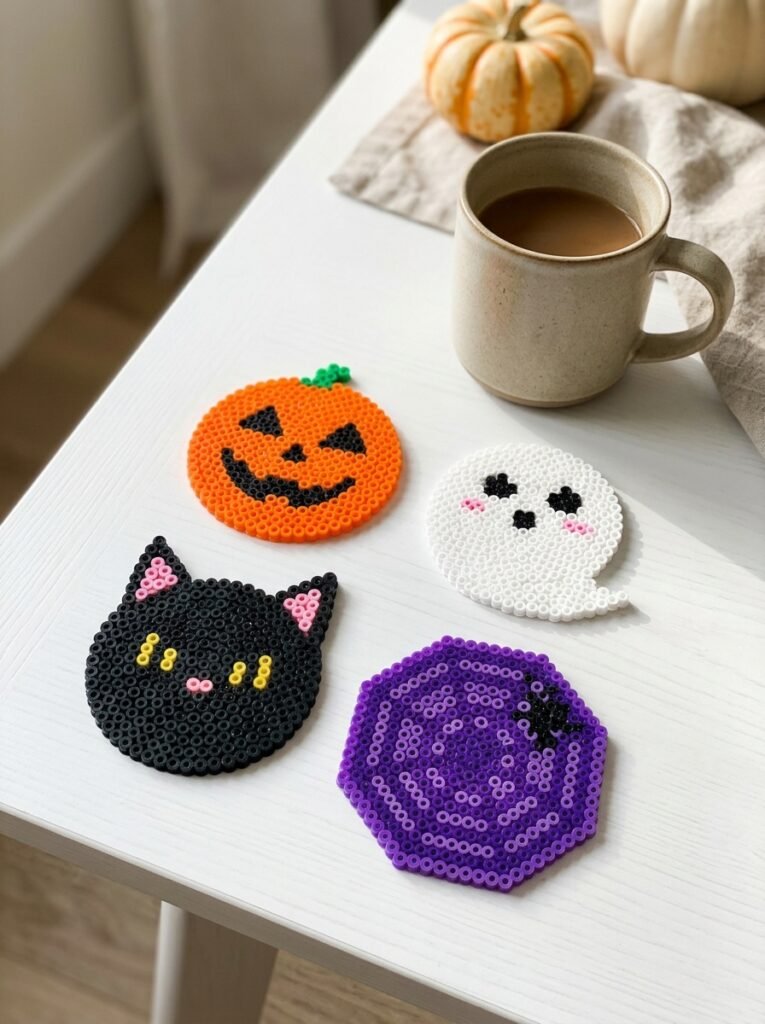
Halloween coasters combine seasonal decoration with a useful household item. Make a flat pumpkin face, a circular ghost, a spider web, or a black cat design using a round or square pegboard. Choose a pattern that leaves a reasonably even surface for placing a cup. For actual drink use, check that the fused bead piece is stable and suitable for the intended temperature; adding an appropriate coaster backing can improve practicality. A matching set in orange, black, purple, and white can create a coordinated look for a Halloween party.
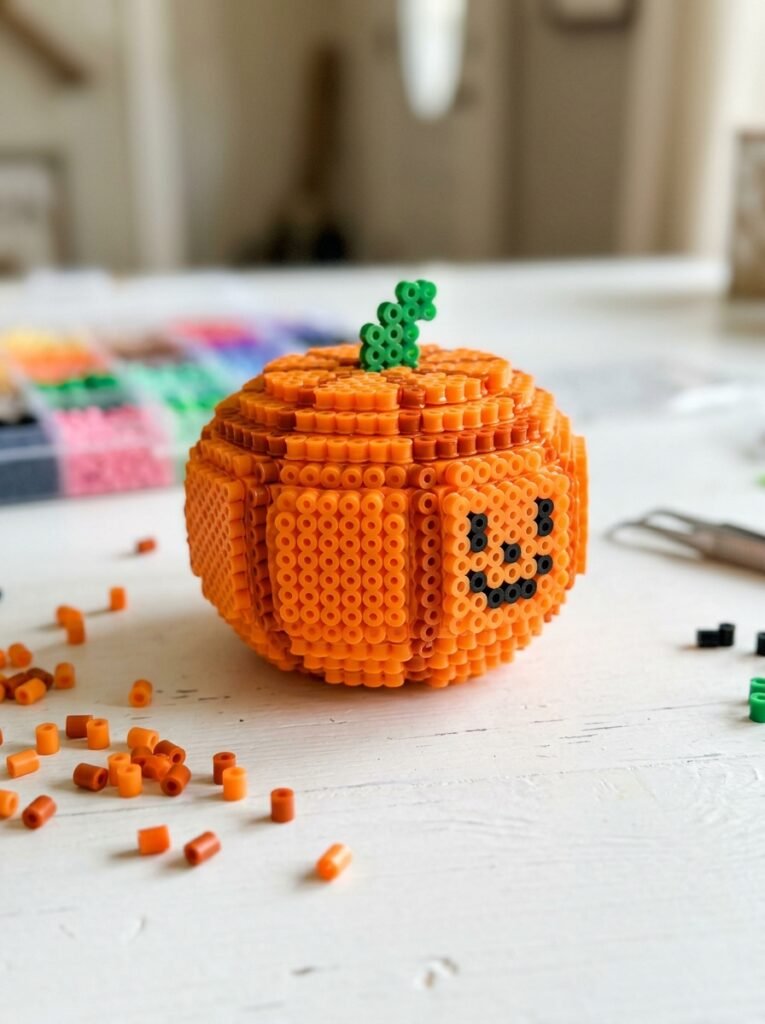
15. 3D Pumpkin Decoration
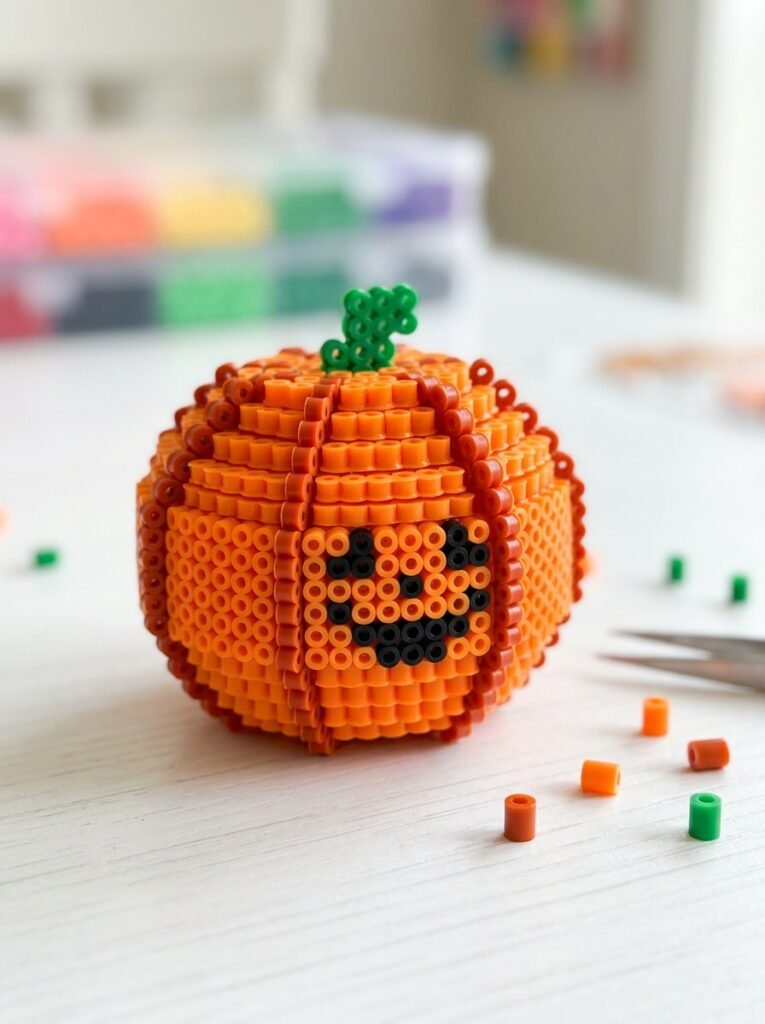
A three-dimensional pumpkin is a more advanced project that adds depth to your Halloween display. Create separate curved-looking sections or interlocking panels using orange beads, then assemble them into a rounded form with a green stem. Darker orange beads can suggest the pumpkin’s ridges, while a small face can turn it into a jack-o’-lantern. Plan the connection points before fusing because thin sections may not support the final structure. Allow each piece to cool completely and follow the manufacturer’s instructions when fusing and assembling the components.
16. Large Halloween Ghost
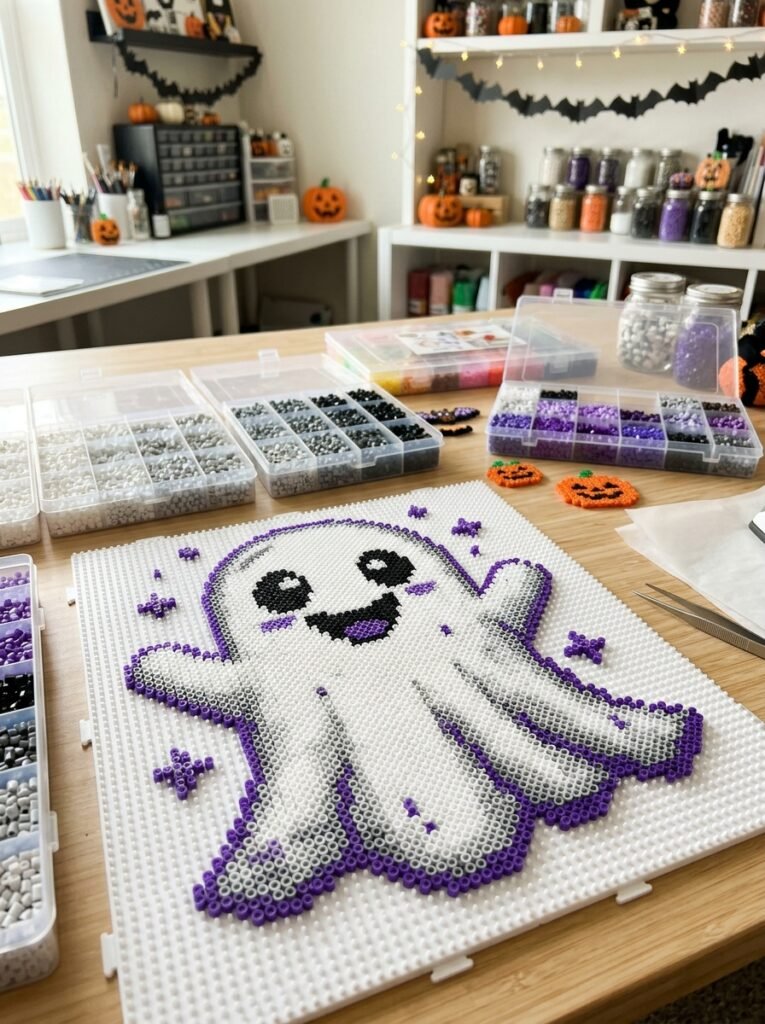
A large ghost makes a bold centerpiece for a seasonal craft display. Use a bigger pegboard to create a wide rounded head and a flowing, wavy lower edge. White beads provide the main shape, while black beads form the eyes and mouth. You can add a purple outline or tiny orange stars around the edges to make the ghost stand out. Larger patterns give you more room for expressive faces and decorative details, but work carefully to keep the outline connected and the bead arrangement even.
17. Vintage-Inspired Halloween Pumpkin
For a vintage-inspired Halloween look, use a muted but coordinated palette of burnt orange, cream, dark green, and charcoal. Create a traditional pumpkin silhouette with a slightly old-fashioned jack-o’-lantern expression, then add a small leaf or curved vine. The design can evoke classic seasonal decorations while still using clean, modern bead construction. Keep the color choices intentional rather than dull, and use a clear outline so the pumpkin remains recognizable. This style works especially well alongside simple black cats and cream-colored ghosts.
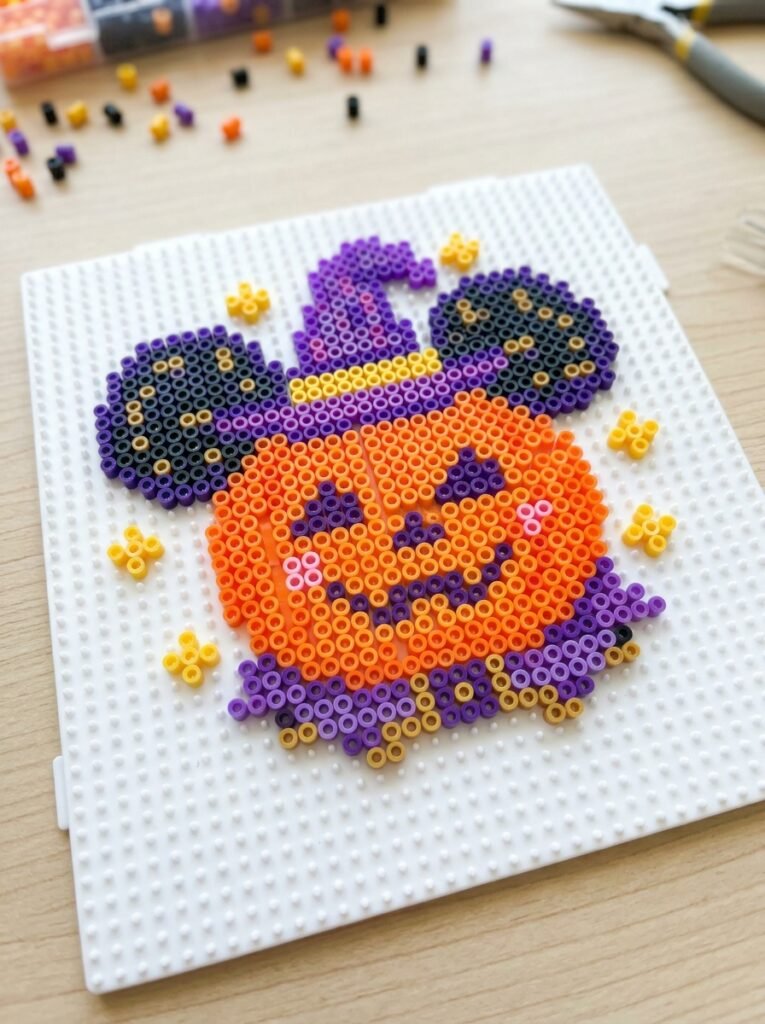
18. Disney-Inspired Halloween Character
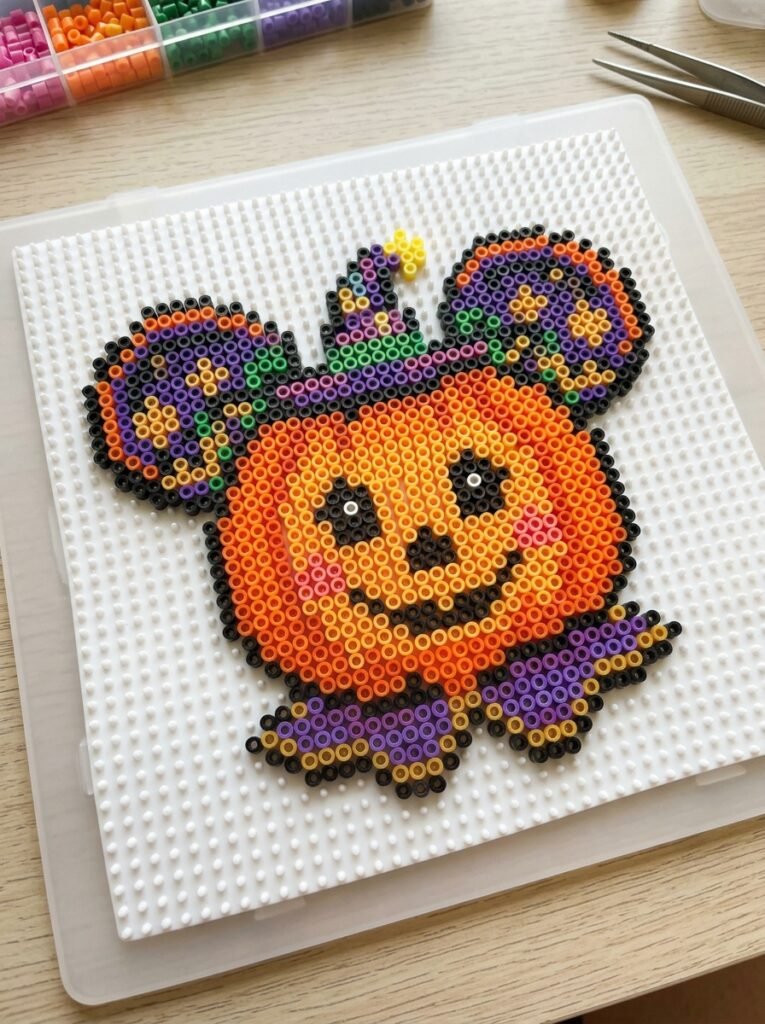
Give your Halloween collection a fairytale feeling with an original cartoon-inspired character. Combine a cheerful pumpkin, a magical mouse-ear-inspired silhouette, tiny stars, or a whimsical ghost using orange, black, purple, and gold beads. Keep the design original rather than copying an exact Disney character, face, or logo. You can create your own friendly Halloween mascot with distinctive ears, a unique expression, and a colorful costume. This approach gives you the playful charm of animated Halloween art while leaving plenty of room for personal creativity.
19. Easy Disney-Inspired Ghost
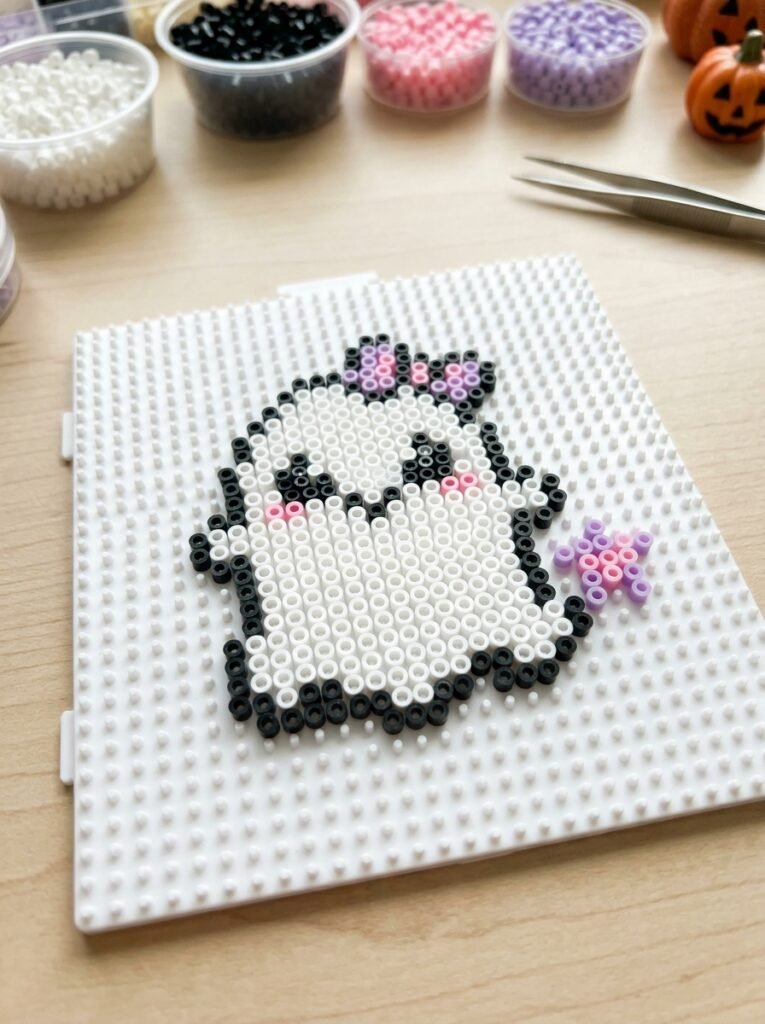
For a beginner-friendly animated look, create a simple ghost with an expressive face and a tiny decorative bow or star. Use white beads for the body, black beads for the eyes, and pink or purple accents for the accessory. Keep the ghost’s shape rounded and uncomplicated, so it is easy to assemble on a small pegboard. Instead of reproducing a specific Disney ghost or character, give your design original facial features and details. The result can still feel magical, cute, and suitable for a playful Halloween craft collection.
20. Hello Kitty-Inspired Halloween Cat
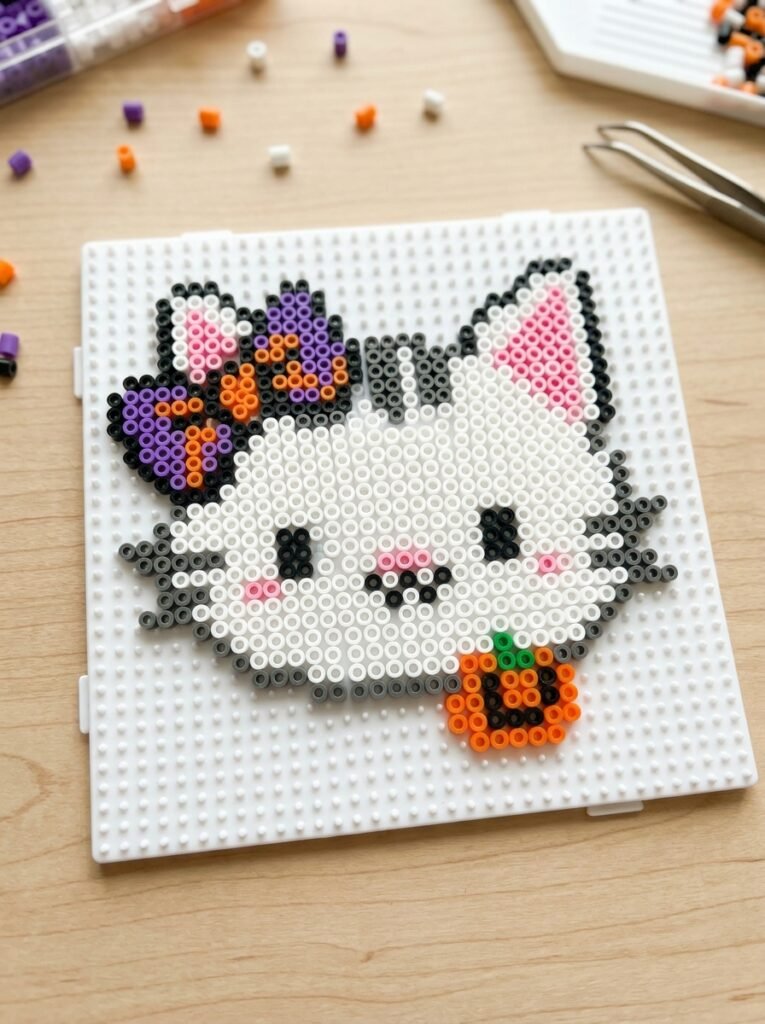
A sweet Halloween cat design can combine a simple cat face with a festive bow and seasonal colors. Use white beads for the face, black beads for the eyes and whiskers, and pink or purple beads for a large bow. Add a tiny pumpkin accent or a small witch-hat detail to give the design a Halloween theme. To keep the pattern original, create your own cat face, proportions, and bow arrangement rather than copying the exact Hello Kitty character artwork. This idea works well as a cute decoration or small accessory.
21. Small Circle Pumpkin
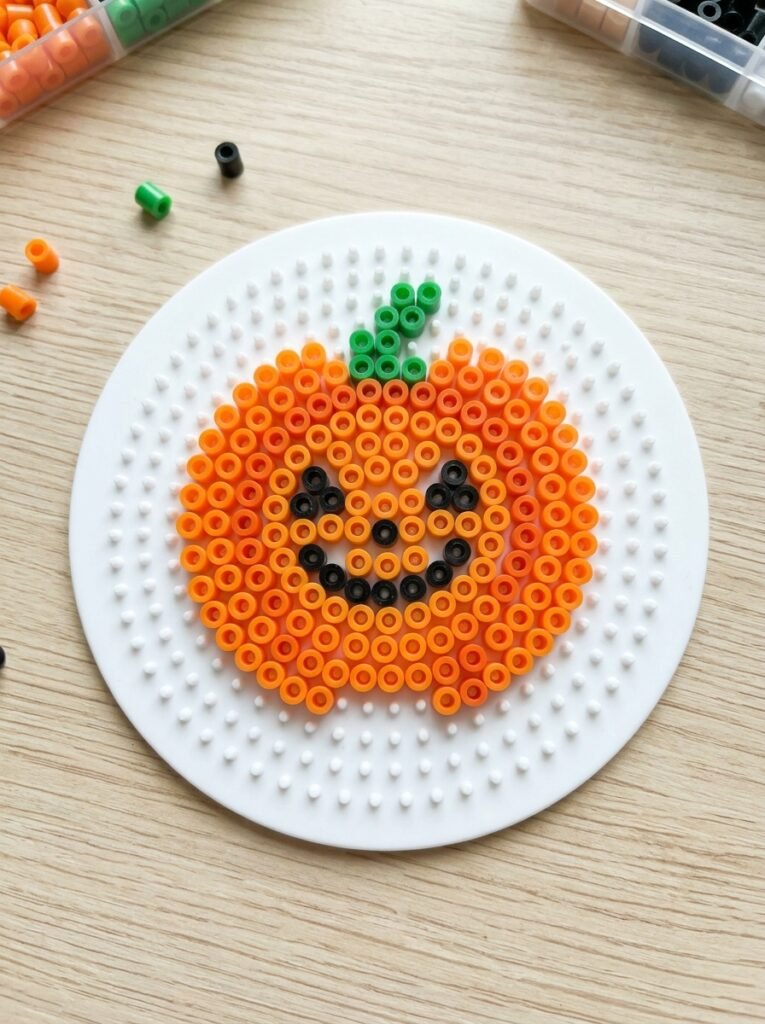
A circular pumpkin pattern is a great option when you want a balanced shape for a coaster, magnet, or hanging decoration. Use orange beads to create the outer circle, then add a few darker orange sections to suggest the pumpkin’s natural grooves. A short green stem at the top completes the silhouette. For a cute version, add tiny black eyes and a curved smile; for a simpler version, leave the face off and focus on the color pattern. This design is easy to repeat in several sizes.
22. Printable Halloween Pattern Planning
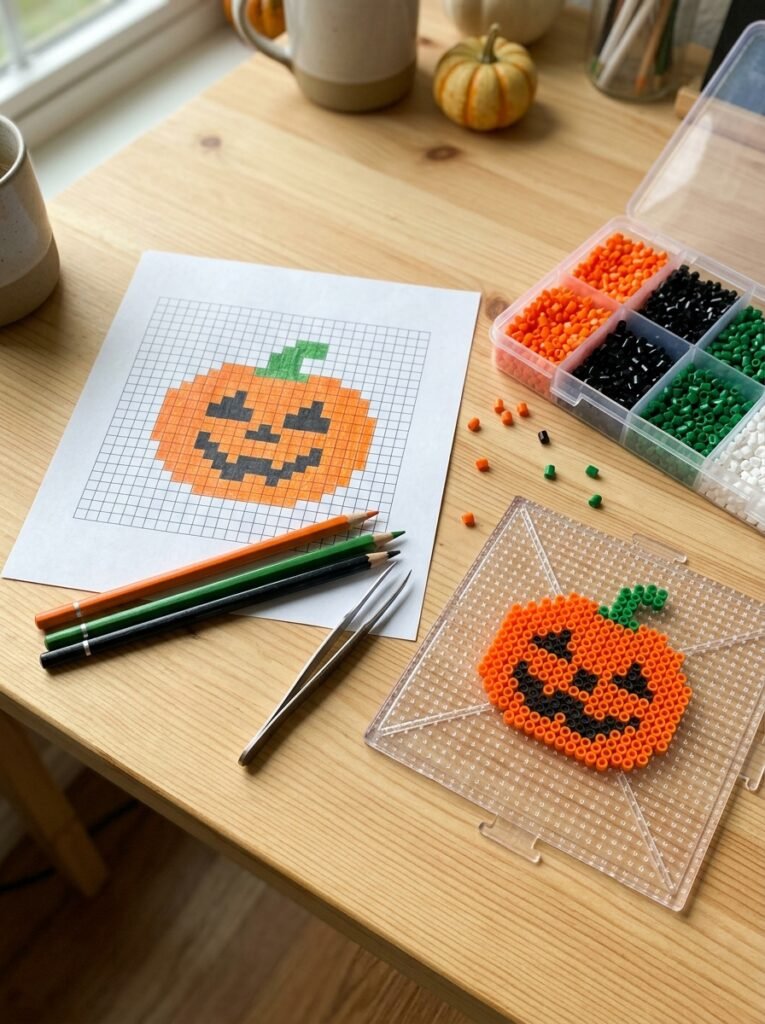
Planning your pattern on paper before placing beads can save time and reduce mistakes. Use a printable grid or create your own square grid where each cell represents one bead. Mark the colors for a pumpkin, bat, ghost, or skull and check that the outline is symmetrical. A simple color key can help you count the beads you need before starting. If you design a reusable grid, you can keep it with your craft supplies and use it to recreate the same project later. The printable is a planning aid, not a substitute for safe fusing instructions.
23. Free-Style Halloween Mini Collection
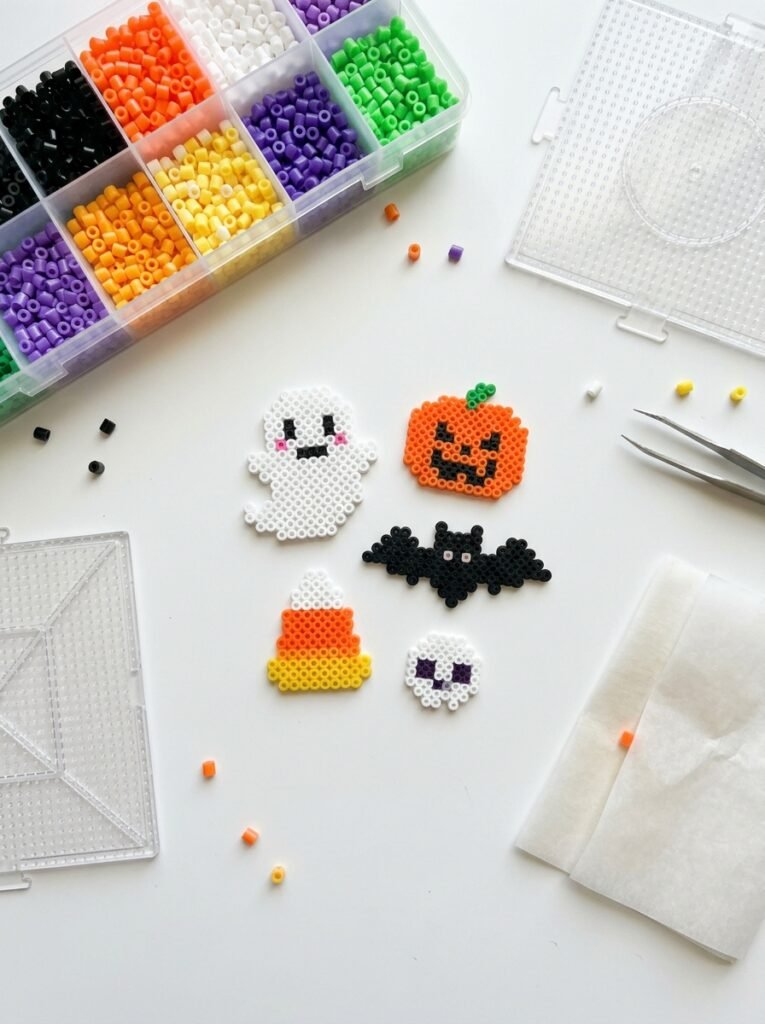
You can create a coordinated Halloween collection without following a complicated paid design. Start with simple shapes such as a ghost, pumpkin, bat, candy corn, and skull, using basic bead colors and a small pegboard. Make each pattern your own by changing the expressions, adding small stars, or adjusting the outline. If you use a downloadable pattern, check its usage terms and make sure it is actually offered for free. Original simple designs are also easy to sketch on grid paper before arranging the beads.
24. Purple Monster with One Eye
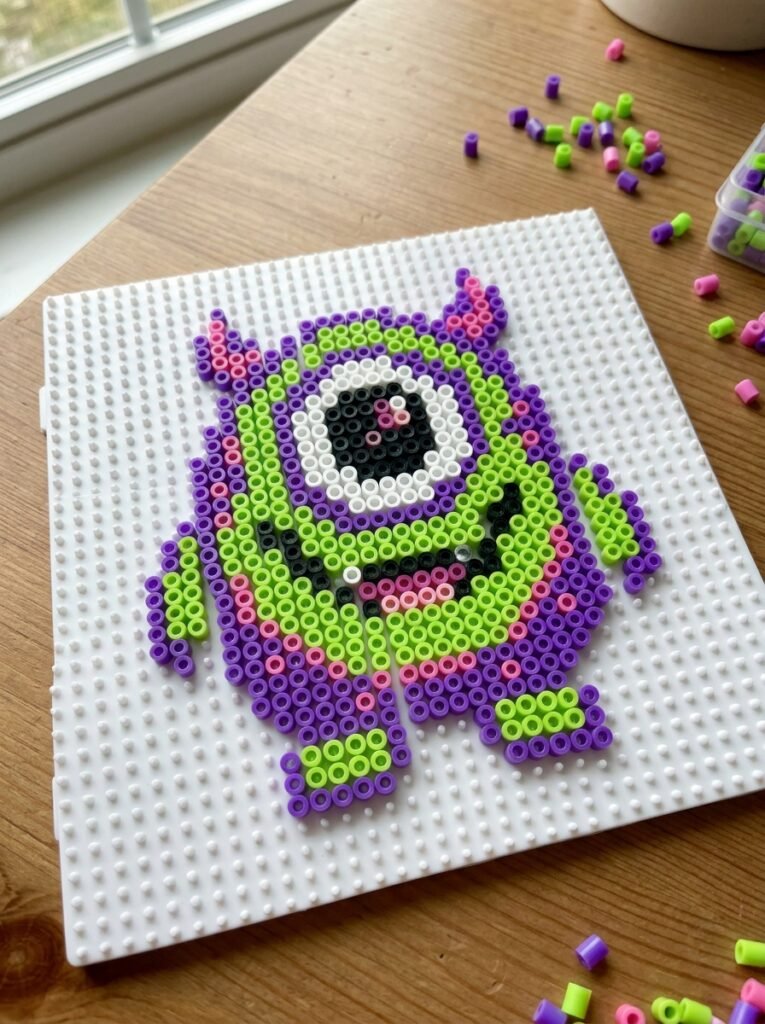
A one-eyed monster is a playful alternative to traditional Halloween characters. Use purple, green, or turquoise beads to build a rounded body, then place a large white eye with a dark pupil near the center. Add tiny horns, a funny smile, or short arms and legs to make the monster look more expressive. The design does not need to be perfectly symmetrical, which makes it forgiving for beginners. You can create several monsters with different colors and eye shapes for a fun Halloween display.
25. Tiny Halloween Treat Bag Charm
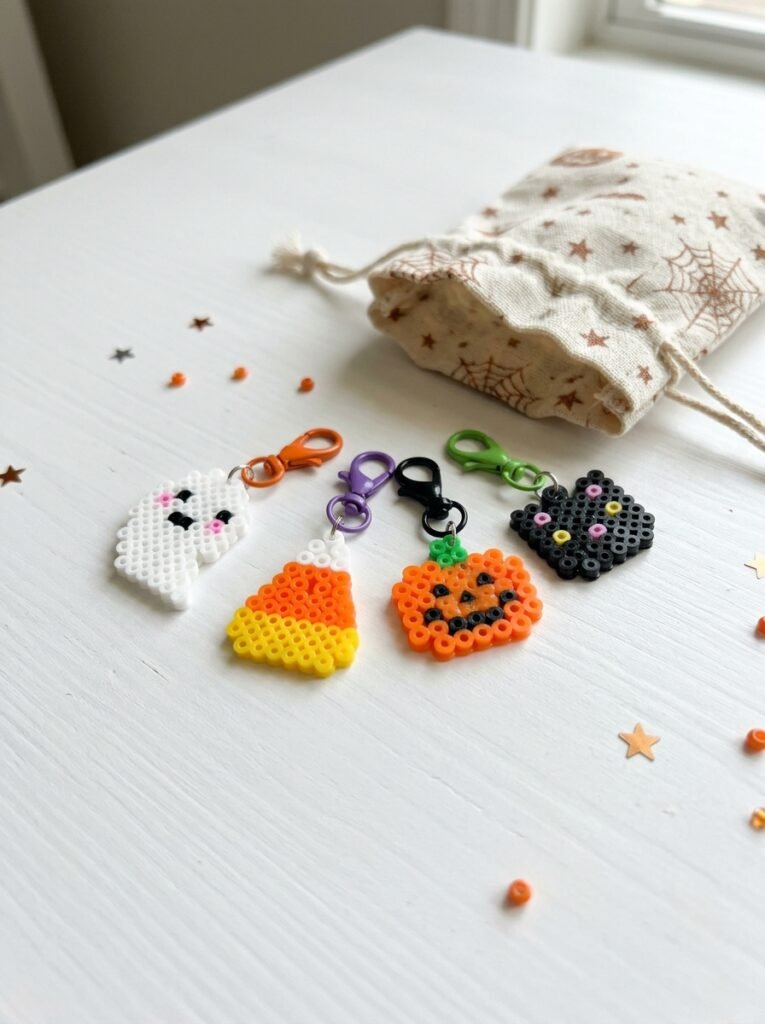
A little treat-bag charm can be designed around a mini pumpkin, candy corn, ghost, or black cat. Choose a compact silhouette with bold colors so it remains recognizable when attached to a bag or backpack. Add a small attachment point in a sturdy area of the pattern, then connect the cooled piece to suitable hardware. You can create a matching set for friends or make different charms for each Halloween character. Since these pieces are small, store them away from young children and pets that could swallow loose beads or small components.
26. Halloween Haunted House
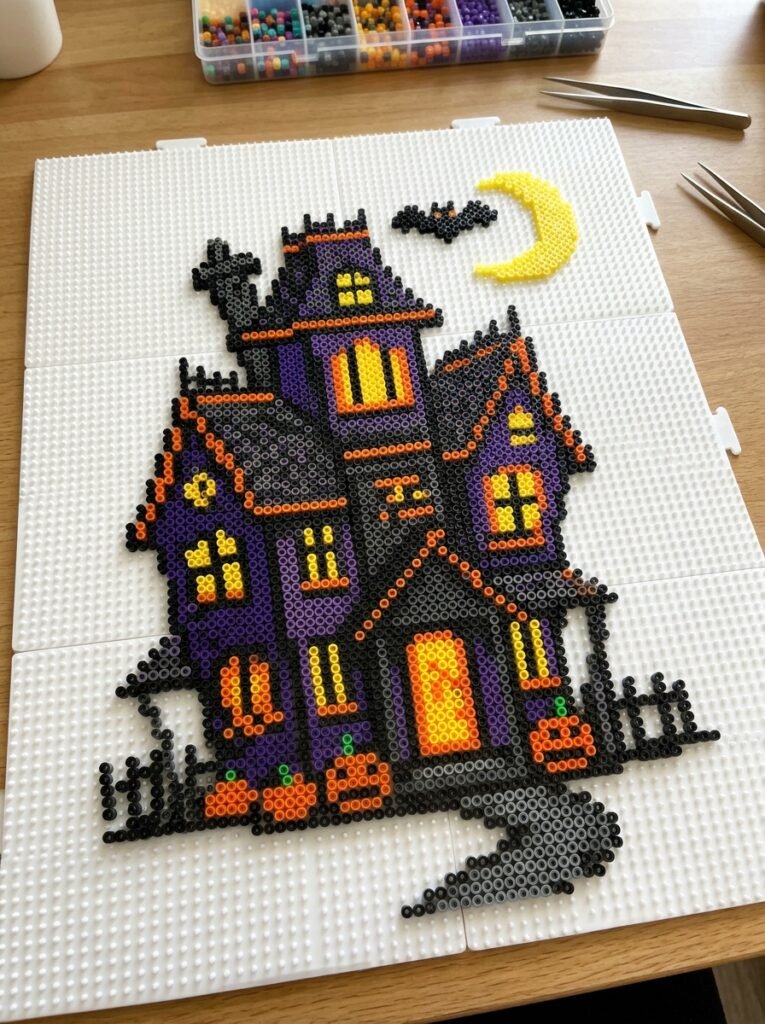
A haunted house makes an excellent final project because it combines several classic Halloween details in one design. Use black and dark purple beads for the building, yellow beads for glowing-looking windows, and orange accents for pumpkins near the entrance. Add a crooked roofline, a small moon, or a tiny bat in the sky to create atmosphere. For a beginner version, keep the house silhouette simple; for a larger project, add more windows, a path, and a spooky tree. Plan the outline carefully before filling in the details.
How to Make Halloween Perler Bead Patterns Step by Step
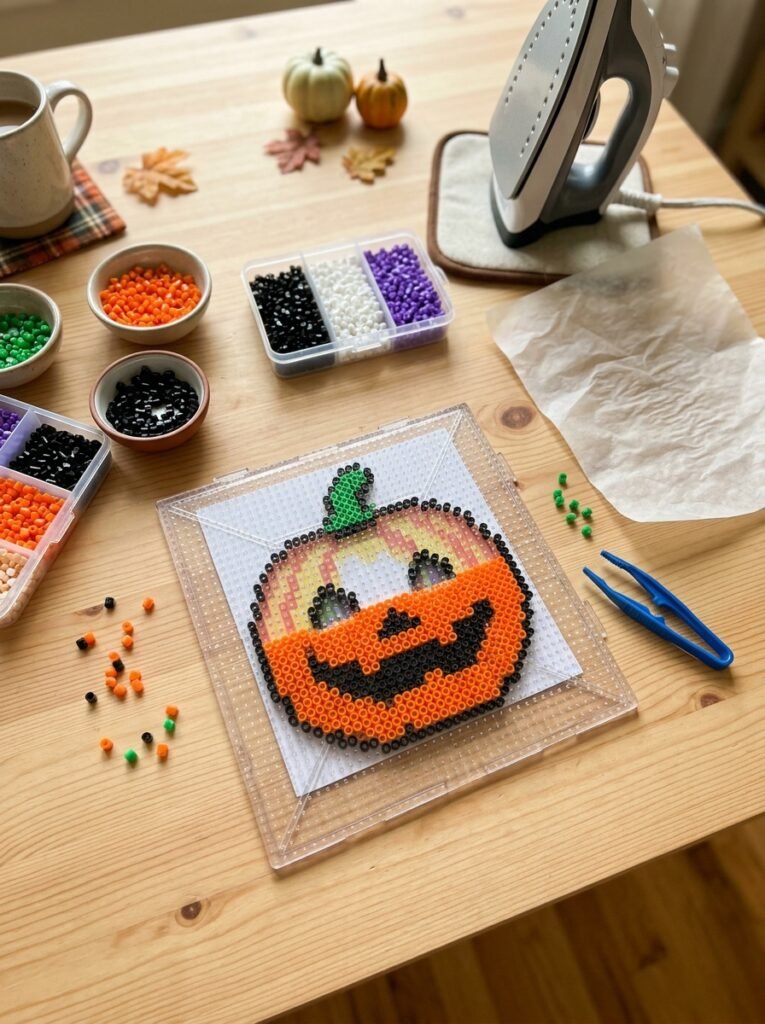
Making Halloween bead art is easier when you prepare the colors and outline before starting. Simple designs such as ghosts, pumpkins, and candy corn are great for beginners, while larger scenes and 3D decorations require more planning.
- Choose a design: Start with a ghost, pumpkin, bat, or candy corn before moving to more detailed projects.
- Gather your supplies: Prepare compatible fuse beads, the right pegboard, ironing paper recommended by the manufacturer, and an iron.
- Sort your colors: Place orange, black, white, purple, green, and other needed beads in separate containers.
- Build the outline: Place the beads around the outer shape first, then fill the center with the main colors.
- Add the details: Use contrasting beads for faces, stripes, windows, webs, and other small features.
- Check the design: Look for gaps and weak connections, especially on thin spider legs, bat wings, and small accessory pieces.
- Fuse safely: Follow the manufacturer’s temperature and timing instructions. An adult should handle the hot iron and supervise children.
- Let it cool: Allow the finished design to cool completely on a flat surface before removing it from the pegboard.
- Finish the project: Add appropriate hardware for keychains or earrings only after checking that the design is stable and securely attached.
Tips for Better Halloween Perler Bead Designs
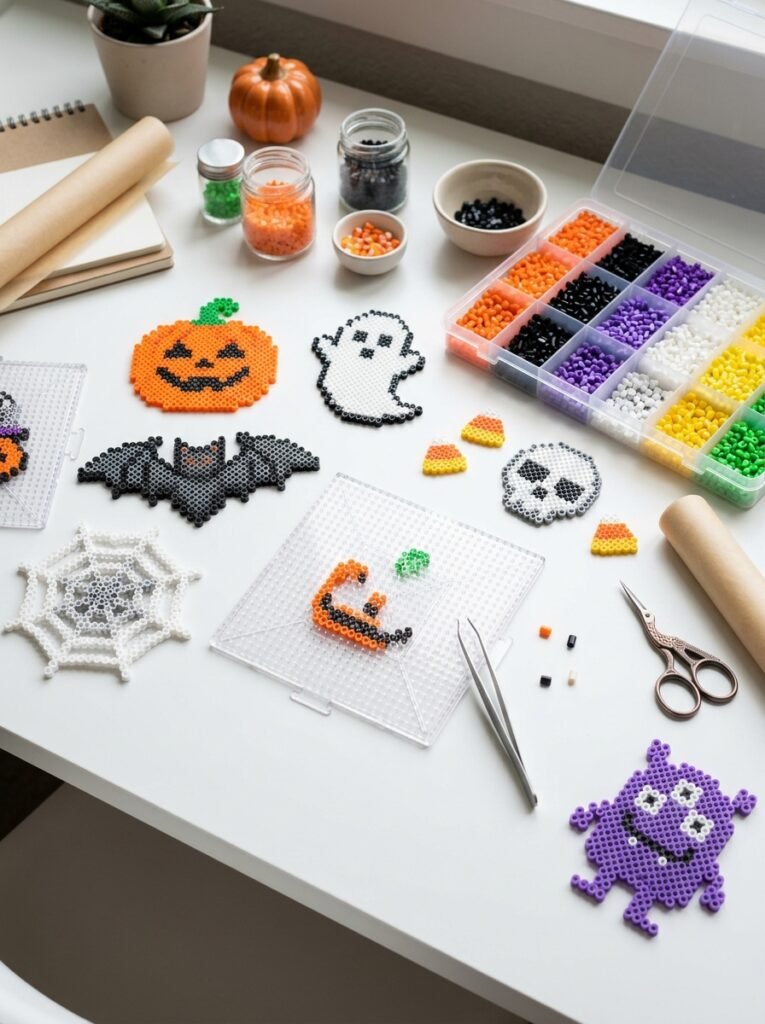
- Start small: Ghosts, candy corn, tiny pumpkins, and bats are easier to complete than large scenes.
- Use strong color contrast: Orange against black and white against purple make the details easy to recognize.
- Plan symmetry: Circular pumpkins, spider webs, and skull faces look neater when you check the spacing as you work.
- Keep narrow parts sturdy: Thin legs, ears, and tails may break if the bead connections are too small.
- Customize the expressions: A simple change to the eyes or mouth can make a ghost look happy, surprised, or spooky.
- Match the project to its purpose: Earrings and keychains need suitable attachment points, while coasters should have a stable, flat surface.
- Treat 3D projects as advanced crafts: Plan how the pieces fit together before fusing them.
- Follow safety instructions: Keep hot irons, heated beads, and small loose components away from children and pets.
Final Thoughts
The best halloween perler bead patterns combine recognizable seasonal shapes with colors and expressions that reflect your personal style. You can start with an easy pumpkin or ghost, create tiny keychains and earrings, or challenge yourself with a large haunted house or 3D pumpkin. Try combining a few designs into a coordinated set for your room, craft table, or Halloween party. With a little planning and a variety of colorful beads, even simple patterns can become memorable handmade decorations and thoughtful seasonal gifts.