

This post may contain affiliate links. Please read my disclosure policy.
In This Article Show
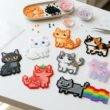
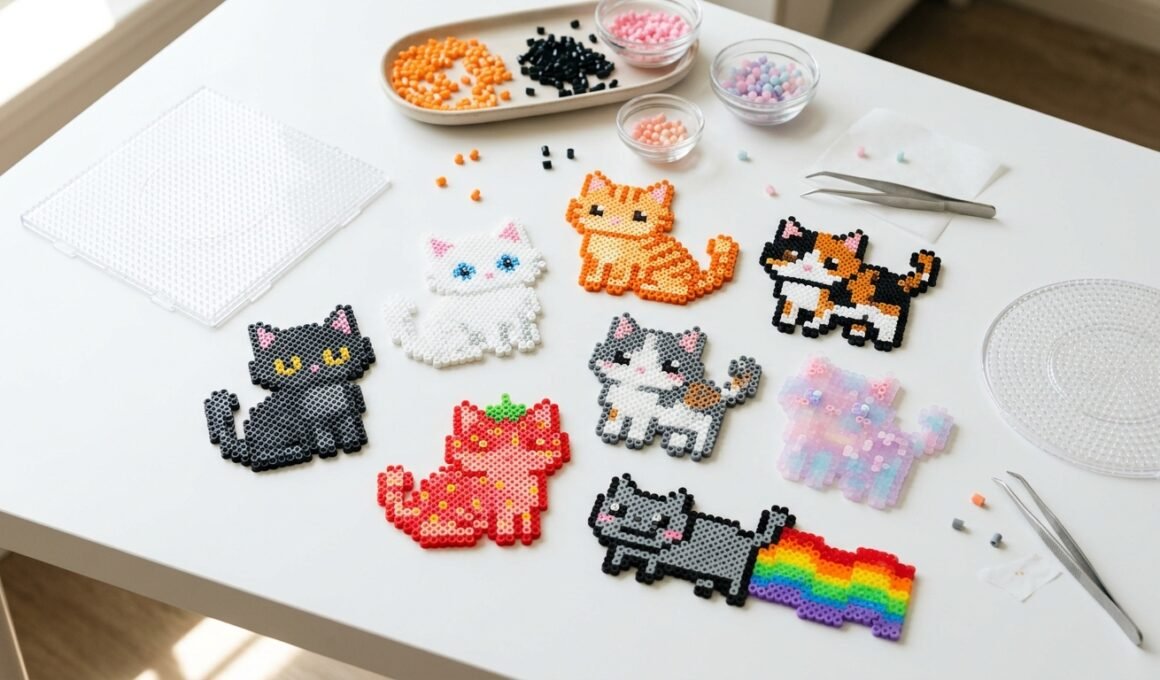
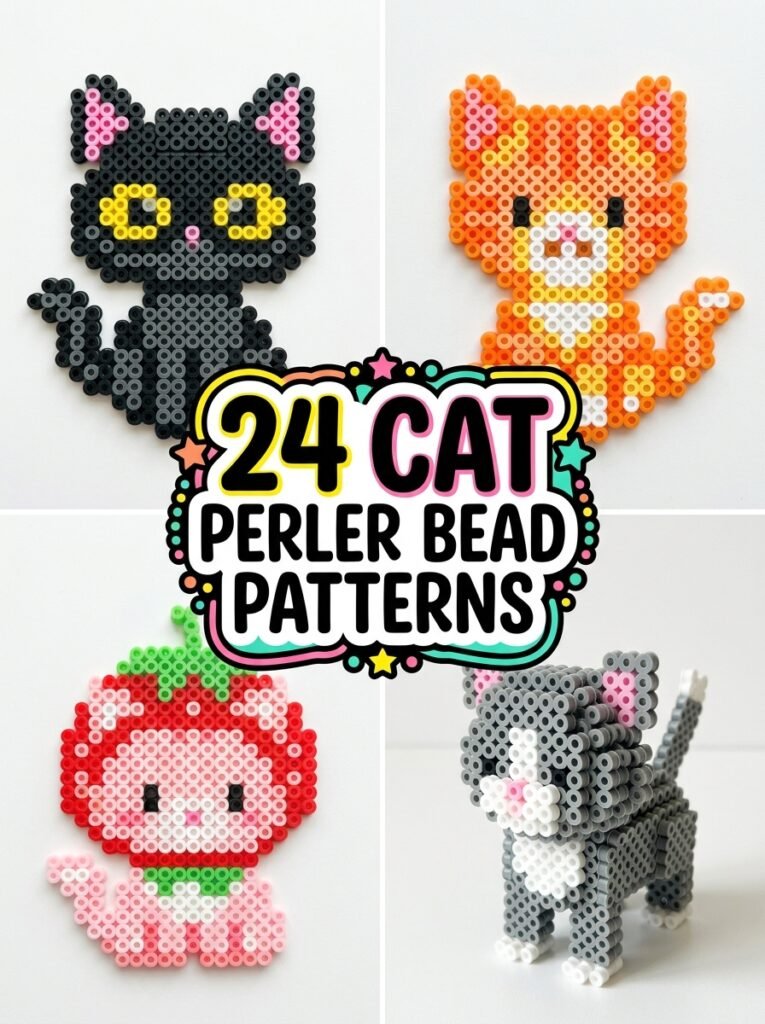
Cats and colorful fuse beads make a perfect combination for fun DIY projects. Whether you love tiny kittens, funny pixel cats, colorful food-inspired designs, or realistic-looking cat patterns, there are plenty of ways to turn simple beads into adorable artwork. These cat perler bead patterns include easy designs for beginners, creative decorations, seasonal projects, and even three-dimensional cat figures. You can use your finished designs as desk decorations, handmade gifts, fridge magnets, or keychains. Choose colors that match your favorite cat, experiment with funny expressions, and personalize each pattern to create something unique.
1. Cute Black Cat
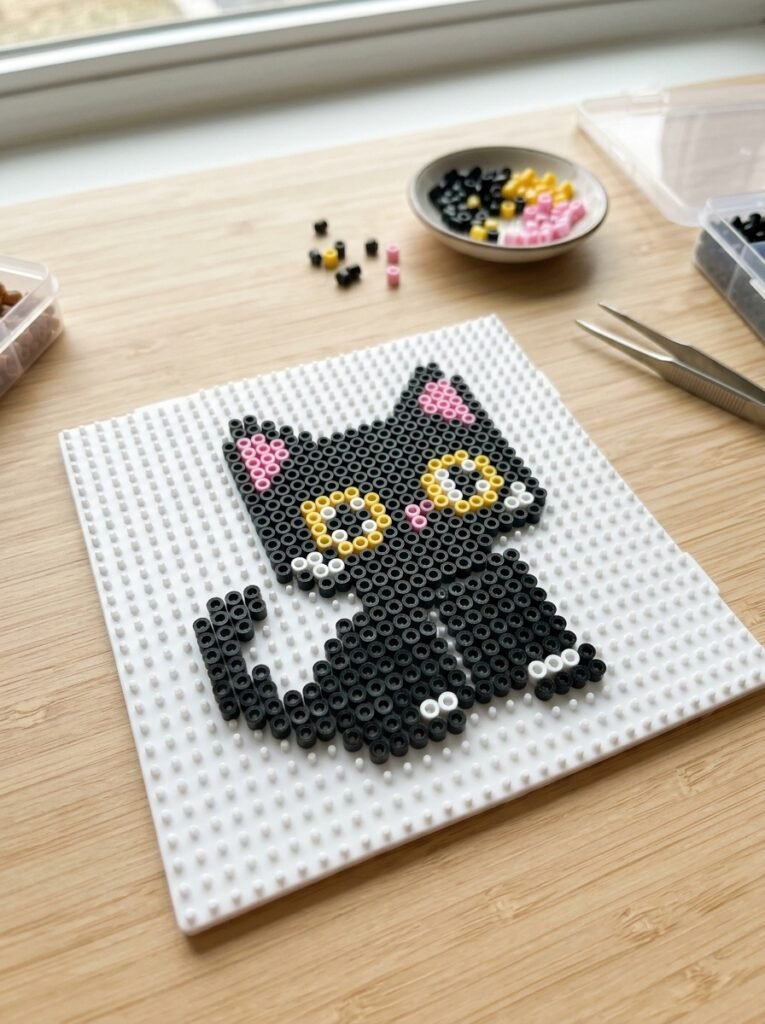
A black cat is a classic choice for a simple and adorable perler bead project. Use black beads to create a rounded head, pointed ears, and a small body, then add white or yellow eyes to make the face stand out. A tiny pink nose and a curved tail can give the design extra personality. For a beginner-friendly version, start with the cat’s head before moving on to a full-body silhouette. This versatile design also works beautifully for Halloween decorations and everyday cat-themed accessories.
2. White Cat with Blue Eyes
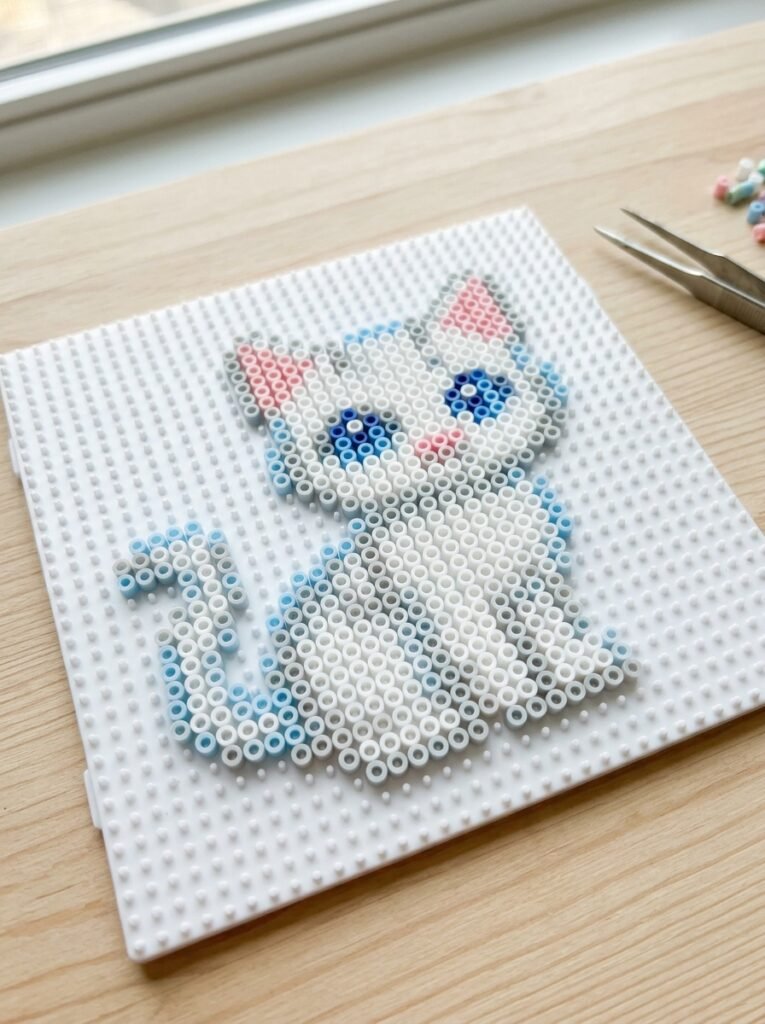
A white cat pattern creates a soft, clean look that stands out against colorful backgrounds. Use white beads for the face and body, pale gray beads for subtle outlines, and bright blue beads for the eyes. A little pink inside the ears and around the nose adds warmth without making the design too busy. You can make a sitting kitten, a curled-up cat, or a simple face-only pattern. This design is especially appealing for minimalist collections and cute handmade gifts.
3. Orange Tabby Cat
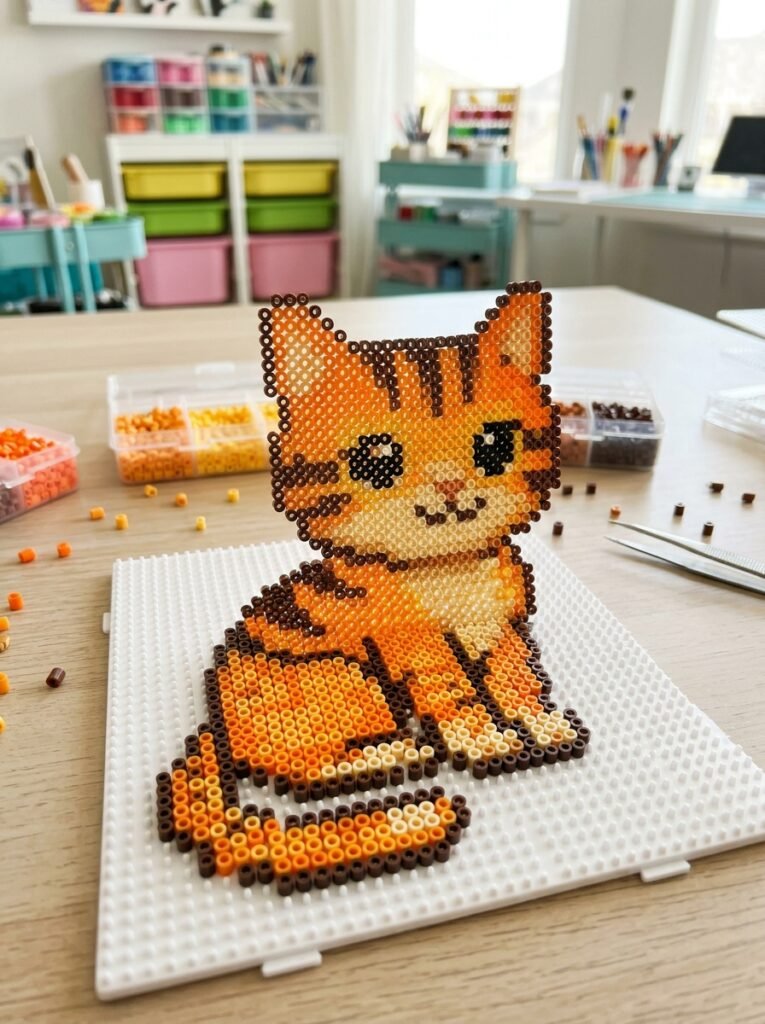
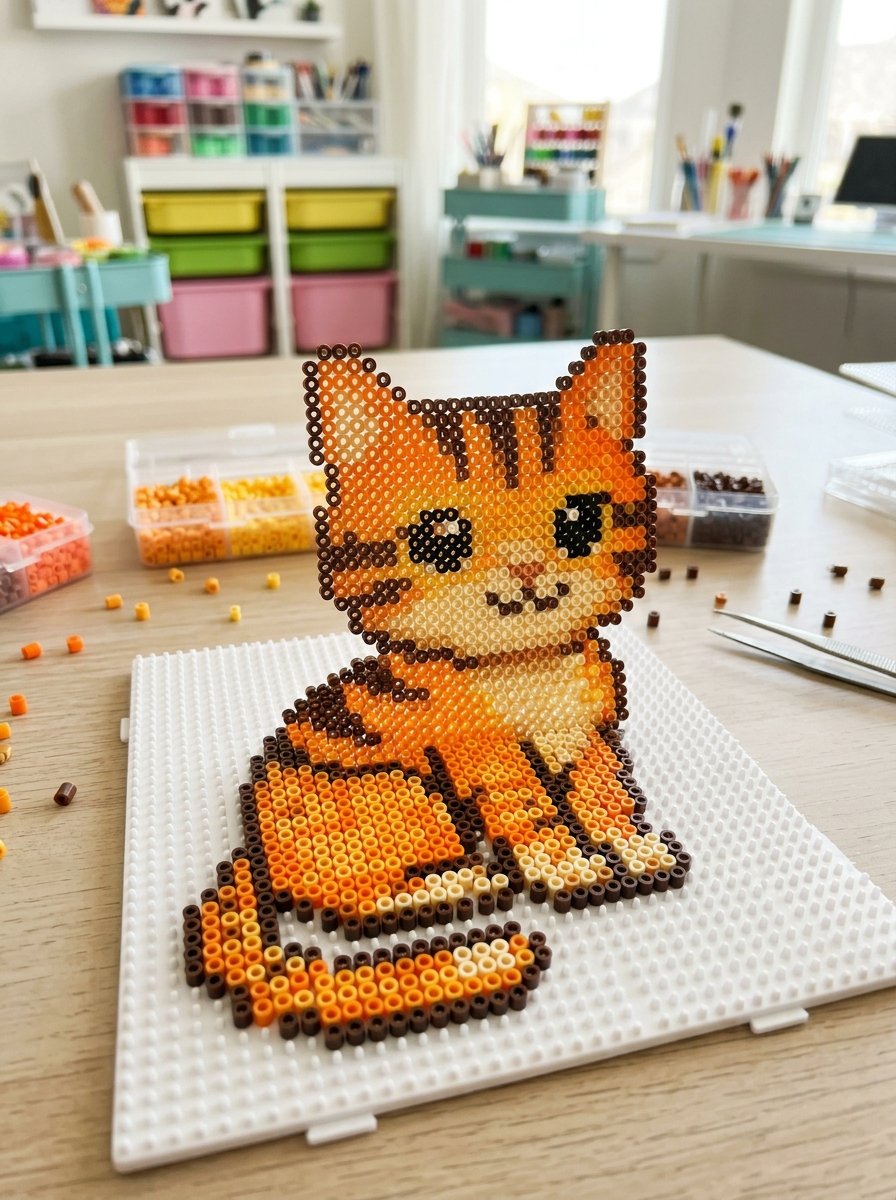
Orange tabby cats are perfect for warm, cheerful bead designs. Combine orange, golden yellow, cream, and dark brown beads to create the striped coat. Add a cream-colored muzzle, small triangular ears, and expressive eyes to make the kitten recognizable. You can represent the stripes with short, evenly spaced lines rather than trying to reproduce every fur detail. A sitting or loaf-shaped pose keeps the design manageable while still capturing the relaxed personality of a tabby cat.
4. Gray Cat with a Curled Tail
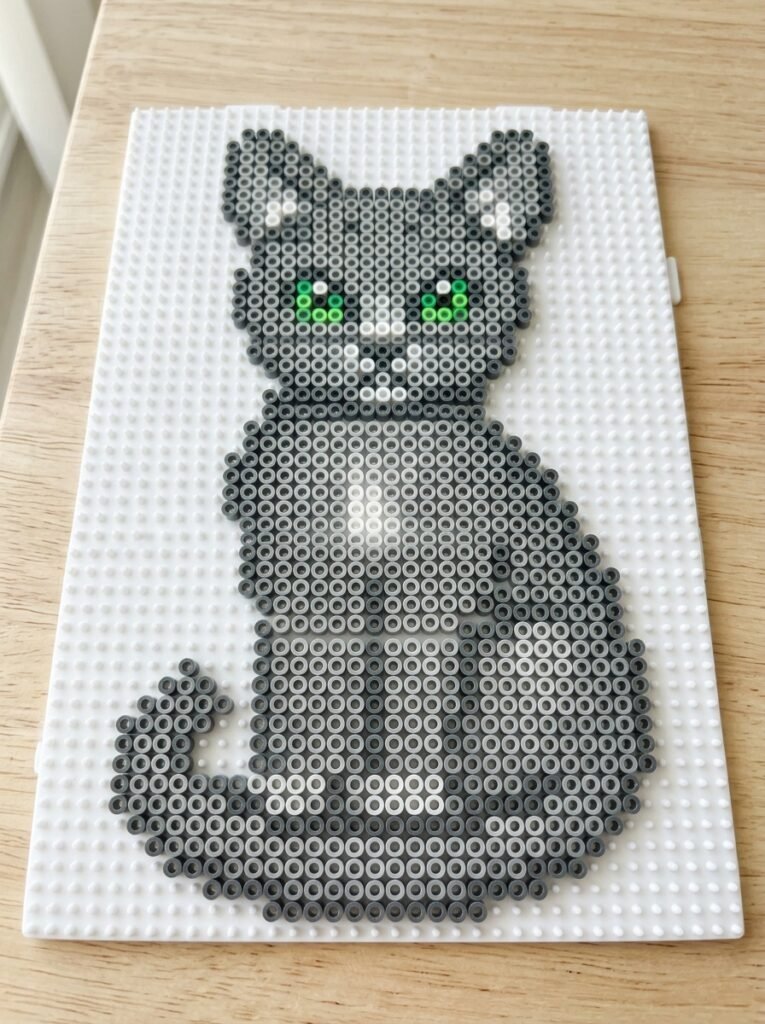
A gray cat is a lovely option if you prefer a calm, modern color palette. Use medium gray beads for the main body, light gray for highlights, and darker gray for the ears and tail outline. Bright green, blue, or yellow eyes can provide contrast without overwhelming the design. Try a sitting pose with the tail curling around the front paws to create a balanced silhouette. This pattern is suitable for beginners who want something more detailed than a basic cat face but still easy to assemble.
5. Calico Cat Pattern
Calico cats are known for their beautiful patches of orange, black, and white. Re-create this distinctive appearance by using white beads as the main base, then adding separate orange and black patches across the head and body. Keep the patches large enough to remain visible after fusing. A small sitting kitten with a curved tail is a good starting point because it provides enough space to show the different colors. Every calico pattern can look different, making this a fun design to personalize.
6. Siamese Cat with Blue Eyes
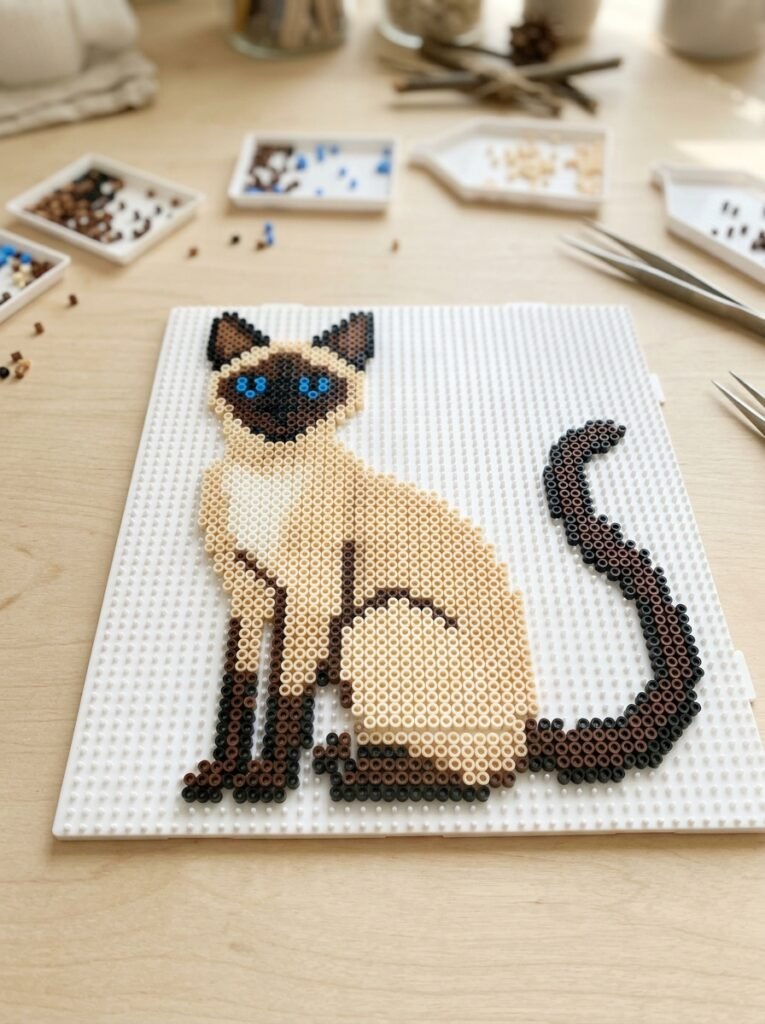
A Siamese-inspired pattern looks elegant because of its contrast between a light body and darker points. Use cream or pale beige beads for the main shape, then add dark brown beads around the ears, face, paws, and tail. Bright blue eyes make the face especially recognizable. A sitting pose works well because the darker paws and tail can be arranged in clearly defined sections. This design is a little more detailed than a solid-color cat, but its limited palette makes it manageable for beginners.
7. Black and White Tuxedo Cat
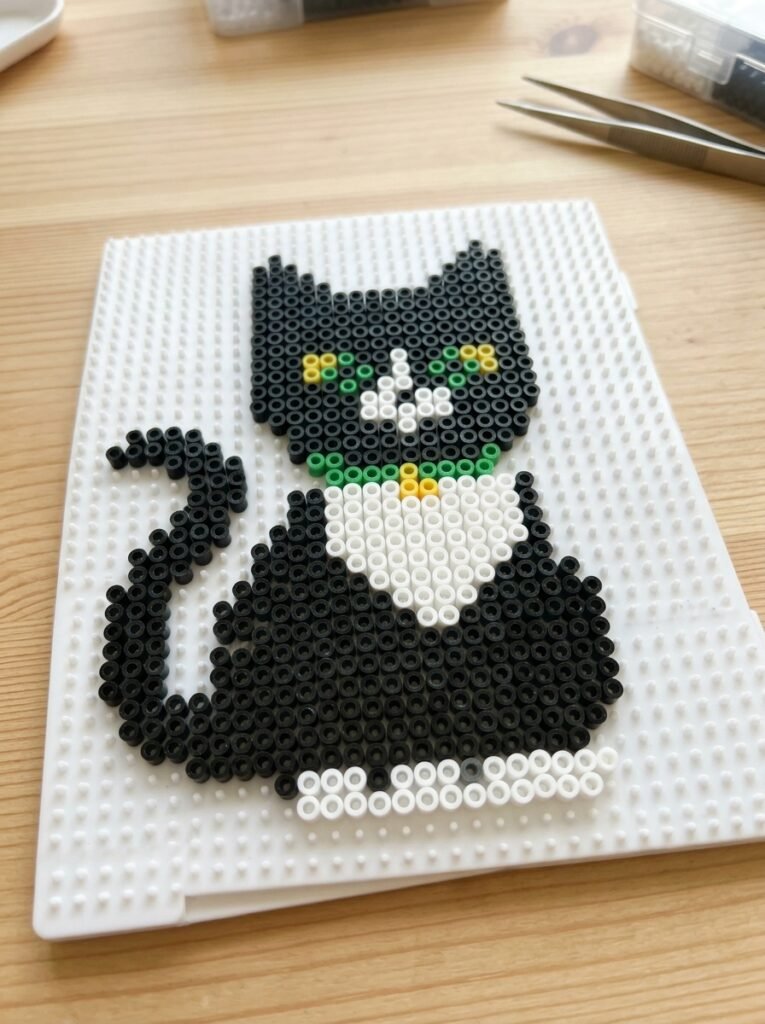
A tuxedo cat pattern combines black and white beads to create a charming formal-looking kitten. Make the body mostly black, then add a white chest, white paws, and a white patch around the nose or mouth. You can give the cat green or yellow eyes for extra contrast. For a simple version, create a sitting silhouette with a small white chest triangle. If you prefer a more expressive design, add raised eyebrows or a tiny smile to make your tuxedo cat look friendly and playful.
8. Persian Cat with a Fluffy Face
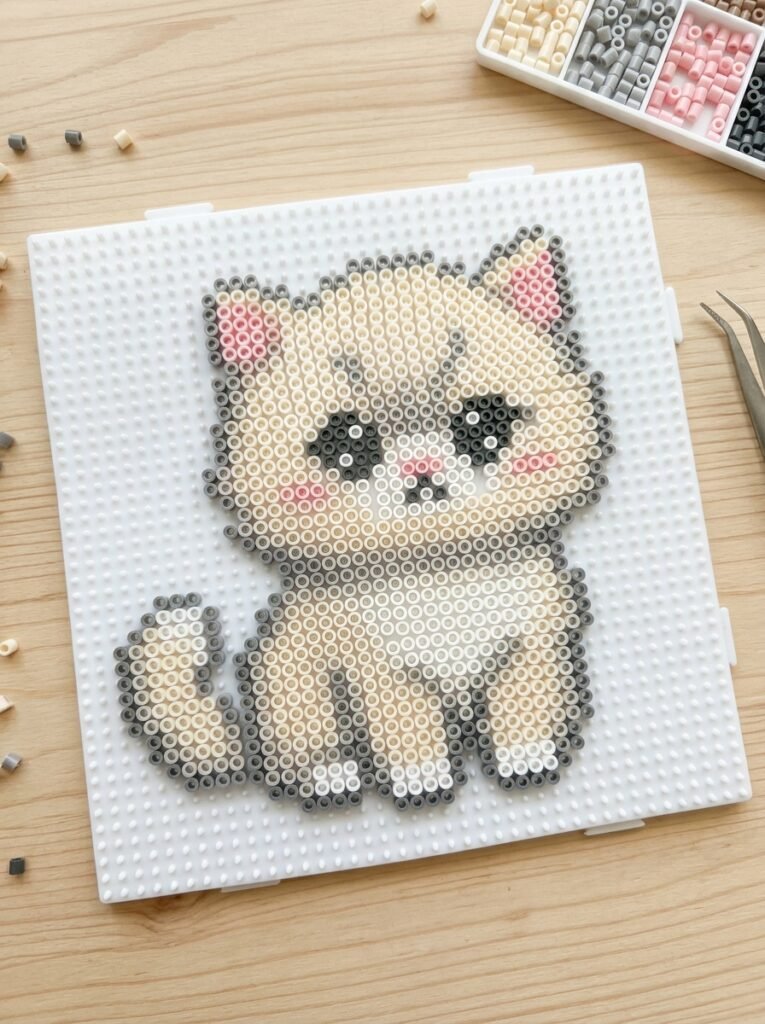
A Persian-inspired cat can be represented with a round head, small ears, full cheeks, and a short, compact body. Use cream, white, gray, or orange beads depending on the coat color you want. A slightly flattened muzzle and large round eyes help communicate the breed’s distinctive appearance. Because fuse beads create a pixelated design, you do not need to add realistic fur strands. Instead, use a few lighter and darker beads around the cheeks to suggest a fluffy coat without making the pattern unnecessarily complicated.
9. Easy Sleeping Cat
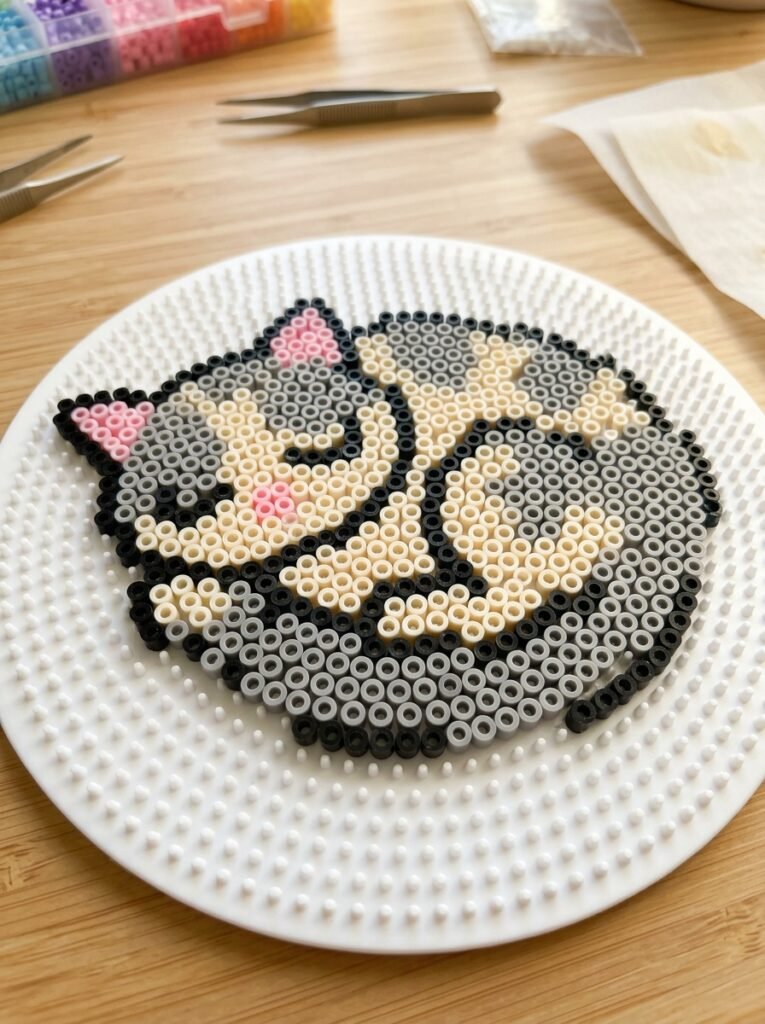
A sleeping cat is one of the easiest cat perler bead patterns because its shape can be built from a few simple curves and rounded sections. Create a curled body with the tail wrapping around the paws, then add closed eyes and tiny whiskers. Choose gray, orange, cream, or black beads to match your favorite cat. A small pink nose adds a cute finishing touch. This peaceful design works well as a desk decoration, a small handmade gift, or part of a collection of sleepy animal patterns.
10. Tiny Cat Face
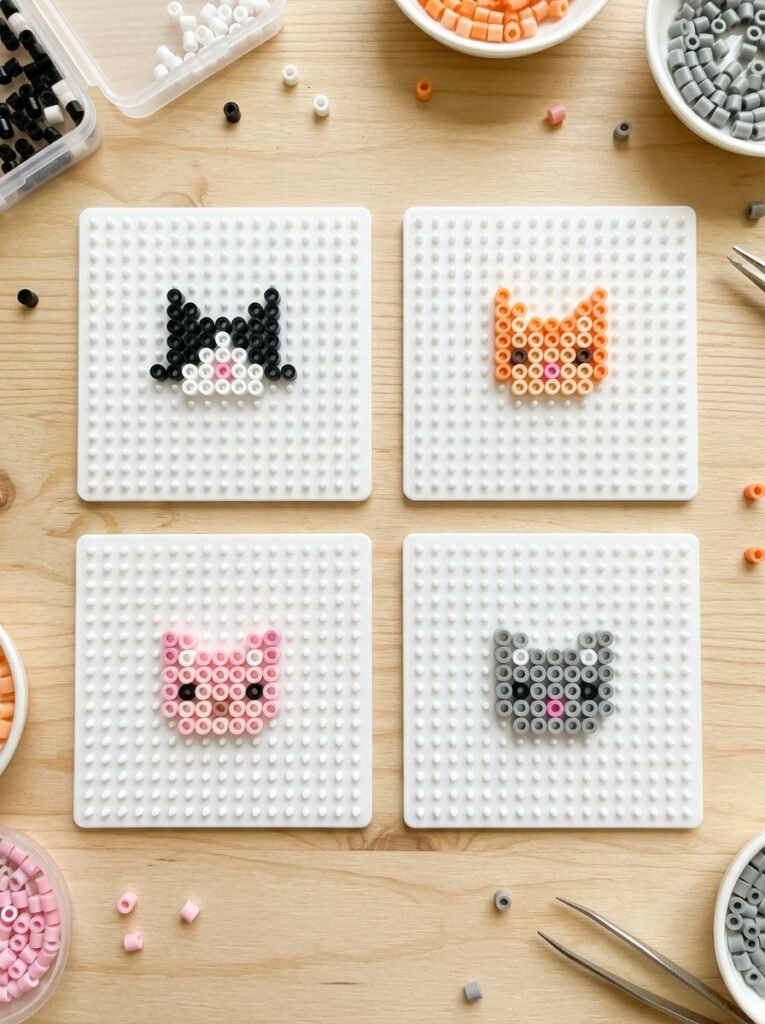
If you want a quick project, make a miniature cat face rather than a full-body design. Use a compact square or rounded shape with two pointed ears, simple eyes, a tiny nose, and short whiskers. Black and white offer a classic appearance, but pink, lavender, mint, or orange can make the face more playful. The small size makes this pattern ideal for using leftover beads and creating several variations in one crafting session. Keep the facial features bold enough to remain visible in the finished piece.
11. 3D Sitting Cat
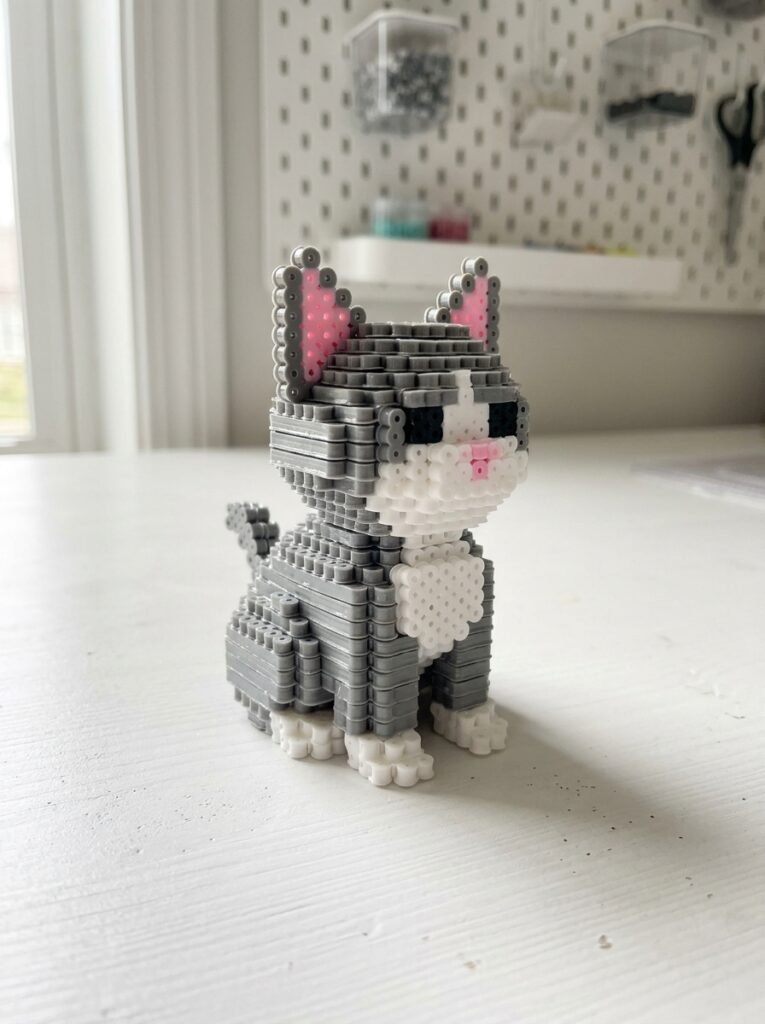
A three-dimensional cat offers a fun challenge once you are comfortable making flat patterns. Build the body, head, and supporting sections as separate pieces designed to fit together securely. A rounded head, upright ears, and a curved tail give the cat a recognizable silhouette. Use the same color scheme across each section so the finished figure looks coordinated. Before fusing, plan how the pieces will connect and make sure the base is stable. Follow the bead manufacturer’s instructions and allow all components to cool fully before assembling.
12. Cute Cat Keychain
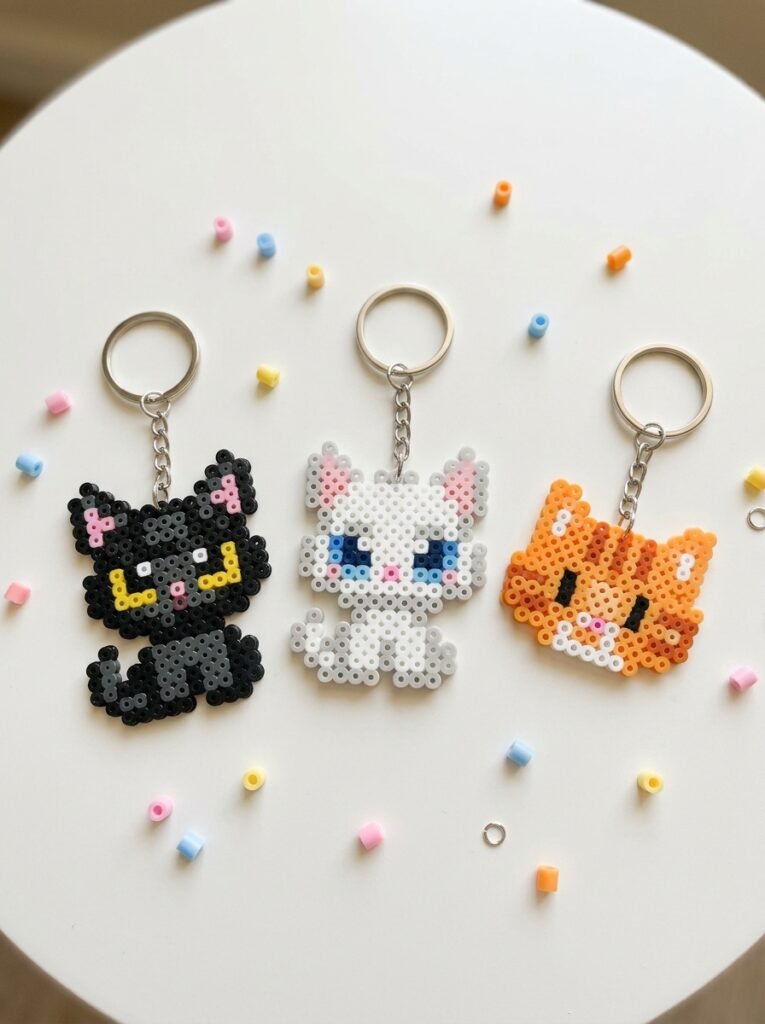
A cat keychain is a practical way to turn a small bead pattern into an everyday accessory. Create a compact cat face or full-body kitten with a sturdy outline and a hole or attachment point planned into the design. Use high-contrast colors so the face stays recognizable at a small size. Black cats with yellow eyes, white kittens with blue eyes, and orange tabbies are all attractive options. Once the piece has cooled, attach suitable keychain hardware securely and check that the design is strong enough for regular handling.
13. Nyan-Inspired Rainbow Cat
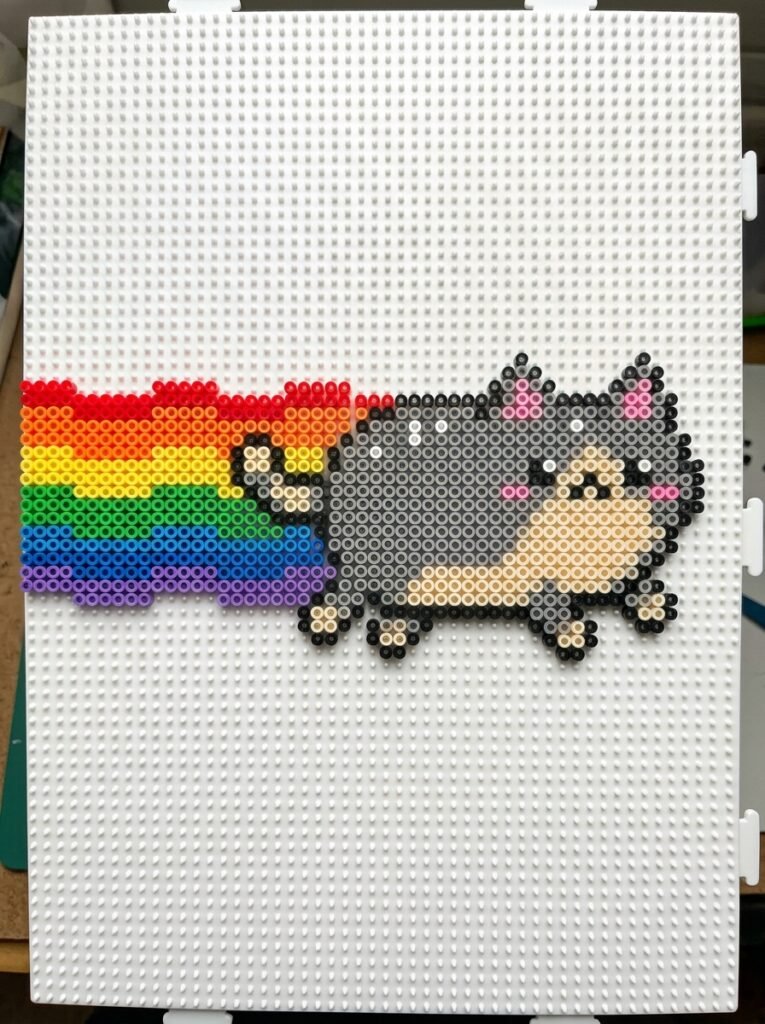
For a playful pixel-art project, create an original space cat with a rainbow trail. Use gray or cream beads for the cat’s body, a pink center detail, and colorful horizontal bands extending behind it. Add a simple smiling face and tiny legs to make the character lively. This design takes inspiration from the general idea of a flying rainbow cat without copying the exact artwork of an existing character. A rectangular pegboard can be helpful for the rainbow trail, while the cat itself can be built from a compact pixel-style outline.
14. Cheshire-Inspired Grinning Cat
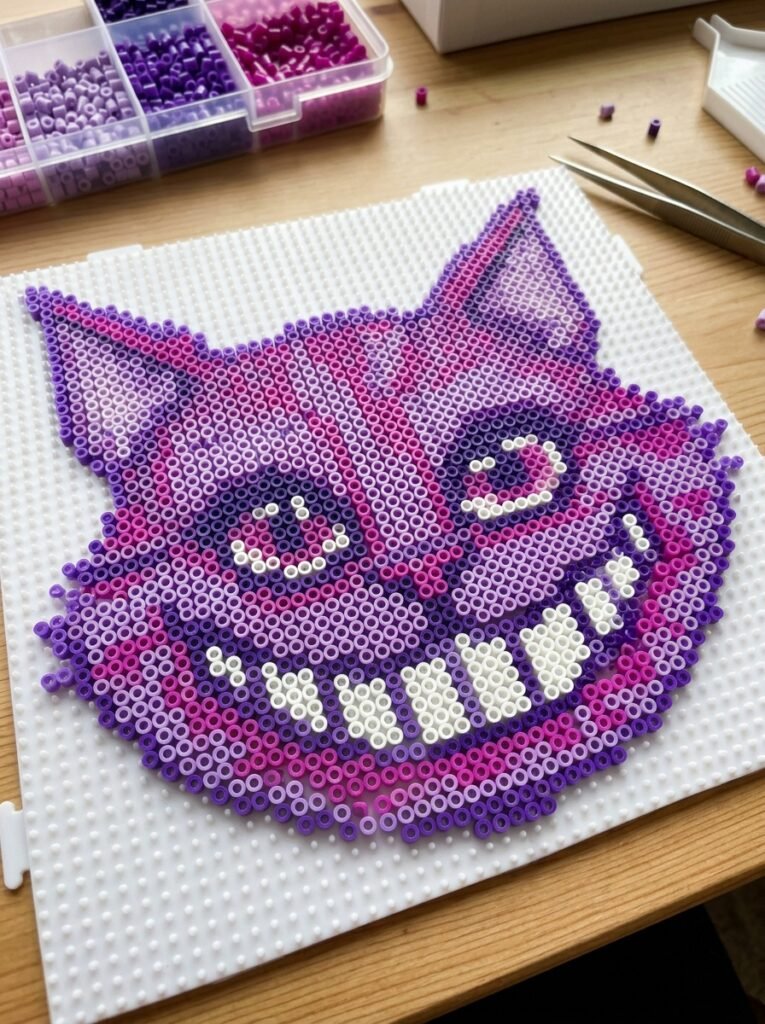
A mysterious grinning cat inspired by classic fantasy stories can be a striking project for people who enjoy unusual expressions. Use purple, pink, and lavender beads for the body or face, then create a wide striped grin using alternating white and dark beads. Curved-looking eyes and a mischievous expression add personality. You can design an original fantasy cat with its own stripe arrangement and color palette rather than copying a specific movie character. This pattern works particularly well as a decorative face or a larger pixel-art portrait.
15. Halloween Black Cat
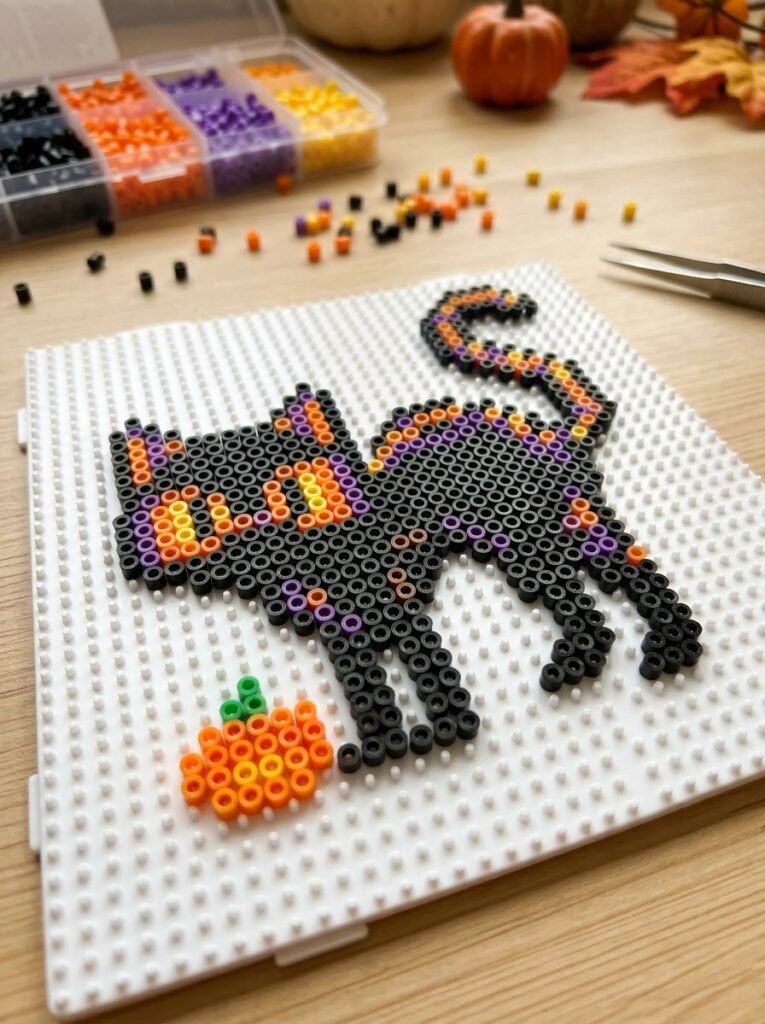
A Halloween cat can be spooky and adorable at the same time. Use black beads for the body, orange beads for the eyes, and purple accents around the ears or tail. Add a tiny pumpkin, crescent moon, or witch-hat-inspired accessory to complete the seasonal theme. A curved back and raised tail create a recognizable silhouette, while glowing-looking orange eyes give the cat a mysterious appearance. This design is suitable for Halloween decorations, handmade seasonal gifts, and a collection of spooky pixel-art animals.
16. Christmas Cat with a Santa Hat
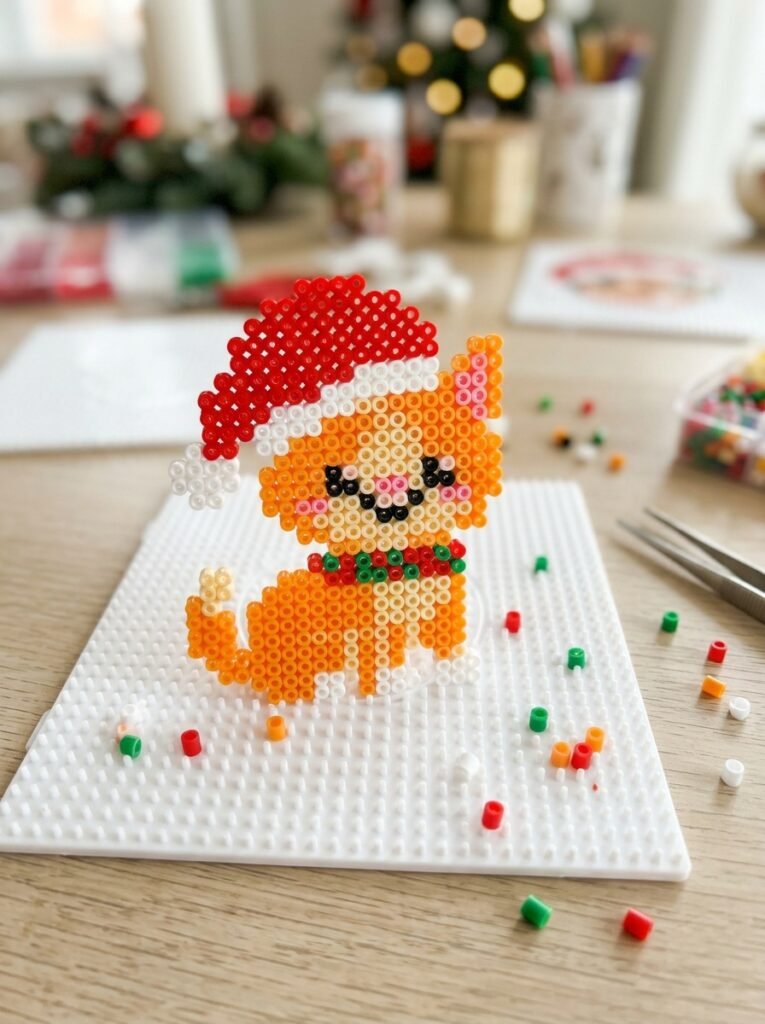
Give a regular cat pattern a festive makeover by adding a red Santa hat with a white brim and pom-pom. A white, gray, or orange cat makes a lovely base, while green and red accents can create a holiday color scheme. You can also add a tiny gift box beside the cat or a small bell around its neck. Keep the hat proportionate to the head so the finished design remains balanced. This is a great seasonal project for handmade ornaments, gift tags, and Christmas craft collections.
17. Alien Cat
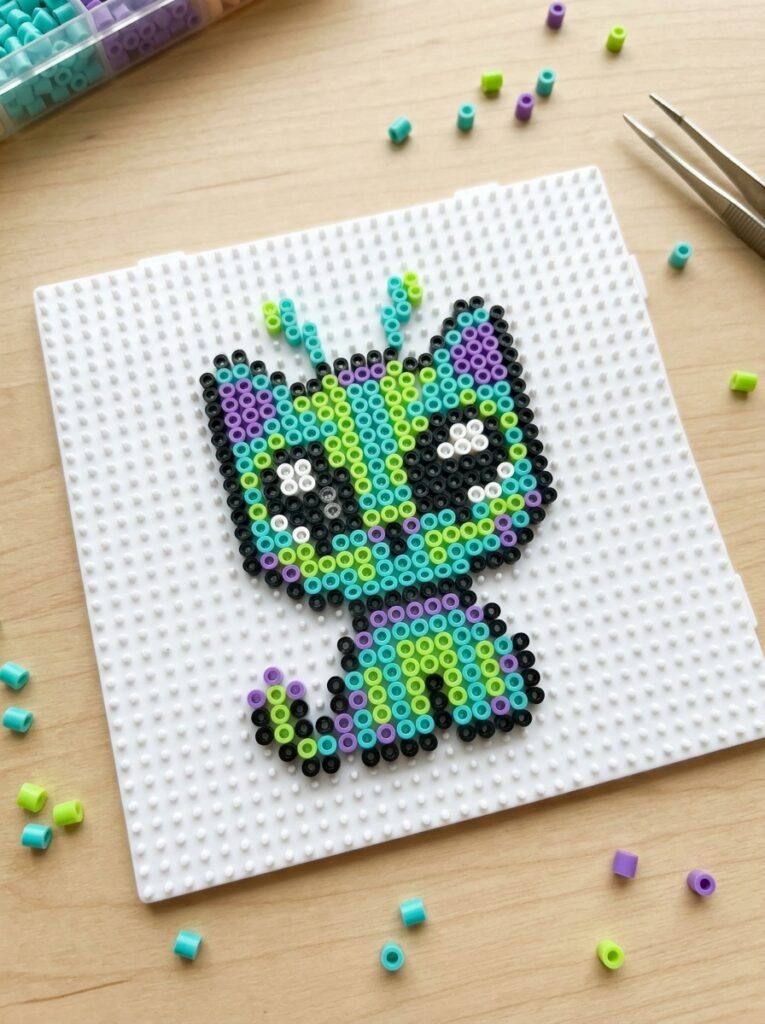
Combine a kitten with an imaginative extraterrestrial design to create an unusual and playful character. Use turquoise, lime green, purple, or bright blue beads for the body, then add oversized eyes, small antennae, and a tiny tail. A few contrasting dots can suggest futuristic markings without making the design too busy. You can make the alien cat friendly with a smile or mysterious with narrow eyes. Keep the antennae and other narrow details sturdy enough to survive handling after fusing.
18. Jelly-Look Pastel Cat
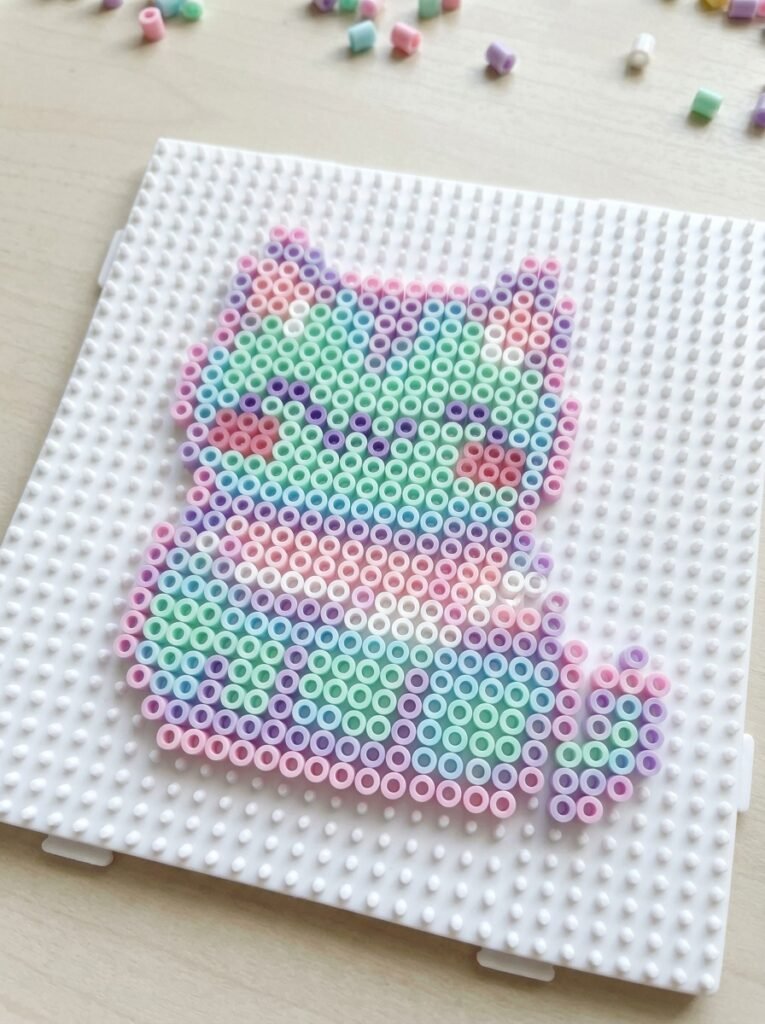
Create a soft-looking cat design with translucent-inspired colors and rounded shapes. Although standard fuse beads are not actually jelly, pale pink, mint, lavender, baby blue, and white can give the finished pattern a sweet, candy-like appearance. Use a rounded head, short legs, and a tiny tail to keep the design compact. Small white highlights can suggest a glossy finish. This original design is ideal for pastel craft collections and cute desk decorations, especially when paired with matching hearts, stars, or tiny flowers.
19. Pete-Inspired Cool Cat
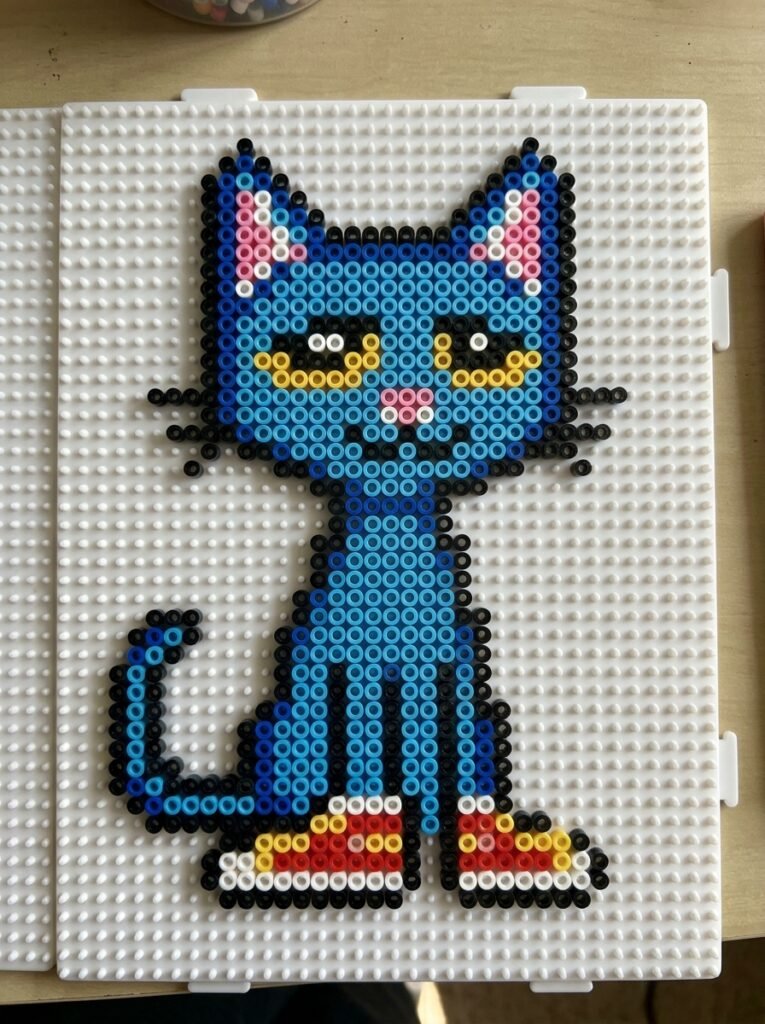
A cool cat design can feature a relaxed pose, confident eyes, and a playful expression. Use a bold base color such as blue, black, or gray, then add contrasting eyes and a small smile. Sunglasses, a tiny guitar, or a colorful accessory can give the character extra personality. If you enjoy the general feel of storybook cats such as Pete the Cat, create your own original character with a different face, outfit, and color arrangement rather than reproducing exact character artwork. The result can still feel fun, musical, and expressive.
20. Banana Cat
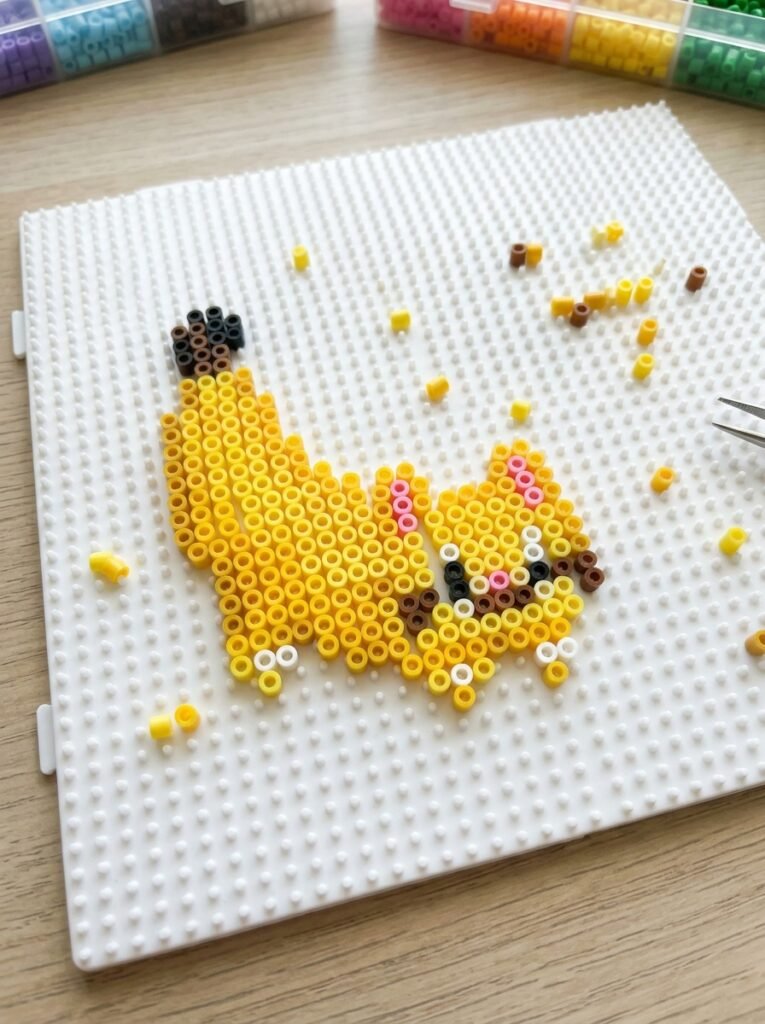
A banana cat combines two familiar shapes into one silly character. Use yellow beads to create a banana-shaped outer body, then add a small cat face, pointed ears, and tiny paws. Brown beads at the ends can suggest banana tips, while pink or white details make the expression extra cute. Keep the silhouette simple so both the fruit and cat elements remain easy to recognize. This playful design works well as a novelty decoration, a small handmade gift, or part of a collection of food-inspired animals.
21. Strawberry Cat
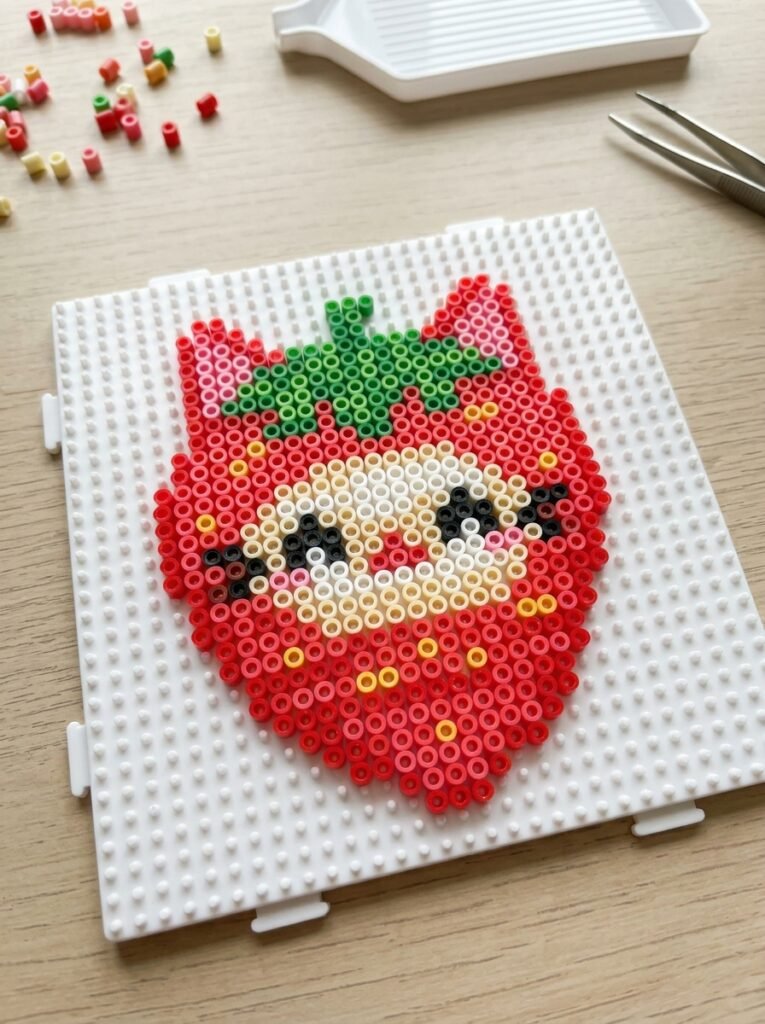
A strawberry cat combines a bright red fruit shape with the face and ears of a kitten. Use red beads for the body, green beads for a leafy top, and small white or yellow beads for the strawberry seeds. Add pointed cat ears, whiskers, and a tiny smiling face to complete the design. Pink and cream variations can create a softer aesthetic. This project is ideal for spring and summer crafts, cute accessories, and collections of food-themed animals.
22. Lucky Cat with a Raised Paw
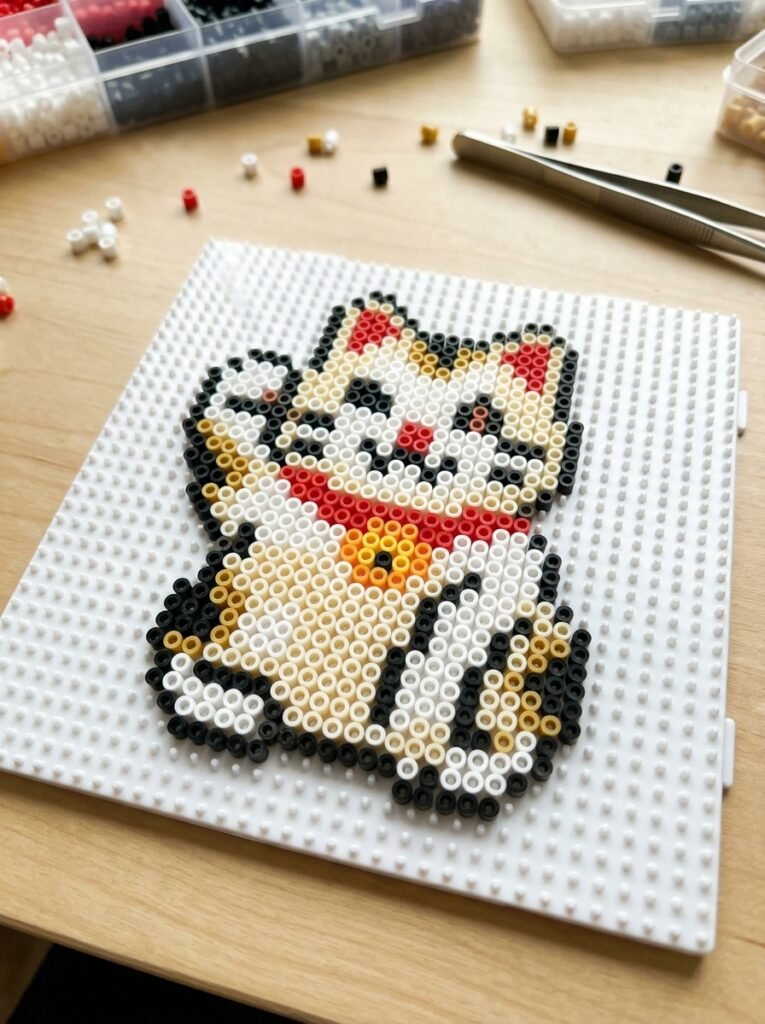
Create an original lucky-cat design featuring a rounded body and one raised paw. White, cream, gold, and red beads create a traditional lucky charm color palette, while small black details define the eyes and whiskers. A tiny collar or bell can add extra detail. Keep the raised paw connected securely to the body so it does not become fragile after fusing. This design makes a thoughtful handmade gift for someone who enjoys cats or decorative good-luck symbols.
23. Easy Pixel Tabby Kitten
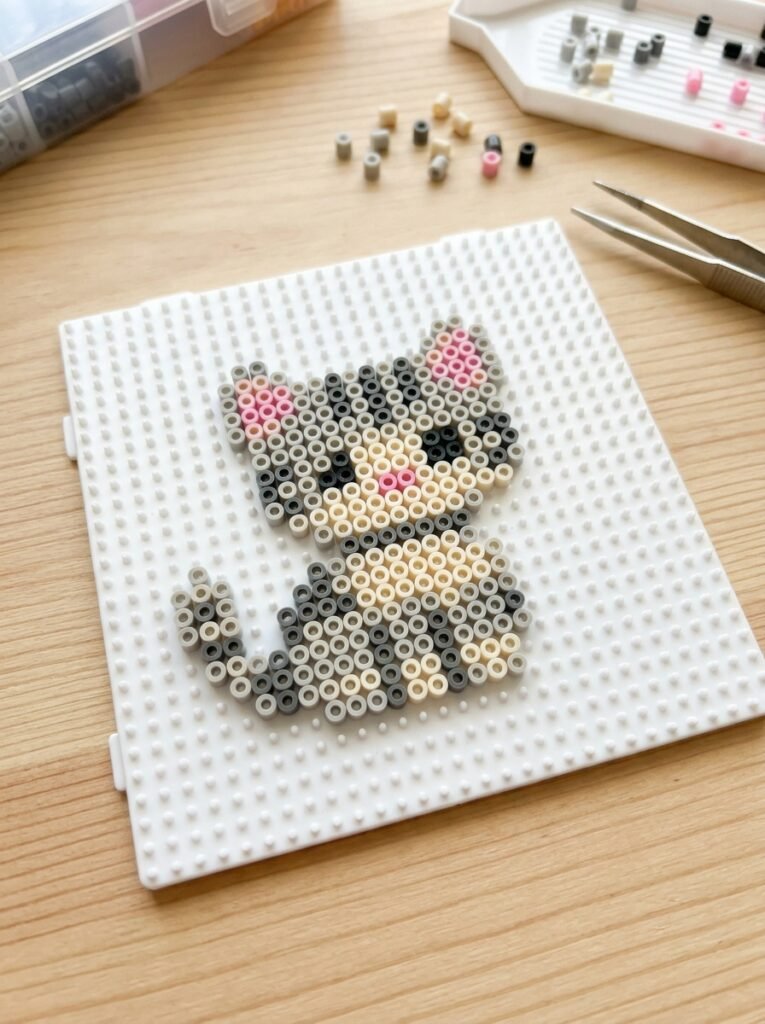
A small tabby kitten is a good choice if you want a recognizable cat without a complicated outline. Build a compact body from cream or light gray beads, then add darker stripes across the forehead, cheeks, back, and tail. Two pointed ears and a pair of bright eyes help bring the face to life. You can change the base color to orange, brown, or gray for different tabby variations. Keep the stripe placement simple and balanced so the design remains clear at a small size.
24. Gray-and-White Christmas Kitten
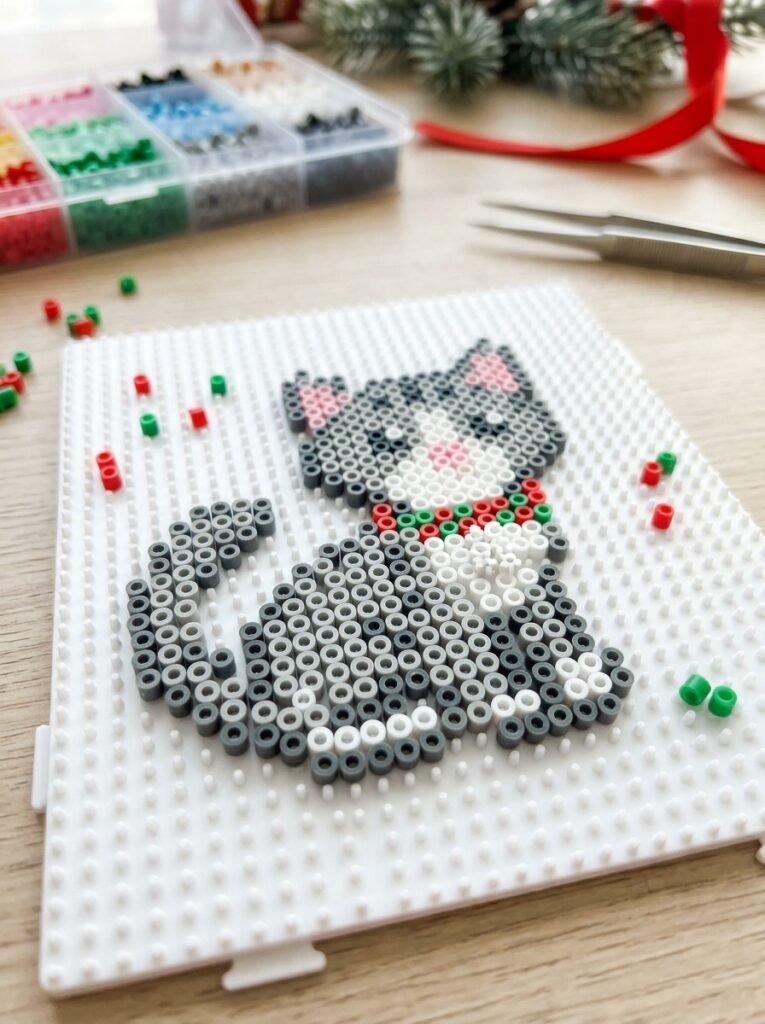
Finish the collection with a soft gray-and-white kitten decorated for Christmas. Use gray beads for the main coat, white beads for the chest and face, and small red and green details for a festive collar. A tiny snowflake or gift-inspired accent can complete the theme without making the design too complicated. This pattern combines a popular cat color scheme with a seasonal style, making it a lovely option for a winter craft collection or a handmade holiday gift.
How to Make Cat Perler Bead Patterns Step by Step
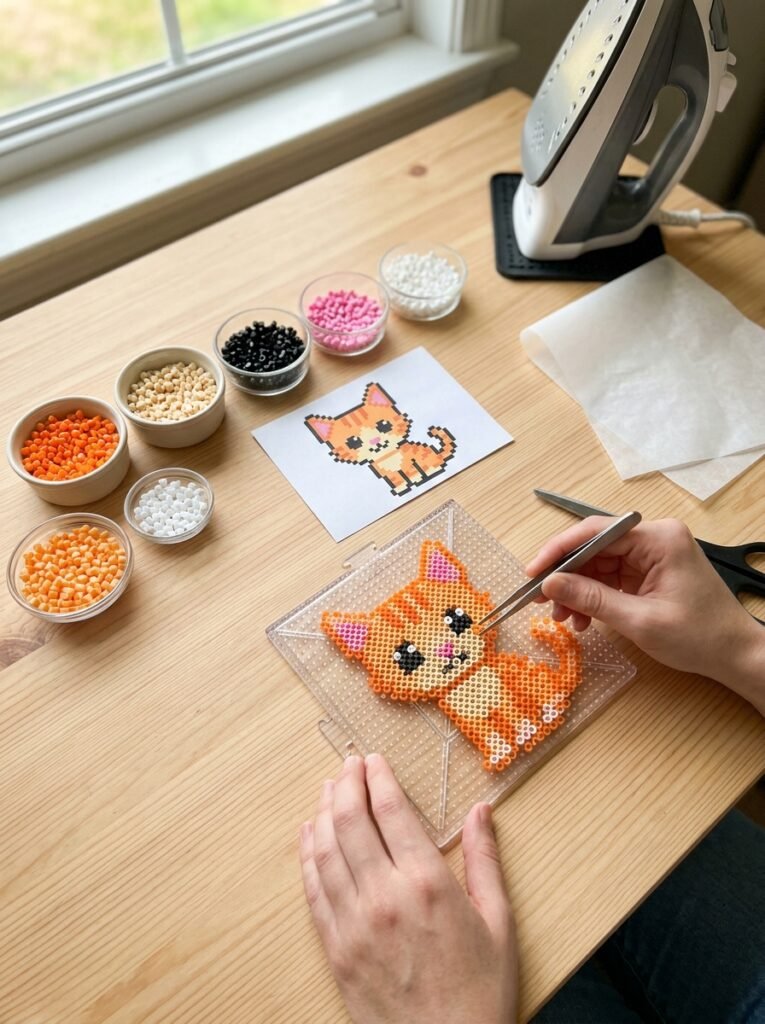
Making a cat from fuse beads is easier when you build the outline first and add facial details afterward. Start with a simple face or sitting kitten before attempting complicated color patches or three-dimensional designs.
- Choose your cat design. Decide whether you want a cat face, full-body kitten, seasonal cat, or keychain.
- Select the colors. Prepare the main coat color, outline color, eye color, and small accent shades before starting.
- Build the outline. Place beads for the ears, head, body, paws, and tail. Check that the silhouette looks balanced.
- Fill in the main colors. Add the base coat, then use smaller groups of contrasting beads for stripes, patches, or facial markings.
- Add the expression. Carefully place the eyes, nose, mouth, and whiskers. A few well-positioned beads can make the cat look happy, sleepy, or mischievous.
- Check the design. Look for gaps, loose beads, and weak connections, especially around the ears, paws, and tail.
- Fuse the beads safely. Use the recommended ironing paper and follow the manufacturer’s instructions. An adult should operate the iron and supervise children.
- Cool and finish. Let the design cool completely on a flat surface before removing it from the pegboard. For a keychain, attach suitable hardware only after checking that the finished piece is sturdy.
Tips for Better Cat Perler Bead Designs
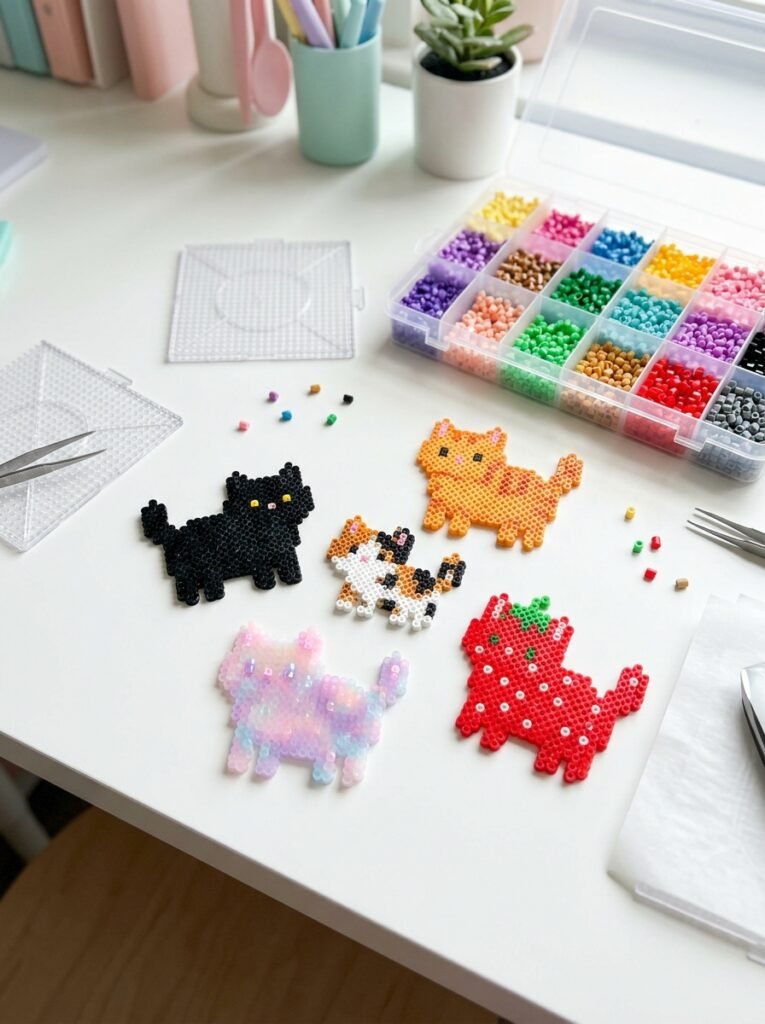
- Start with simple shapes: A cat face or sitting kitten is easier to build than a complicated full-body pose.
- Use contrasting eyes: Bright blue, green, or yellow eyes stand out against gray, black, and white coats.
- Plan stripes and patches: For tabby and calico cats, place the markings before filling the entire body.
- Keep small features connected: Thin tails, pointed ears, and tiny paws may break if their connections are too narrow.
- Make keychains sturdy: Avoid placing attachment holes too close to the edge, and use suitable hardware.
- Experiment with expressions: Changing the eyes, eyebrows, and mouth can turn one basic cat into several distinct characters.
- Follow safety instructions: Keep hot irons and freshly fused beads away from children until everything has cooled completely.
Final Thoughts
The best cat perler bead patterns let you combine your favorite cat colors, expressions, and creative themes. Start with an easy cat face, then try a tabby kitten, a rainbow-trailing pixel cat, a seasonal design, or a more advanced 3D figure as your skills grow. You can also turn smaller designs into keychains or create a matching collection of black, white, orange, gray, and calico cats. With a little patience and a few colorful beads, each project can become a unique handmade decoration or a thoughtful gift for a fellow cat lover.