

This post may contain affiliate links. Please read my disclosure policy.
In This Article Show
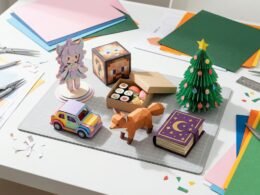
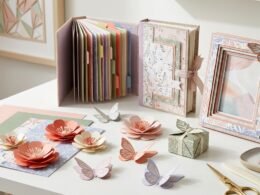
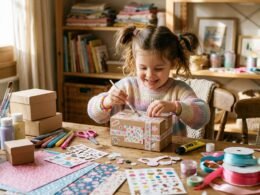
Looking for creative activities that keep children entertained while helping them learn new skills? Paper crafts for kids are a wonderful way to turn simple supplies into colorful animals, cheerful seasonal decorations, handmade gifts, and playful artwork. With construction paper, tissue paper, glue, child-safe scissors, and a little imagination, children can create exciting projects at home, in classrooms, or during school holidays. These activities are suitable for different interests and skill levels, from simple paper folding for younger children to more detailed 3D creations for older kids. Whether you need an easy afternoon activity, a Halloween decoration, or a Christmas craft to make together, these ideas offer plenty of inspiration without requiring expensive materials.

1. Easy Construction Paper Animals

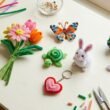
Construction paper animals are a wonderful starting point for young crafters because children can create recognizable creatures using simple shapes. Cut circles, ovals, triangles, and rectangles to form animals such as cats, rabbits, fish, lions, and turtles. Children can choose their own colors, add paper ears and tails, and create expressive faces with drawn details. Younger children can work with pre-cut shapes prepared by an adult, while older kids can plan and cut their own designs. Display the finished animals on a bedroom wall, use them for a classroom nature board, or turn them into characters for imaginative storytelling.
2. Tissue Paper Rainbow Art

Tissue paper rainbow art is a simple activity that introduces children to colors, patterns, and creative composition. Draw a large rainbow outline on cardstock, then cut small squares of tissue paper in red, orange, yellow, green, blue, and purple. Children can scrunch the squares into little balls or gently fold them before gluing them inside the matching rainbow bands. The raised texture makes the finished artwork more interesting than a flat drawing, and children can add paper clouds, raindrops, or a smiling sun. This project works particularly well during spring, rainy-day activities, or color-learning sessions at home.
3. Halloween Paper Plate Pumpkin

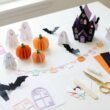
A paper pumpkin is an easy Halloween decoration that children can customize with different facial expressions. Draw a pumpkin shape on orange cardstock or use a plain paper plate as the base. Add green paper leaves and a stem, then cut black paper shapes for the eyes, nose, and mouth. Children can create a friendly smiling pumpkin, a silly face, or a slightly spooky expression depending on their preferences. Attach a paper loop at the back if you want to hang it on a door or wall. For younger children, prepare the cutout pieces in advance so they can focus on arranging and gluing the design.
4. Simple Folded Paper Butterflies

Folded paper butterflies are ideal for children who enjoy bright colors and symmetrical designs. Begin with two squares of lightweight colored paper, fold each into an accordion, and secure the centers together to create upper and lower wings. Add a narrow paper strip for the body and two small antennae to complete the butterfly. Children can decorate the wings with dots, circles, hearts, or contrasting paper shapes. These butterflies look lovely attached to greeting cards, displayed on classroom boards, or arranged around a spring-themed wall display. Demonstrate the folding process slowly, as even folds help the wings open into a balanced shape.
5. Christmas Paper Snowflakes

Paper snowflakes help children explore symmetry while creating decorations for the holiday season. Fold a square sheet of white or pale blue paper into smaller sections, then carefully cut small triangles and curves along the edges. When the paper is unfolded, the cutouts form a unique snowflake pattern. Children can make several different designs and hang them in windows, attach them to greeting cards, or combine them into a winter garland. Adults should handle more complicated cutting for younger children. Using lightweight paper makes folding easier, while slightly thicker paper can produce snowflakes that hold their shape longer.
6. Toilet Paper Roll Animal Crafts

Empty cardboard toilet paper rolls can become playful animals and characters with only a few basic supplies. Cover each tube with colored paper, then add paper ears, wings, tails, feet, and facial features to transform it into an owl, rabbit, fox, butterfly, or friendly monster. Children can experiment with unusual color combinations and create an entire collection of miniature creatures. This activity also introduces the idea of reusing clean household materials instead of immediately throwing them away. Make sure the cardboard tubes are clean and dry, and prepare tricky cuts in advance for younger children.
7. Easy Paper Flower Bouquet

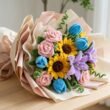
Paper flowers give children a chance to explore color combinations and create something they can proudly display or give as a handmade gift. Cut large and small petal shapes from colored paper, layer them around a circular center, and attach a green paper stem. Children can make daisies, simple roses, tulips, or imaginary flowers with unusual colors. Add paper leaves to make each flower look more complete, then arrange several stems in a lightweight container. This project is especially lovely for spring, Mother’s Day, birthdays, or classroom displays. Older children can experiment with curled petals and multiple layers to create more dimensional blooms.
8. 3D Paper Christmas Trees

A three-dimensional paper tree adds a playful handmade touch to Christmas decorations without needing a real tree or complicated materials. Fold two matching tree shapes in half, then glue the folded halves together to create a standing tree with depth. Children can decorate the branches with small paper circles, stars, and colorful geometric ornaments. Choose green cardstock for a traditional appearance or use pink, blue, or rainbow colors for a more imaginative design. These miniature trees look attractive on a classroom display, a study desk, or a holiday craft table. Use a sturdy base so the finished tree stands upright.
9. Colorful Paper Caterpillars

Paper caterpillars are a fun way for children to practise repeating patterns and arranging shapes in a sequence. Cut several equal-sized circles from construction paper and glue them in a row, slightly overlapping each circle to form the body. Use a different color for each segment or repeat a pattern such as red, yellow, blue, and green. Add a larger circle for the head, two antennae, and a friendly face. Children can make short or long caterpillars and give each one a name. Display the finished creations on a wall or use them to introduce discussions about insects and butterfly life cycles.
10. Spring Paper Flower Garden

A paper flower garden lets children combine several craft techniques to create one large piece of artwork. Start with a sheet of blue or pale green cardstock as the background, then add green paper stems and leaves. Layer different flower shapes across the page, varying their sizes and colors to create the impression of a garden in bloom. Children can include paper butterflies, clouds, bees, and a bright sun to complete the scene. Encourage them to choose their own flower arrangements instead of copying one exact pattern. This project is ideal for spring lessons, classroom wall displays, and collaborative family art sessions.
11. Crepe Paper Party Flowers

Crepe paper flowers have a soft, textured appearance that makes them especially attractive for birthday parties and special celebrations. Cut petal shapes from colorful crepe paper, gently stretch the middle of each petal, and layer them around a small paper center. Add a green paper stem and leaves to complete the flower. Children can make several flowers in matching colors and arrange them into a bouquet or a decorative party display. Because crepe paper can tear when stretched too far, demonstrate the technique first and encourage gentle handling. Younger children can assemble pre-cut petals while adults assist with delicate shaping.
12. Easter Paper Bunny and Egg Decorations

Easter crafts can help children celebrate the season through playful shapes and bright spring colors. Cut bunny silhouettes from white, pink, or pastel cardstock and add long paper ears, small cheeks, and a simple nose. For eggs, cut oval shapes and decorate them with paper stripes, dots, zigzags, or layered patterns. Children can attach the designs to greeting cards, create a hanging garland, or arrange them into a colorful seasonal display. Use a mix of pastel shades and brighter accents to keep the finished artwork lively. These projects are easy to adapt for different ages by changing the size and complexity of the shapes.
13. Foam Sheet and Paper Animal Masks

Combining paper with lightweight craft foam allows children to create playful animal masks for pretend play, dress-up activities, or school celebrations. Draw a simple mask shape on cardstock, cut out the eye openings with adult assistance, and add foam or paper ears, spots, feathers, or whiskers. Children can design a lion, cat, butterfly, or colorful fantasy creature using their favorite shades. Attach a suitable elastic or handle securely, ensuring that the mask fits comfortably and does not obstruct vision or breathing. For younger kids, an adult should prepare the base and supervise all cutting and attachment steps.
14. Simple Paper Pinwheels for Summer

Paper pinwheels are colorful decorations that bring a playful summer feeling to parties, garden celebrations, and classroom displays. Cut a square sheet of colored paper, draw diagonal lines from each corner toward the center, and make cuts that stop before reaching the middle. Fold alternate corners inward and secure them with an appropriate fastener. An adult should handle pins or sharp fasteners, especially when crafting with younger children. Use patterned paper or alternating colors to create an attractive design, then attach the pinwheel to a safe handle for display. These decorations look especially lovely in coordinated groups of different sizes.
15. Winter Paper Mittens and Snowmen

Winter paper art is a simple way to create seasonal decorations when the weather keeps children indoors. Trace mitten shapes onto colored cardstock, cut them out, and decorate them with paper stripes, dots, hearts, or zigzag patterns. For a snowman, stack three white paper circles and add a black paper hat, orange carrot-shaped nose, and colorful scarf. Children can combine both designs into a winter collage or a greeting card. Encourage them to invent different scarf patterns and mitten colors rather than making every design identical. This activity develops cutting, arrangement, and color-selection skills while producing cheerful seasonal artwork.
16. Printable Paper Animal Masks

Printable animal masks are useful when children want to make something detailed without drawing every shape from scratch. Choose a simple template featuring an animal face, print it on cardstock, and let children color the design before cutting it out with adult assistance. They can add extra paper ears, spots, feathers, or a colorful mane to personalize the finished mask. Make sure the eye openings are correctly positioned and the mask allows comfortable breathing and clear vision. These masks are great for pretend play, storytelling, classroom theme days, or a homemade animal parade.
17. Fun Paper Chain Decorations

Paper chains are one of the simplest activities for children and can be adapted for birthdays, Christmas, classroom celebrations, or everyday room decoration. Cut paper into equal-sized strips, form the first strip into a loop, and secure the ends with glue or tape. Thread the next strip through the first loop before joining it, then continue until the chain reaches the desired length. Children can alternate colors in a pattern or create a rainbow effect with every link. Hang the finished chain across a wall or doorway, ensuring it is placed safely away from flames, heaters, and other potential hazards.
18. Make a Paper Fish Aquarium

A paper fish aquarium turns simple cutouts into an imaginative underwater scene. Begin with a blue cardstock background and add green paper seaweed, colorful fish, bubbles, coral, and small paper rocks. Children can cut fish from bright construction paper, then add fins, tails, scales, and expressive eyes using contrasting shapes. Arrange the pieces at different heights to make the aquarium look more lively and dimensional. Older children can fold some fish slightly forward or layer additional fins to create a 3D effect. This project works well for summer activities, ocean-themed lessons, or a shared classroom display.
19. Create Cool Paper Rocket Ships

Paper rocket ships encourage children to experiment with shapes, patterns, and imaginative storytelling. Cut a tall rectangle for the rocket body, a triangle for the top, and smaller triangles or fins for the sides. Add circular paper windows, stripes, stars, and colorful flame shapes at the bottom. Children can build one large rocket or create an entire fleet in different sizes and color combinations. Attach the finished rocket to a sheet of dark blue cardstock decorated with paper planets and stars to create a space scene. Keep the design lightweight so it can be displayed easily on a wall or classroom board.
20. Fall Construction Paper Leaf Garland

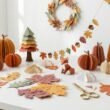
A paper leaf garland is a lovely autumn project that helps children explore seasonal colors and repeated patterns. Trace simple maple, oak, or rounded leaf shapes onto construction paper in orange, yellow, red, and green. Cut out the leaves, add drawn veins or small paper details, and attach them to a string with paper tabs or tape. Children can alternate the colors in a pattern or arrange the leaves randomly for a more natural appearance. Hang the garland on a classroom display board, bedroom wall, or seasonal craft area. This activity also offers a chance to discuss how real leaves change color during autumn.
How to Make Paper Crafts Easier and More Enjoyable for Kids
The best paper crafts for kids are projects that match a child’s age, interests, and ability level. A simple activity with a few large shapes can be just as rewarding as a complicated 3D design when children have the freedom to make their own choices. Instead of aiming for a perfect result, focus on letting kids experiment with colors, textures, and creative combinations.
Use these practical tips to prepare a successful crafting session:
- Prepare a small craft station: Keep construction paper, glue sticks, crayons, child-safe scissors, and scrap paper together so children can work comfortably.
- Choose age-appropriate designs: Younger children usually benefit from larger pre-cut shapes, while older kids can try detailed cutting, folding, and layered projects.
- Introduce one technique at a time: Demonstrate folding, cutting, layering, or gluing separately before combining several steps into one project.
- Use seasonal inspiration: Create pumpkins for Halloween, trees for Christmas, bunnies for Easter, flowers for spring, pinwheels for summer, and snowmen for winter.
- Encourage original ideas: Let children choose their own colors, expressions, patterns, and decorations instead of expecting every craft to look identical.
- Display their creations: A simple wall display or rotating artwork board can help children feel proud of their work and encourage them to try another project.
For safe crafting, supervise scissors and small fasteners, use age-appropriate glue and materials, and follow product instructions. Keep small decorative pieces away from children who may put them in their mouths. An organized workspace and manageable steps make crafting more enjoyable for everyone.
Final Thoughts
Creative activities do not need expensive kits or complicated instructions to be memorable. Paper crafts for kids offer an accessible way to explore colors, develop fine-motor skills, practise following steps, and express individual ideas. From paper animals and tissue-paper rainbows to Halloween pumpkins and Christmas decorations, every project can be adapted to suit different ages and interests. Start with one simple idea, gather a few supplies, and let children personalize their creations. You can turn an ordinary afternoon into a colorful art session, prepare decorations for a special occasion, or build a collection of handmade projects to display at home. The most rewarding part is not making every craft perfect it is giving children the freedom to create something that feels uniquely theirs.