As a homeowner, you may not have given much thought to the ventilation in your kitchen sink. However, proper ventilation is critical to ensure your kitchen operates efficiently and safely. Without adequate ventilation, you could be exposing yourself and your family to harmful gases, unpleasant odors, and even potentially hazardous conditions.
But what exactly is a kitchen sink vent, and how does it work? That’s where the kitchen sink plumbing vent diagram comes in. In this article, we will explore the anatomy of a kitchen sink vent and how it functions, as well as the importance of its proper installation and maintenance.
If you’re a DIY enthusiast, you’ll find useful tips on how to install and troubleshoot your kitchen sink vent. And even if you’re not, understanding the basics of a kitchen sink vent will enable you to recognize potential problems and communicate with a professional when needed.
So, whether you’re a seasoned DIYer or a homeowner looking to increase your knowledge of home maintenance, keep reading to learn more about kitchen sink vents and how they can benefit you and your home.
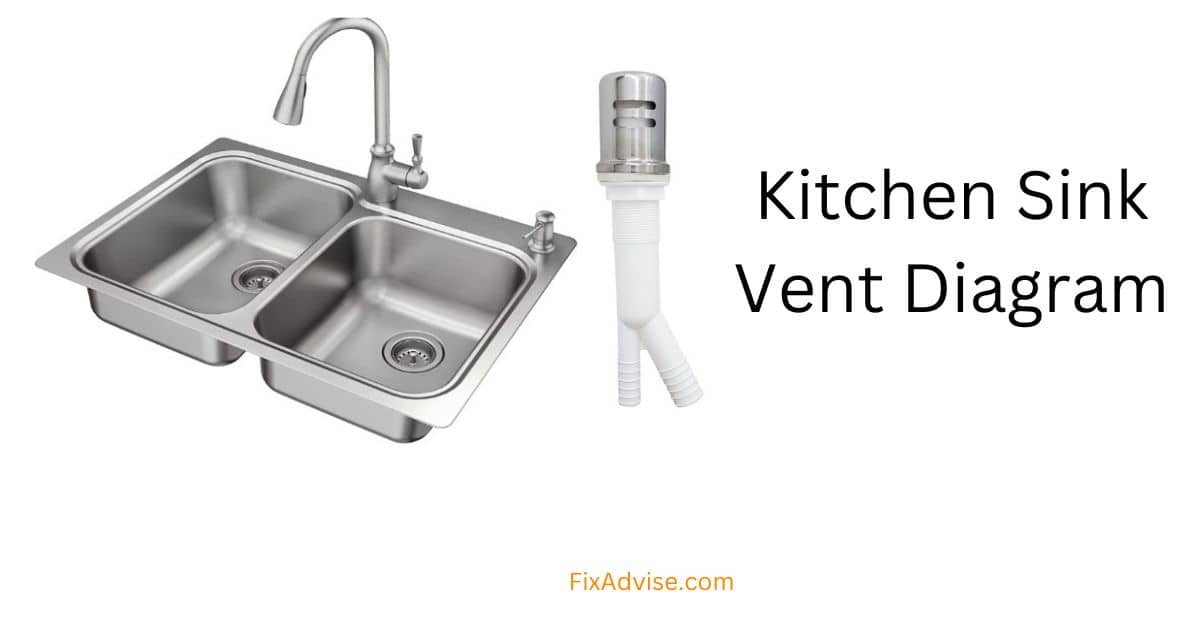
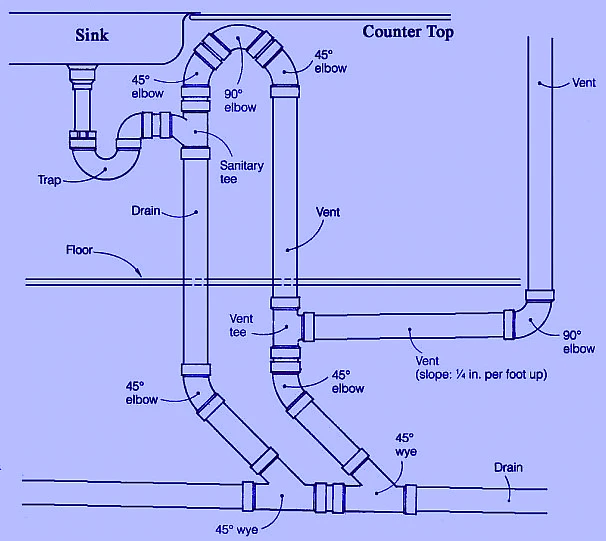
Kitchen Sink Vent Diagram
Kitchen Sink Plumbing Diagram With Garbage Disposal

Kitchen Sink Plumbing Diagram Without Garbage Disposal
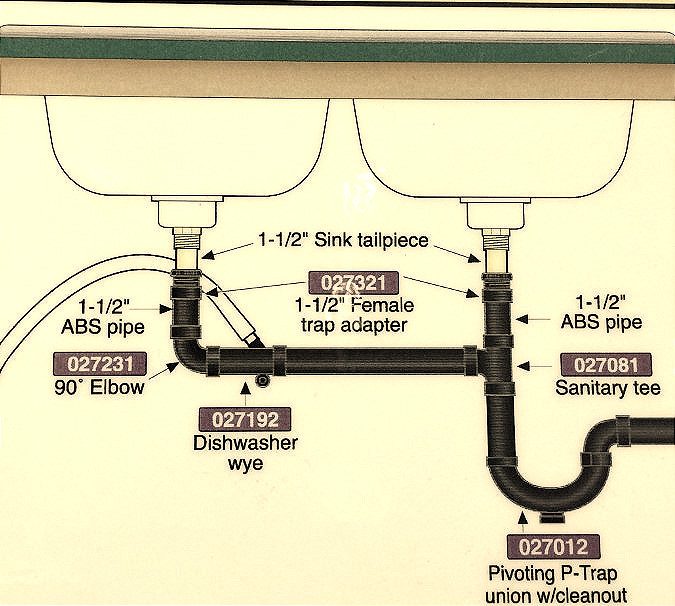
Double Kitchen Sink With Garbage Disposal Plumbing Diagram
Kitchen Sink plumbing parts
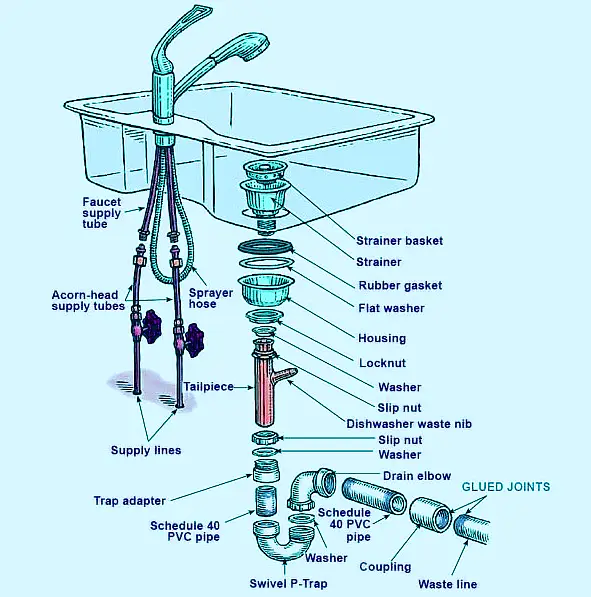
Here is a list of common plumbing parts you may need for your kitchen sink:
- Sink strainer: A basket-like device that fits into the drain of the sink to prevent food particles and other debris from clogging the pipes.
- P-trap: A curved section of pipe that is installed beneath the sink to trap debris and prevent sewer gases from entering the home.
- Tailpiece: A straight section of pipe that connects the sink drain to the P-trap.
- Slip-joint pliers: A type of pliers that can be adjusted to grip objects of various sizes.
- Plumbers putty or silicone caulk: A sealant used to prevent water from leaking around the sink and drain connections.
- Faucet: A device that controls the flow of water into the sink.
- Supply lines: The pipes that bring hot and cold water to the faucet.
- Shut-off valves: Valves that can be used to turn off the water supply to the sink in case of a leak or other emergency.
- Escutcheon plate: A decorative cover that can be used to hide the holes in the sink or countertop where the kitchen faucet and other plumbing fixtures are installed.
- Mounting hardware: Screws or other fasteners used to secure the sink and other plumbing fixtures in place.
How To Install Kitchen Single Sink Plumbing With Garbage Disposal
Here is a general overview of how to install a kitchen sink plumbing system with a garbage disposal:
- Start by turning off the water supply and disconnecting any existing plumbing from the sink and garbage disposal.
- Install the sink strainer by placing it into the sink drain and tightening the locknut from underneath the sink.
- Install the garbage disposal by attaching the mounting assembly to the sink flange and securing it with the mounting screws. Then, connect the discharge tube to the disposal and tighten the mounting bolts.
- Install the P-trap and tailpiece. Connect the tailpiece to the sink strainer and the P-trap to the tailpiece. Then, connect the other end of the P-trap to the drain of the garbage disposal.
- Install the dishwasher drain line by connecting it to the side of the garbage disposal with the dishwasher inlet. Use a hose clamp to secure the connection.
- Install the faucet and water supply lines. Connect the supply lines to the faucet and then to the hot and cold water valves under the sink. Tighten the connections using adjustable wrenches.
- Turn on the water supply and check for leaks.
- Test the garbage disposal by turning it on and running water through it.
It’s important to note that the exact steps may vary depending on the specific model and brand of your sink and garbage disposal
Kitchen Sink Plumbing Diagram Height
The height of the kitchen sink plumbing diagram will vary depending on the specific design of your plumbing system and the placement of the sink, but here are some general guidelines:
- Sink drain height: The height of the sink drain should be approximately 1-2 inches below the top of the sink bowl. This allows for proper drainage and prevents water from overflowing onto the countertop.
- P-trap height: The height of the P-trap should be approximately 6-8 inches below the sink drain. This allows for sufficient space for the trap to work effectively in preventing sewer gases from entering the home.
- Tailpiece height: The tailpiece should be installed so that it slopes downward towards the P-trap. This ensures that water drains properly and does not sit stagnant in the pipes.
- Garbage disposal height: The height of the garbage disposal should be such that the discharge tube aligns with the P-trap inlet. This allows for proper flow of food waste and prevents clogging.
- Faucet height: The height of the faucet should be such that it allows for comfortable use of the sink while also providing adequate clearance for large pots and pans.
It’s important to note that these are general guidelines and the specific height measurements may vary depending on the design of your plumbing system and the sink you are installing.
Kitchen Sink Plumbing Dimensions
The dimensions of the kitchen sink plumbing will depend on the specific design of your plumbing system and the sink you are installing. However, here are some general dimensions to consider:
- Sink dimensions: The size of the sink can vary depending on the style and model. Standard sink sizes range from 22 inches to 30 inches in length and 16 inches to 22 inches in width.
- Sink bowl depth: The depth of the sink bowl can also vary, but standard depths are typically around 8 inches to 10 inches. This provides sufficient space for washing dishes and filling pots.
- Drain diameter: The standard diameter for a kitchen sink drain is 3.5 inches. This allows for proper drainage and prevents clogs.
- P-trap diameter: The diameter of the P-trap will depend on the size of the drain and the flow rate of the water. Typically, the P-trap diameter is 1.5 inches or 2 inches.
- Discharge tube diameter: The diameter of the garbage disposal discharge tube will depend on the specific model, but standard sizes range from 1.25 inches to 1.5 inches.
- Water supply line diameter: The diameter of the water supply line will depend on the specific plumbing system, but standard sizes are typically 1/2 inch or 3/8 inch.
It’s important to note that these are general dimensions and the specific measurements may vary depending on the design of your plumbing system and the sink you are installing
Kitchen Sink Plumbing Problems
Here are some common kitchen sink plumbing problems and their potential causes:
- Clogged drain: A clogged drain is one of the most common plumbing problems in a kitchen sink. The cause can be anything from food scraps and grease to soap scum and mineral buildup. A plunger or a drain snake can usually clear minor clogs. For stubborn clogs, you may need to use a drain cleaner or call a professional plumber.
- Leaking faucet: A leaking faucet can be caused by a worn-out washer, damaged O-ring, or corroded valve seat. In some cases, tightening the faucet handle may fix the problem. Otherwise, you may need to replace the damaged parts or the entire faucet.
- Low water pressure: Low water pressure can be caused by mineral buildup or a clogged aerator. Cleaning the aerator or replacing it can usually fix the problem.
- Garbage disposal issues: A garbage disposal can become clogged or jammed due to food scraps, grease, or foreign objects. You can try resetting the disposal or using a hex wrench to manually turn the motor. For stubborn clogs, you may need to use a plunger or a drain snake.
- P-trap problems: The P-trap is designed to prevent sewer gases from entering the home, but it can become clogged or develop leaks. A clogged P-trap can be cleared with a plunger or a drain snake, while a leaking P-trap may require tightening or replacement.
FAQ
Does A Kitchen Sink Drain Need A Vent?
Yes, a kitchen sink drain typically requires a vent to ensure proper drainage and prevent the buildup of sewer gases.
Where Is The Vent In The Kitchen Sink?
The vent for the kitchen sink drain is typically located on the roof of the house or can be connected to a nearby vent stack.
How Do You Air Vent A Kitchen Sink?
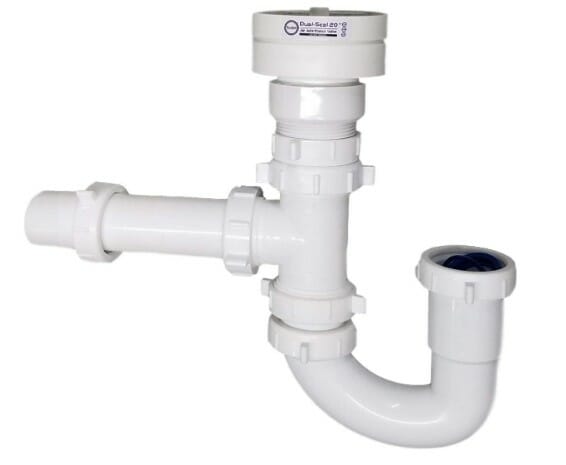
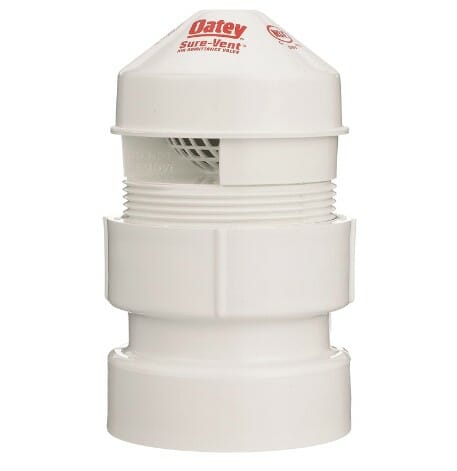
The most common way to vent a kitchen sink drain is by installing an air admittance valve (AAV) under the sink. This valve allows air to enter the drain line and equalize pressure, preventing water from getting trapped in the pipes.
How Does Kitchen Sink Drain Vent Work?
A kitchen sink drain vent works by equalizing pressure in the drain line, allowing water to flow freely and preventing sewer gases from entering the home. When water flows down the drain, it creates negative pressure that can cause water to be siphoned out of nearby P-traps, resulting in odors and slow drainage. The vent allows air to enter the drain line, preventing negative pressure and ensuring proper drainage.
How Do I Know If My Sink Vent Is Working?
You can tell if your sink vent is working by observing how quickly the water drains from the sink. If the water drains slowly or gurgles, it may be a sign that the vent is clogged or not functioning properly.
What Happens If A Drain Is Not Vented?
If a drain is not vented, it can cause problems with the drainage system, such as slow draining, gurgling sounds, and sewer odors. It can also lead to clogs and backups.
Does Every Drain Need A Vent?
Every drain does not necessarily need a vent, but it is recommended for proper functioning of the drainage system. Traps, which prevent sewer gases from entering the home, can function without a vent, but they may cause problems with proper drainage.
How Do You Test A Drain Vent?
To test a drain vent, you can pour water into the drain and observe how quickly it drains. If the water drains quickly and without gurgling sounds, the vent is likely functioning properly. Alternatively, you can use a smoke test or a water test to check for blockages or leaks in the vent system. It’s recommended to call a professional plumber for vent testing and repairs.
Conclusion
In conclusion, understanding the kitchen sink vent diagram is crucial to ensuring proper drainage and preventing the buildup of harmful sewer gases in your home. A properly installed vent system helps equalize pressure in the drain line and ensures that wastewater flows freely, keeping your plumbing system in good working condition. By following the correct plumbing codes and consulting a professional plumber if necessary, you can ensure that your kitchen sink vent system is properly installed and functioning, providing you with a clean and safe home environment.