
When it comes to installing an air admittance valve (AAV), one key question often comes up: how high should you place it? Getting the height right is crucial for your plumbing system to work smoothly and avoid unpleasant issues like slow draining or sewer odors.
If you’ve ever wondered about the perfect spot for your AAV, this article is made just for you. You’ll learn clear, simple guidelines that help you position your valve correctly, ensuring your pipes breathe easy and your home stays fresh.
Keep reading to discover expert tips that can save you time, money, and headaches down the line.
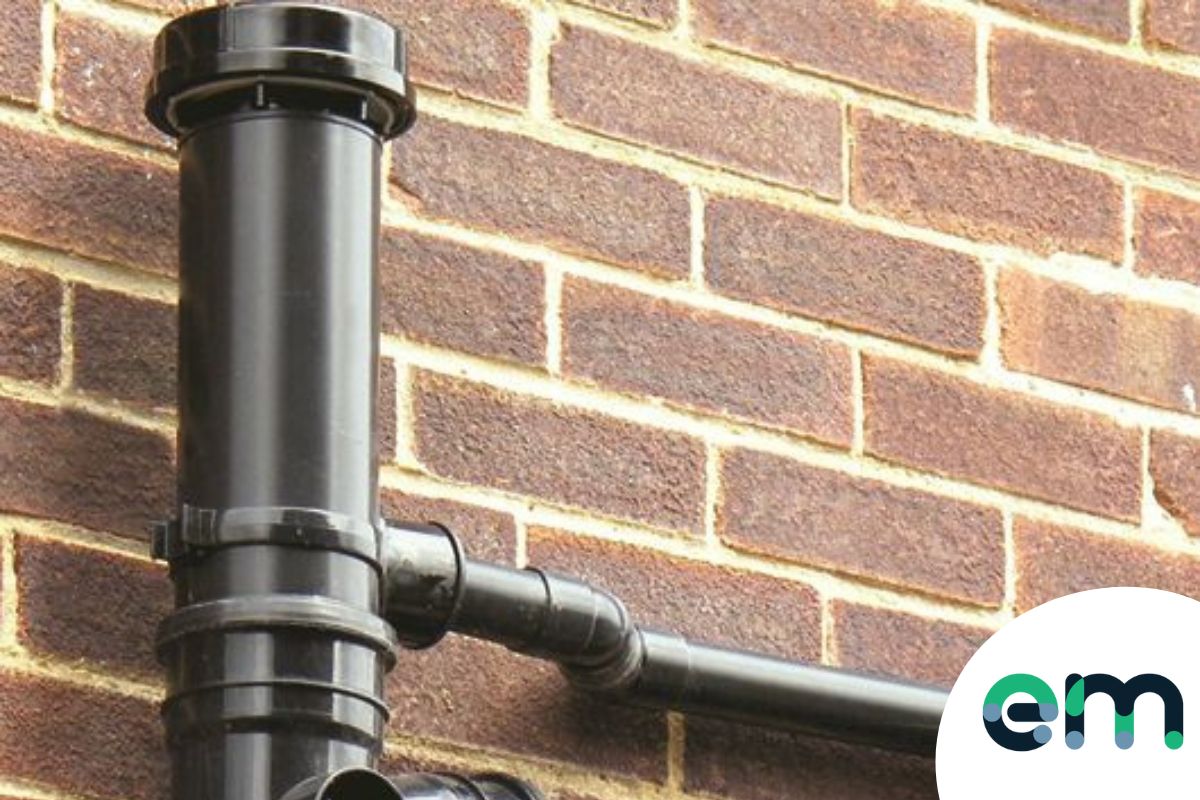
Credit: www.easymerchant.co.uk
Aav Height Basics
An air admittance valve (AAV) needs the right height for proper function. Too low or too high placement can cause venting issues. Understanding basic height rules ensures your plumbing works well and avoids odors or slow drainage.
Placing an AAV correctly helps air flow smoothly into drain pipes. This balance stops pressure problems inside plumbing. Let’s explore the key height points for AAV installation.
Recommended Installation Height
Most codes suggest installing an AAV at least 4 inches above the fixture’s flood level rim. This height prevents water from entering the valve. It also helps the valve open and close properly with air pressure changes.
Installing the valve too low risks water damage or valve failure. Too high placement might reduce venting efficiency. Keeping the valve within the recommended height range is essential for reliable performance.
Height Relative To Fixtures
Place the AAV above the highest fixture it serves. For example, if the sink is the highest point, the valve must be higher than its flood rim. This position allows air to enter the system and prevents sewer gases from escaping.
In multi-fixture systems, consider the tallest fixture. The valve should be at least 4 inches above this point. Proper height relative to fixtures stops water traps from drying out and keeps the system sealed.
Impact Of Height On Performance
Correct height ensures smooth air flow into the drain pipes. If the valve is too low, water might enter and block it. If too high, air might struggle to enter, causing slow drainage or gurgling sounds.
Height affects how well the valve opens to admit air and closes to block sewer gases. Installing at the right height boosts valve life and keeps your plumbing odor-free. Proper height placement is a small step with big benefits.
Placement Guidelines
Proper placement of an air admittance valve (AAV) ensures it works well. Follow these guidelines to install it correctly. Good positioning prevents odors and keeps drainage flowing smoothly. Each point below helps you place the valve at the right height and spot.
Position Above Drain
Install the AAV above the drain line it serves. This helps air enter easily and prevents sewer gases from escaping. The valve must be higher than the pipe it vents. This position aids in proper air flow and pressure balance.
Above Flood Level Rim
Place the valve higher than the flood level rim of any fixture. This stops water from entering the valve during overflow. Keeping it above this rim protects the valve from damage and blockages.
Within Vent Length Limits
Ensure the valve is within the maximum vent length allowed by code. If it is too far, the valve may not vent correctly. Check your local plumbing rules for exact vent length limits to follow.
Ensure Vertical Orientation
Install the AAV in a vertical position. The valve works best standing straight up. Tilting or laying it sideways can cause failure or block the air flow inside.
Accessibility For Maintenance
Place the valve where you can easily reach it. Regular checks and occasional replacement may be needed. Avoid covering the valve or hiding it in tight spots. Air must enter freely around the valve for it to work well.
Common Installation Mistakes
Installing an air admittance valve (AAV) can improve your plumbing system’s function. Yet, many common mistakes happen during installation. These errors reduce valve performance and cause odors or slow drainage. Understanding these mistakes helps keep your system working well.
Installing Too Low
Placing the AAV too low is a frequent error. The valve must be above the flood level rim of the fixture. If installed too low, water may enter the valve. This blocks air flow and stops proper venting. Always check the height before installation.
Covering The Valve
Another mistake is covering the AAV with cabinets or insulation. The valve needs free air access to work correctly. Covering it traps air and prevents the valve from opening. Keep the valve in an open and accessible spot for maintenance.
Incorrect Orientation
The valve must be installed vertically. Installing it at an angle or upside down causes malfunction. Air cannot enter properly, and the valve may stay closed. Follow manufacturer guidelines to ensure the valve faces straight up.
Prohibited Locations
Knowing where not to install an air admittance valve (AAV) is crucial for safety and proper function. Certain locations are off-limits due to health risks or code violations. Avoid placing AAVs in these prohibited areas to ensure your plumbing system works well and stays safe.
Special Waste Systems
AAVs must never be used in special waste systems. These systems handle hazardous or nonneutralized wastes. Installing an AAV here can cause harmful gases to escape. Such gases may pose serious health risks to building occupants. Always use approved venting methods for special waste lines.
Ventilation Plenums
Do not install AAVs inside ventilation plenums. These plenums carry air for heating or cooling. An AAV in this space can release sewer gases into the air supply. This contaminates the indoor air quality. Local codes strictly forbid AAVs in these critical air handling areas.
Unventilated Or Confined Spaces
AAVs need fresh air to work correctly. Installing them in unventilated or confined spaces blocks air entry. This causes valve failure and sewer gas buildup. Always place AAVs where air circulates freely. Avoid tight, closed areas such as crawl spaces or sealed rooms.
Code And Compliance
Understanding code and compliance is crucial when installing an air admittance valve (AAV). Codes ensure the valve functions safely and effectively. They also prevent plumbing issues and maintain building safety. Meeting these rules avoids costly corrections and fines.
Building Code Requirements
Building codes set clear rules for AAV height and placement. The valve must be installed above the flood level rim of the fixture. This prevents wastewater from entering the valve. Codes also require the AAV to be within the venting system’s maximum developed length. This helps the valve work properly by allowing air to enter and exit.
Local Regulations
Local rules may add extra conditions beyond national codes. Some cities or states have stricter rules for AAV installation height. It is important to check local plumbing codes before installation. Following local laws ensures the valve passes inspection. It also guarantees long-term compliance and safety.
Inspection Considerations
Inspectors focus on the valve’s placement and accessibility. The AAV must be easy to reach for maintenance. Inspectors check that the valve is not covered or blocked. They verify the valve is installed at the correct height. Proper installation helps the valve pass inspections quickly and without issues.
Credit: www.easymerchant.co.uk
Mechanical Limitations
Mechanical limitations affect the proper height of an air admittance valve (AAV). These limits influence how well the valve works and how long it lasts. Understanding these factors helps to install the valve correctly for best performance.
Airflow Capacity
The valve must allow enough air to flow into the plumbing system. Too low placement can block air entry and reduce airflow. Too high placement might cause delays in venting. The height affects how air moves through the valve and pipe.
Compatibility With Pump Systems
Pump systems in plumbing can create pressure changes. The AAV must match these systems to avoid pressure buildup. Incorrect height may cause the valve to fail or leak. Proper positioning ensures the valve opens and closes at the right times.
Risk Of Mechanical Failure
Placing the valve too low or too high can cause strain on its parts. This strain increases the risk of cracks or leaks. The valve’s internal mechanism may wear out faster. Correct height reduces mechanical stress and extends valve life.
Potential Issues
Installing an air admittance valve (AAV) at the correct height is vital. Improper placement can cause several problems. These issues affect your plumbing system’s function and your home’s comfort. Understanding the potential issues helps avoid costly repairs and health risks.
Sewer Gas Leaks
One common problem is sewer gas leaks. If the AAV is too low or blocked, it may not seal properly. This failure lets foul gases escape into your home. These gases can cause unpleasant odors and health hazards. Proper height and clear air flow keep the valve working well.
Slow Draining And Gurgling
Incorrect AAV height can slow draining sinks and tubs. Water may drain slowly or cause gurgling sounds. This happens because air cannot enter the drain line fast enough. The valve must be high enough to allow air in when needed. This prevents suction and keeps water flowing smoothly.
Noise Concerns
Noise from an AAV often signals poor installation height. A valve placed too close to water pipes may create popping or clicking sounds. These noises occur when the valve opens and closes frequently. Installing the valve at the right height reduces noise and improves comfort.
Maintenance Tips
Proper maintenance of an air admittance valve (AAV) ensures it functions well over time. Regular care prevents blockages and keeps air flowing freely. This section covers simple tips to maintain your AAV and avoid plumbing issues.
Regular Inspection
Check the AAV every few months. Look for cracks, dirt, or damage on the valve. Make sure the valve is upright and not tilted. Watch for unusual smells or slow draining that may signal a problem. Early detection helps avoid costly repairs.
Cleaning Procedures
Turn off the water supply before cleaning. Remove the valve cover gently. Clean the inside with a soft brush or cloth. Avoid harsh chemicals that can damage the valve. Rinse thoroughly and dry before reassembling. Keep the vent area free of dust and debris.
When To Replace
Replace the AAV if you see cracks or broken parts. If the valve does not open or close properly, it needs replacement. Frequent foul odors or slow drainage may also mean the valve is failing. Use a new valve that matches your plumbing system for best results.
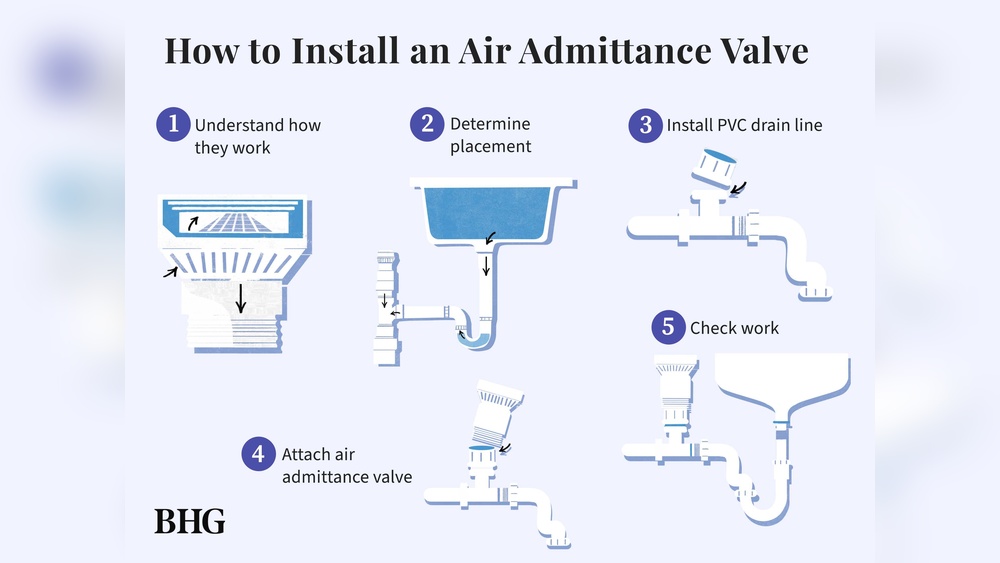
:strip_icc()/air-admittance-valve-b5d78cbecf6e4b26bd8a37f76691a632.jpg)
Credit: www.bhg.com
Frequently Asked Questions
Where To Position An Air Admittance Valve?
Position an air admittance valve above the fixture drain, above the flood rim, and within vent length. Ensure vertical placement and accessibility for maintenance. Avoid installing in special waste systems or air plenums.
What Is The Downside To An Air Admittance Valve?
Air admittance valves may fail over time, causing sewer gas leaks and slow draining. They don’t work with sewage pumps and can cause noise. Some building codes prohibit their use, and they only allow air in, not out, so they can’t replace roof vents.
What Is The Height Code For Plumbing Vents?
The plumbing vent must extend at least 6 inches above the roof surface, following local code requirements. This ensures proper ventilation and prevents sewer gas entry.
Can A Toilet Vent Be 2 Inches?
Yes, a toilet vent can be 2 inches if local plumbing codes allow it. Generally, 3-inch vents are preferred.
Conclusion
Placing an air admittance valve at the right height ensures proper venting. It should be above the flood level rim and easy to access. Avoid hidden or restricted spots to keep air flowing freely. Correct positioning helps prevent odors and drainage problems.
Always follow local codes and manufacturer instructions for best results. Proper installation keeps your plumbing working smoothly and safely.