
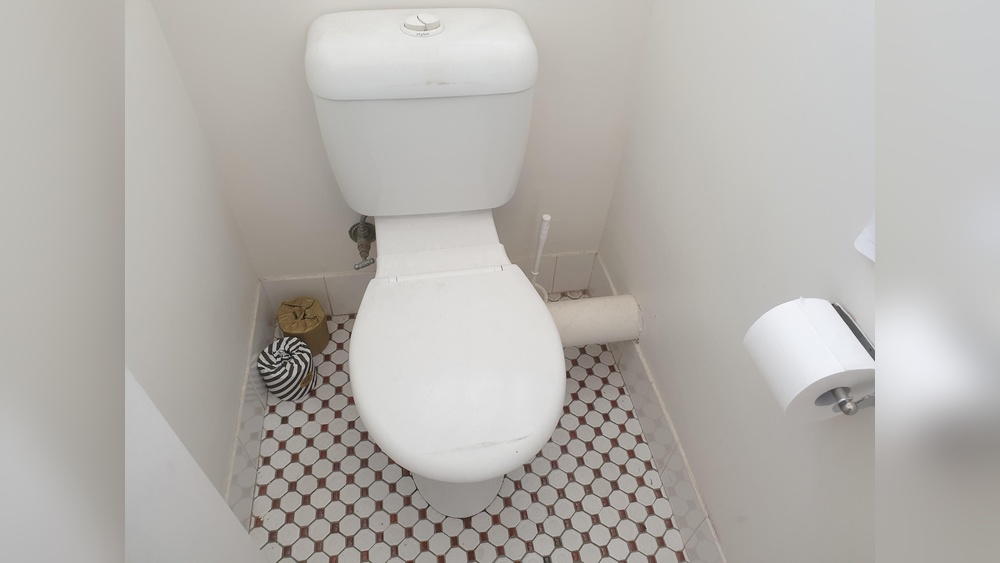
If you’ve ever looked at your bathroom and felt annoyed by those ugly toilet waste pipes or drain pipes sticking out, you’re not alone. These pipes are essential, but they don’t have to ruin the look of your space.
You might wonder how to cover a toilet waste pipe or drain pipe without spending a fortune or hiring a pro. The good news is, you can easily hide or box them in with simple materials and a little know-how.
In this guide, you’ll discover practical, budget-friendly ways to transform those eyesores into a clean, polished feature that blends seamlessly with your bathroom. Keep reading, and you’ll learn exactly how to make your pipes disappear from sight and keep your bathroom looking fresh and tidy.

Materials For Pipe Covers
Choosing the right material to cover toilet waste pipes or drain pipes makes a big difference. The material should protect pipes and look good in your bathroom. It must also be easy to install and maintain. Several materials fit these needs well. Each offers unique benefits and styles. Below are some common options for pipe covers.
Pvc Pipe Covers
PVC pipe covers are lightweight and waterproof. They fit snugly around pipes and protect them from damage. These covers come in white or gray, matching most bathroom pipes. PVC is easy to clean and resists mold. They are simple to cut and install, perfect for DIY projects. PVC covers also hide pipes without adding bulk.
Wooden Boxing
Wooden boxing creates a traditional and warm look. It can be painted or stained to match your bathroom decor. Wood boxes fully enclose pipes, hiding them completely. These covers need careful cutting and fitting. Wood is strong and can hold hooks or shelves. Make sure to seal the wood to protect it from moisture damage.
Decorative Sleeves
Decorative sleeves add style to plain pipes. These sleeves come in various colors, patterns, and materials. They wrap around pipes and clip tightly in place. Sleeves are quick to install and easy to remove. They can brighten up your bathroom or match the room theme. Choose sleeves made from durable materials for long-lasting use.
Metal Cladding Options
Metal cladding offers a modern and sleek finish. Stainless steel or aluminum sheets cover pipes securely. Metal covers resist rust and are easy to clean. They provide strong protection in busy bathrooms. Metal cladding can reflect light, making the room look larger. Installation may require tools, but the result is very durable and attractive.
Tools Needed
Covering a toilet waste pipe or drain pipe requires the right tools. Proper tools make the job easier and ensure a neat finish. Preparing all tools before starting saves time and reduces mistakes.
Cutting Tools
Cutting tools help trim pipes and covers to the correct size. A hacksaw is ideal for cutting plastic or metal pipes. A utility knife works well for trimming softer materials like foam or tape. Use sharp blades for clean cuts and safety.
Measuring Tools
Accurate measuring tools ensure the cover fits perfectly. A tape measure is essential for measuring pipe length and width. A spirit level helps keep covers straight and even. Mark measurements clearly with a pencil before cutting.
Adhesives And Sealants
Adhesives keep the cover securely in place. Use PVC cement for plastic pipes and covers. Silicone sealant seals joints to prevent leaks and dust entry. Apply adhesives evenly and allow drying time for strong bonds.
Fastening Equipment
Fastening tools hold covers firmly around pipes. Screws and wall plugs secure wooden or plastic boxes. A drill makes screw holes quickly and accurately. Clamps can hold pieces while glue dries for better adhesion.
Preparing The Pipe Area
Preparing the pipe area is the first step to cover a toilet waste or drain pipe effectively. A clean and well-checked pipe ensures a neat finish and long-lasting cover. Proper preparation avoids issues such as leaks or poor adhesion of the covering material. Follow these key steps to get the pipe ready.
Cleaning The Pipe Surface
Start by removing dust and dirt from the pipe surface. Use a damp cloth or sponge to wipe the pipe clean. Avoid using harsh chemicals that may damage the pipe. Let the pipe dry completely before moving forward. A clean surface helps the cover stick better and look smooth.
Measuring Pipe Dimensions
Measure the length and diameter of the pipe accurately. Use a tape measure for precise dimensions. Record the measurements clearly to cut the cover material correctly. Proper measuring prevents gaps and ensures a snug fit. Double-check your numbers before buying or cutting materials.
Checking For Leaks
Inspect the pipe carefully for any leaks or moisture. Look for water stains, drips, or damp spots. Run water through the system to see if any leaks appear. Fix any leaks before covering the pipe to avoid damage later. A dry and leak-free pipe guarantees a secure and lasting cover.
Boxing In Pipes
Boxing in pipes is an effective way to hide toilet waste or drain pipes. It creates a neat, clean look by enclosing the pipes in a wooden frame. This method also protects pipes from damage and dust. The process uses plywood panels and simple tools, making it suitable for most DIYers.
Cutting Plywood Panels
Measure the length and width of the area around the pipe. Mark these dimensions on a plywood sheet. Use a saw to cut the panels carefully. Cut at right angles for a clean finish. Make sure the panels fit snugly around the pipe space.
Assembling The Box Frame
Join the cut plywood pieces to form a box shape. Use wood glue or screws for a strong hold. Check the corners to keep them square. The box should be slightly bigger than the pipe. This allows space for fitting and airflow.
Securing The Box Around The Pipe
Position the box carefully over the pipe. Use screws to fix it to the wall or floor. Avoid tightening screws too much to prevent cracking. Ensure the box stays stable and does not move. Leave access panels if you need to reach the pipes later.
Finishing And Painting
Sand the surface of the box to smooth rough edges. Apply a primer to prepare the wood for paint. Choose a paint that matches the bathroom decor. Use water-resistant paint to protect from moisture. Let the paint dry fully before use.
Using Pipe Sleeves And Covers
Using pipe sleeves and covers provides a neat solution to hide toilet waste pipes. These accessories improve the bathroom’s look by concealing unsightly pipes. They protect pipes from dust and damage while offering a clean finish. Installing them is straightforward and requires minimal tools. This method suits both new installations and pipe renovations.
Choosing The Right Sleeve Size
Select a sleeve that fits the pipe snugly without gaps. Measure the pipe diameter accurately before buying. Sleeves come in different sizes for various pipe widths. Too loose a sleeve will look untidy and offer less protection. A tight fit ensures the pipe is fully covered and secure. Check product details to match your pipe’s exact size.
Installing Snap-on Covers
Snap-on covers are easy to install and remove when needed. Align the cover around the pipe carefully. Press both sides until you hear a click, indicating a secure fit. These covers come in plastic or metal finishes to blend with bathroom decor. Snap-on covers hide pipes instantly without extra tools or adhesives. They are ideal for quick upgrades or temporary covers.
Ensuring A Tight Fit
A tight fit prevents the cover from slipping or rattling. Use foam strips or silicone sealant to fill small gaps. Check the cover edges to ensure they lie flush against walls or floors. Proper fitting blocks dust and moisture from reaching the pipe. Secure covers improve safety by reducing sharp edges or loose parts. Regularly inspect covers for wear and replace if loose.
Sealing And Insulating
Sealing and insulating toilet waste pipes or drain pipes is essential for a clean and safe bathroom. Proper sealing stops leaks and blocks unpleasant odors. Insulating helps reduce noise and prevents pipe damage from temperature changes.
Applying Sealants
Start by cleaning the pipe surface around the joints. Use a silicone or plumber’s sealant suitable for waste pipes. Apply the sealant evenly along the pipe connections. Press the joints firmly to ensure a tight fit. Allow the sealant to dry fully before testing for leaks. This step prevents water from escaping the pipe system.
Preventing Sewer Gas Escape
Sealing also keeps sewer gases from entering your bathroom. These gases can cause bad smells and health issues. Use foam or rubber gaskets at pipe joints for extra protection. Check all pipe openings and cover any gaps with sealant. A well-sealed pipe system improves air quality in your home.
Adding Pipe Insulation
Choose foam or rubber pipe insulation tubes designed for drain pipes. Cut the insulation to fit the pipe length precisely. Wrap the insulation around the pipe and secure it with tape or cable ties. Insulation lowers noise from water flow and prevents pipes from freezing in cold weather. Proper insulation also extends the life of your pipes.
Temporary Cover Solutions
Temporary cover solutions offer a quick and easy way to protect toilet waste pipes or drain pipes during repairs or renovations. These covers help prevent debris, odors, and pests from entering the plumbing system. They also keep the work area clean and safe. This section explores simple options anyone can use for short-term pipe coverage.
Using Test Caps And Plugs
Test caps and plugs fit directly onto the pipe ends. They create a tight seal that blocks water and air. These tools come in various sizes to match common pipe diameters. Installing them requires no special tools—just a firm push or twist. Test caps are ideal for temporary closures during inspections or pipe replacements.
Diy Temporary Covers
Household items can serve as quick pipe covers. Plastic bags, duct tape, or rubber sheets work well to block open pipes. Wrap the material around the pipe opening and secure it tightly. This method is cost-effective and fast. It suits situations where professional caps are not available immediately.
Safety Considerations
Always ensure temporary covers fit securely to avoid leaks or accidents. Avoid using materials that degrade quickly or allow hazardous gases to escape. Keep children and pets away from open or covered pipes. Replace temporary covers with permanent solutions as soon as possible to maintain plumbing safety and hygiene.

Credit: plumbing4home.com
Decorative Ideas
Decorative ideas transform ugly toilet waste pipes into stylish bathroom features. These ideas help hide pipes and add charm. Use simple techniques to cover pipes without major remodeling. Bright colors, natural elements, and smart storage all work well.
Painting And Finishing Options
Painting pipes in a color that matches your walls blends them into the background. Glossy finishes create a clean, modern look. Matte paint hides imperfections for a soft effect. Use waterproof paint to protect pipes from moisture. Metallic paint adds a sleek, industrial style. Choose colors that complement your bathroom decor.
Using Plants And Planters
Plants soften the look of exposed pipes. Place small planters around the base of pipes. Hanging plants can draw attention away from pipes. Use moisture-loving plants suited for bathrooms. Greenery brings freshness and life into the space. Choose simple pots that match the room’s style for a neat look.
Incorporating Shelving
Shelves built around pipes create useful storage and hide plumbing. Floating shelves keep the area open and airy. Use wood or metal shelves for durability and style. Store toiletries, towels, or decorative items on these shelves. Custom-fit shelving units make pipes disappear while adding function. Keep shelves minimal to avoid clutter.
Maintenance Tips
Maintaining your toilet waste pipe or drain pipe cover keeps your bathroom neat and functional. Regular care prevents damage and prolongs the cover’s life. Simple steps help avoid costly repairs and keep pipes clean.
Regular Inspection
Check your pipe covers often for cracks or loose parts. Look for signs of moisture or mold around the pipe area. Early detection helps fix small issues before they grow. Make inspection part of your routine bathroom cleaning.
Cleaning Pipe Covers
Wipe covers with a damp cloth weekly to remove dust and grime. Use mild soap and water for tougher stains. Avoid harsh chemicals that can damage the cover’s surface. Clean covers keep the bathroom fresh and pipes visible for quick checks.
Addressing Wear And Damage
Replace cracked or broken covers immediately to protect pipes. Use sealant on small gaps to stop leaks and pests. Tighten any loose fittings to keep covers secure. Proper care prevents water damage and keeps your bathroom safe.
Frequently Asked Questions
How To Cover An Old Toilet Pipe?
Cover an old toilet pipe by boxing it in with plywood or using a waste pipe cover. Paint or tile it for a seamless look. Ensure all joints are sealed to prevent leaks and odors. This method protects the pipe and enhances bathroom aesthetics effectively.
How To Make Exposed Pvc Pipe Look Better?
Paint exposed PVC pipes with matching wall colors or wrap them in decorative tape. Use pipe covers or box them in with wood for a neat look. Adding plants or creative shelving also camouflages pipes effectively.
Should A Toilet Waste Pipe Be Sealed?
Yes, seal toilet waste pipe connections to prevent leaks and block sewer gases. Use a watertight seal for proper function and hygiene.
What Do You Cover Drainage Pipes With?
Cover drainage pipes with wooden or PVC boxing to conceal them. Paint or tile the box for a clean look. Use pipe covers or collars to protect and hide pipes easily.
Conclusion
Covering toilet waste or drain pipes improves bathroom looks instantly. Use simple materials like plywood or pipe covers for neat results. Ensure all joints are sealed tightly to prevent leaks and odors. Choose a method that fits your skill level and budget.
A clean, well-covered pipe keeps your space tidy and safe. Taking small steps now saves future repair costs. Your bathroom will feel more comfortable and inviting. Keep it easy, practical, and effective for best results.