
Remove the plastic insert in Sharkbite fittings when working with PEX piping. Leave the insert if you’re connecting to copper or CPVC pipes.
Sharkbite Fittings offers an innovative solution to connect pipes without soldering or gluing. These fittings accommodate different types of plumbing pipes, including PEX, copper, and CPVC. Understanding when to remove the plastic insert from a Sharkbite fitting is crucial for a successful installation.
The insert in Sharkbite fittings plays a crucial role in supporting the structure of PEX pipes, ensuring a secure fit. This understanding enhances the reader’s comprehension of the fitting’s function and its impact on the installation. Properly using Sharkbite fittings can make plumbing projects efficient and hassle-free for DIY enthusiasts and professionals alike.
With the versatility of Sharkbite connections, home repairs and improvements become accessible to a wider audience, streamlining what once were complex plumbing endeavours.
Characteristics Of Sharkbite Fittings
Understanding the characteristics of SharkBite fittings is crucial. They are popular for quick and reliable pipe connections. Knowing when to remove the plastic insert is also important for certain applications. Below, let’s dive into what makes SharkBite fittings stand out.
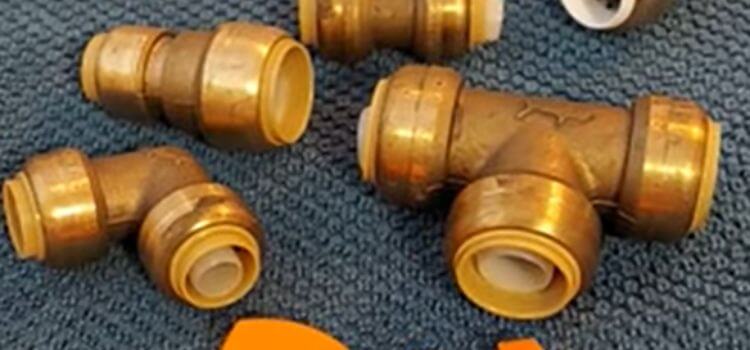
Material Composition
SharkBite fittings feature a durable brass body. They are lead-free, making them safe for drinking water. Inside, a plastic (PEX) tube is the body. This combination ensures long-term performance and reliability. SharkBite’s material quality allows it to withstand different environmental conditions.
Functionality
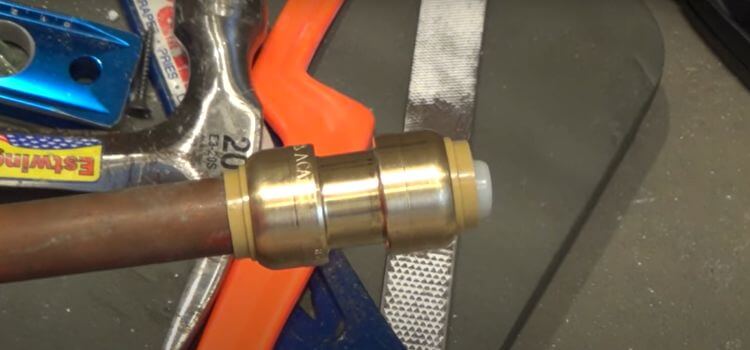
The functionality of SharkBite fittings is impressive. They provide a push-to-connect design that simplifies installation. These fittings work on copper, CPVC, PEX, and PE-RT tubing. For PEX applications, keep the insert within. For CPVC and copper, could you remove them? This ensures a proper fit and maximizes the efficiency of your plumbing.
- Effortless installation: Slide the fitting on the pipe for a watertight seal.
- Versatile: Compatible with multiple types of tubing.
- Removable: An easy-to-use disconnect clip lets you remove the fitting when needed.
Signs Of Possible Removal
Recognizing signs for removing the plastic insert in Sharkbite fittings is crucial. Sometimes, the plastic insert must come out. Not all pipes need this small piece. Learn when to take it out. Leakage
Leakage
- Water drips or sprays from the fitting.
- Wet spots appear on walls, ceilings, or floors nearby.
- Unusual water bills suggest hidden leaks.
Difficulty In Connection
- The fitting won’t attach smoothly to the pipe.
- It feels like something is blocking the connection.
- Wiggling or force is needed to fit the connection.
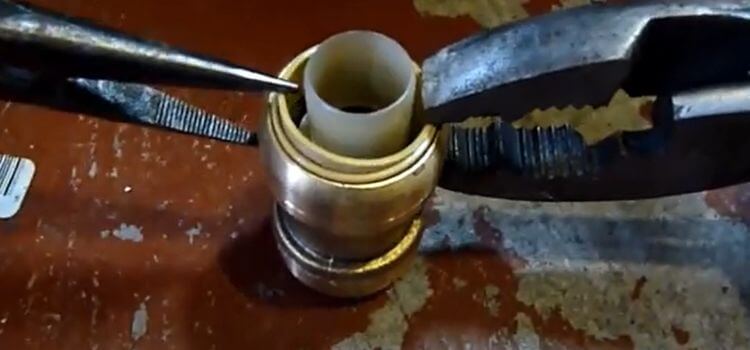
Proper Removal Techniques
Understanding the correct removal techniques for Sharkbite fittings is vital. This ensures the integrity of your pipes and fittings. Sharkbite fittings rely on their internal plastic inserts for a firm hold. However, certain situations require these inserts to be removed.
Tools Required
To begin, gather the necessary tools:
- shark bite removal tool or adjustable wrench
- Pliers
- Gloves for safety
Step-by-step Process
Follow these steps to remove the plastic insert:
- Ensure water flow is stopped.
- Place gloves on for protection.
- Slide the Sharkbite removal tool or use a wrench to release the fitting.
- Hold the pipe steady with pliers.
- Push the fitting towards the pipe.
- While maintaining pressure, press the release collar with the removal tool.
- Pull the fitting off straight to avoid pipe damage.
- Once removed, inspect for any damage or wear.
These steps ensure the safe removal of the plastic inserts without harming the Sharkbite fitting or connected pipes.
When To Keep The Plastic Insert
When installing Sharkbite fittings, the plastic insert plays a critical role. Understanding when to keep it is key to a successful, leak-free connection. The insert ensures stability and reliability, especially for certain pipe types.
For Specific Pipe Types
Sharkbite fittings are designed to work with a variety of pipes. The plastic insert is essential when dealing with specific pipe materials.
- PEX tubing: For a stronger seal.
- Polyethylene and polybutylene pipes: Provides necessary support.
No insert removal is needed for these materials. It prevents the pipe from collapsing.
Manufacturer’s Recommendations
Always check what the manufacturer says. Sharkbite provides clear guidelines:
| Pipe Material | Plastic Insert Needed? |
|---|---|
| PEX, Polyethylene, Polybutylene | Yes |
| Copper, CPVC | No |
Follow their instructions for a secure fit. The insert supports the pipe’s internal structure.
Safety Measures
Working with plumbing requires precision and caution. Specific steps ensure safety while removing the plastic insert from SharkBite fittings. This section covers important safety measures to prevent potential issues during the removal process.
Avoiding Damage
Handle SharkBite fittings with care. To avoid damage, never use excessive force. Here’s what you should do:
- Inspect: Begin by examining the fitting and insert.
- Tools: Use appropriate tools designed for this task.
- Technique: Follow the recommended technique closely.
Take care not to scratch or dent the fitting. Damage can lead to leaks and compromised connections.
Ensuring Proper Seal
A firm seal is critical. When you remove the insert, make sure you:
- Check the O-ring: Make sure it’s intact and seated correctly.
- Cleanliness: Keep the fitting free from debris.
- Reassembly: Reassemble carefully to maintain seal integrity.
By ensuring a proper seal, you can prevent leaks and secure the system’s long-term reliability. Remember, cutting corners in plumbing can lead to water damage and costly repairs.
Common Mistakes To Avoid
Working with Sharkbite fittings can be easy. But certain mistakes can cause trouble. Knowing when and how to remove the plastic insert is key.
Forceful Removal
Never yank out the plastic insert. It might seem like a quick fix, but excessive force can damage both the fitting and the pipe. Follow these steps instead:
- Ensure the fitting is for a CTS (copper tube size) pipe, like PEX or copper.
- If for a PVC pipe, removal is necessary. Use moderate pressure.
- For non-PVC pipes, the insert should stay in place to hold the pipe firmly.
Using Incorrect Tools
Using the right tools can protect your fittings. A special Sharkbite removal tool is the right choice. Here’s why:
- It helps push the release collar effectively.
- Ensures no scratches or dents on the fitting.
- It’s the correct size for a hassle-free removal process.
Avoid pliers or wrenches. These are not meant for Sharkbite fittings. They may seem handy, but they can cause irreparable harm.
FAQ On When to Remove Plastic Insert in Sharkbite Fittings
Do You Remove Plastic From Sharkbite Fittings For Copper?
No, you do not remove the plastic insert when using SharkBite fittings with copper piping; it remains in place to ensure proper connection.
What Is The Tube Liner For On Sharkbite?
The tube liner, also known as a stiffener, supports the pipe’s structure during SharkBite fittings, ensuring a secure, leak-free connection.
Can You Remove The Pex Stiffener From A Sharkbite?
Yes, you can remove the PEX stiffener from a SharkBite fitting if it’s not required for your piping material.
How Do You Remove A Sharkbite Insert?
To remove a SharkBite insert, push down the disconnect clip against the fitting, slide the clip towards the pipe, and then pull the insert out firmly.
Conclusion
Removing the plastic insert in Sharkbite fittings is straightforward. It’s vital only for PEX installations. Remember to take the insert out for copper or CPVC pipes. Ensuring a leak-free seal means following the correct procedure. To conclude, correct insert usage guarantees your plumbing’s longevity and reliability.
Need guidance? Consult a professional. Safe plumbing!