



This post may contain affiliate links. Please read my disclosure policy.
In This Article Show
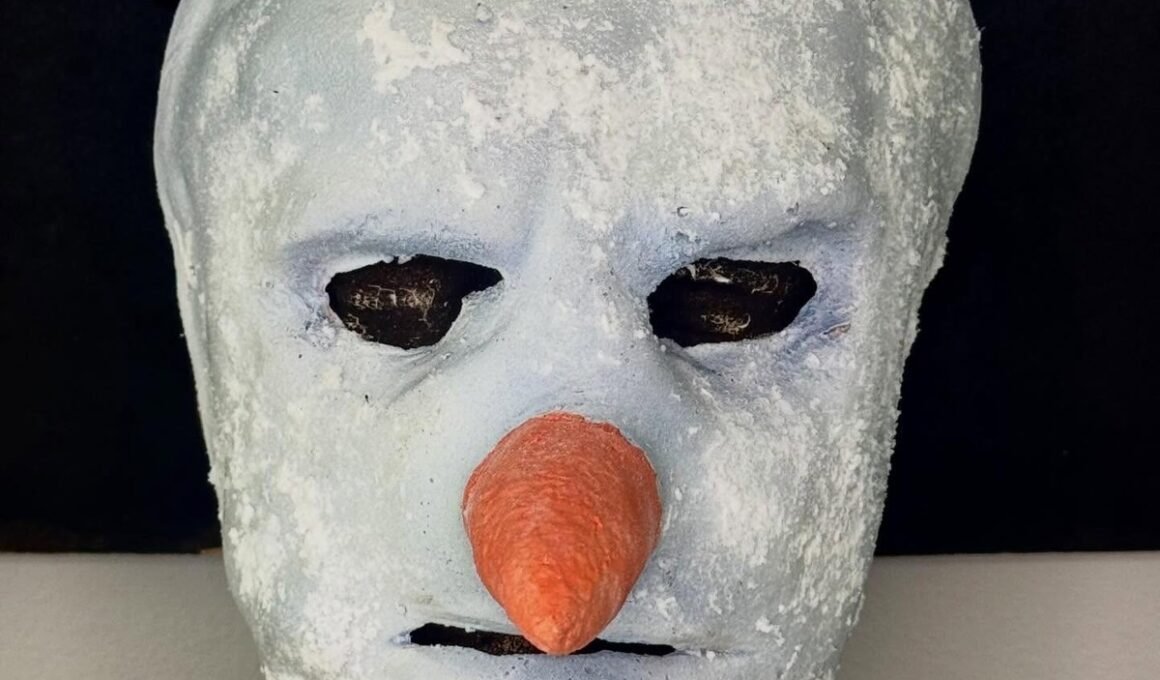
Every Christmas party has a Santa hat and a pair of reindeer antlers. Very few have a snowman mask that makes people step back before they laugh. A creepy snowman takes the friendliest face of winter and twists it just enough to be unforgettable.

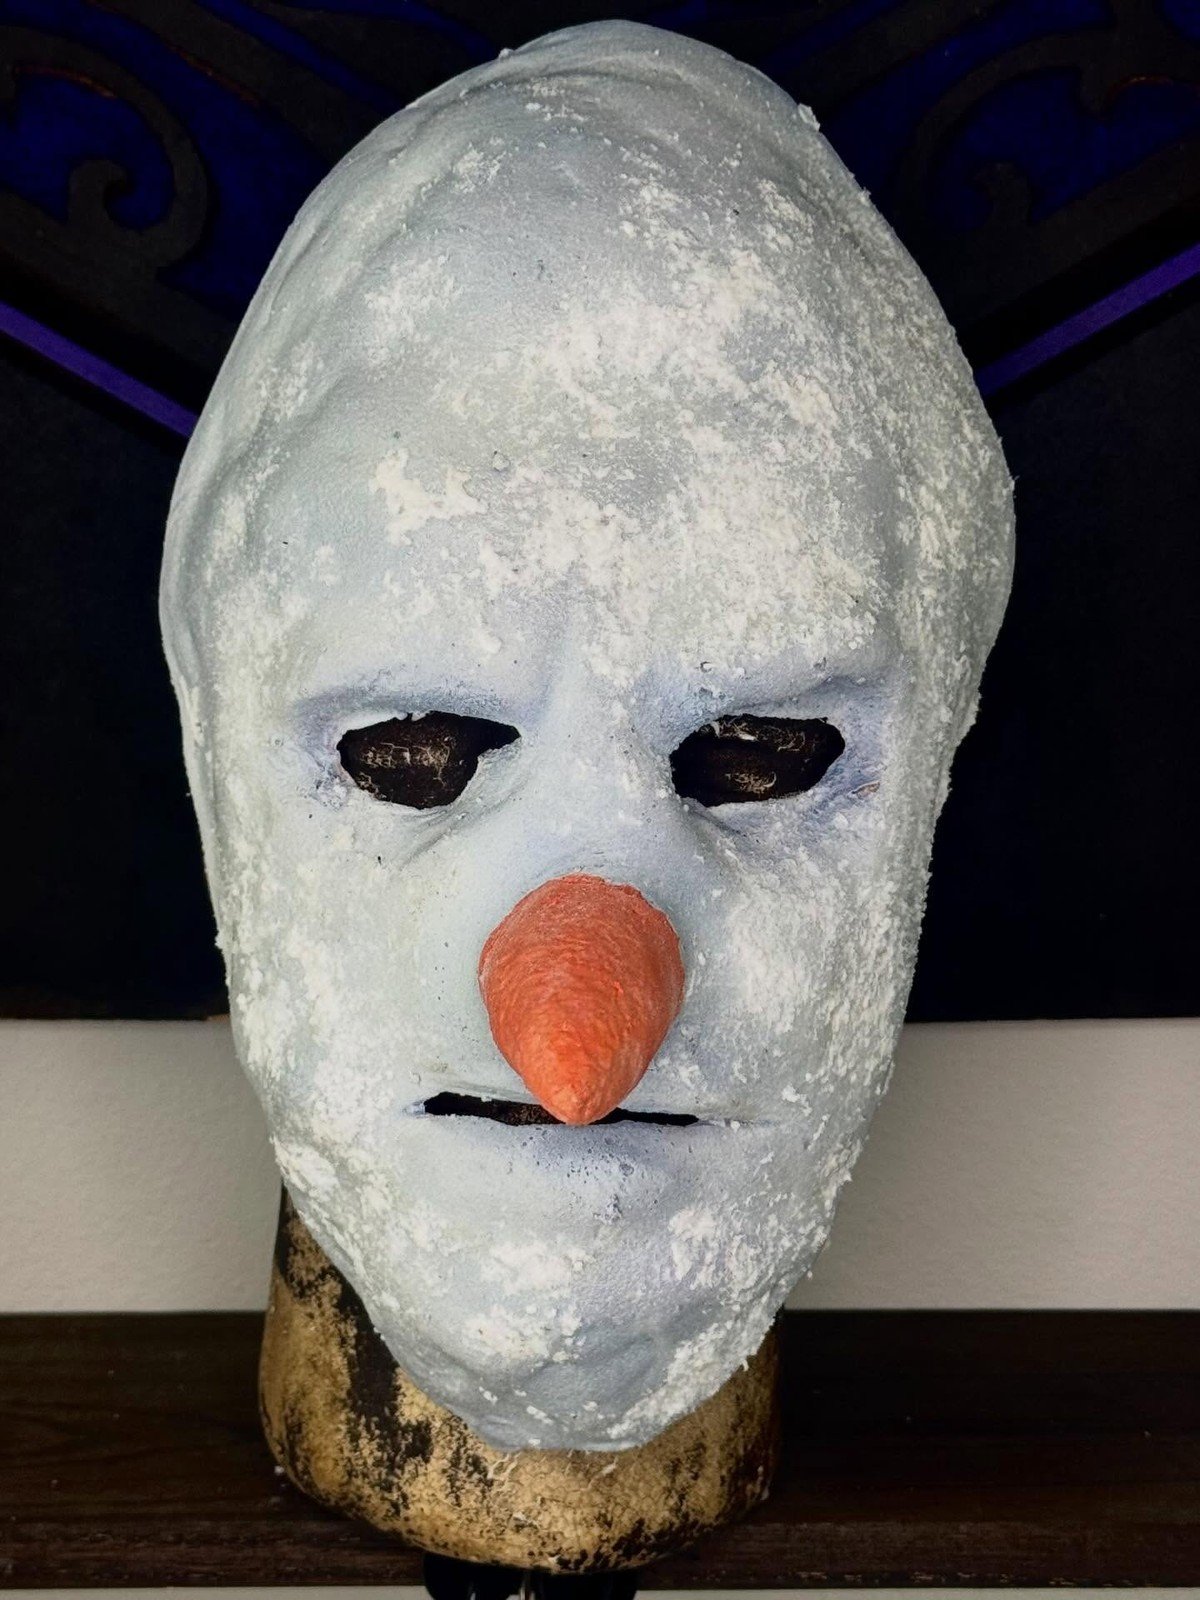
This diy polymer clay creepy snowman mask craft guide builds the mask properly, on a form, with a thin clay shell that bakes hard and light. The first three ideas are full builds, the classic hollow eyed mask, a melting version and an easier half mask.
After that come styling variations, longer noses, button eyes, frostbite finishes and ways to display the mask when nobody is wearing it.
These masks are party and display pieces. Build them with care, and they will come out every winter for years.
Quick Picks
- 1. Classic Creepy Snowman Mask: the signature build, hollow eyes, carrot nose and that jagged smile.
- 2. Melting Snowman Mask Design: dripping, drooping and deeply unsettling, the most dramatic version.
- 3. Half Mask Creepy Snowman: the wearable party option, all the creep with room to breathe.
1. Classic Creepy Snowman Mask
A Sculpey Premo classic colors multipack is a good mask clay because Premo stays strong in thin shells, and the pack includes the white, black and orange this mask needs.
⏱ About 2 hours plus baking🛠 IntermediateThe signature build
Materials Needed
- White polymer clay, about 200 g
- A plain craft mask or foil covered mask form
- Orange clay for the carrot nose
- Black clay or black acrylic paint
- Clay roller and craft knife
- Parchment lined baking tray
- Elastic cord and strong glue
- Matte varnish and brushes
How to Make It
Step 1: Cover a plain craft mask or a foil mask form with a thin layer of cling film so the clay releases after baking.
Step 2: Roll white clay to about 6 mm and drape it over the form, smoothing it down over the nose bridge and cheeks.
Step 3: Cut out two uneven hollow eye holes and a wide mouth slit with a craft knife, then pull the mouth into a jagged shape with a toothpick.
Step 4: Roll a long orange carrot nose, score lines around it, and press it on firmly, blending the base into the face.
Step 5: Texture the surface with a crumpled foil ball for a snowy look, bake on the form following the packet instructions, cool, then paint dark shading into the eyes and mouth.
Step 6: Glue elastic cord inside the edges and add a soft felt strip where the mask touches the face.
Tip: Make the eye holes a little bigger than feels right. Paint and shadow shrink them visually, and a mask you cannot see out of is no fun at a party.
2. Melting Snowman Mask Design

⏱ About 2 hours plus baking🛠 IntermediateMost unsettling finish
Materials Needed
- White polymer clay
- Mask form and cling film
- Orange clay for a drooping nose
- Clay tools for drips and pulls
- Black acrylic paint
- Gloss varnish for a wet look
How to Make It
Step 1: Build the basic mask shell on the form as in the classic mask, but keep the lower face longer than usual.
Step 2: Pull the clay downward at the cheeks, chin and eye edges with your fingers and a clay tool to form drips, thinning some to points.
Step 3: Bend the carrot nose downward as if it is sliding off, and blend one side more than the other.
Step 4: Stretch one eye hole longer than the other so the face looks like it is sliding sideways.
Step 5: Bake on the form per the packet instructions, cool, then paint shadows under every drip and finish with gloss varnish so it looks wet.
Tip: Exaggerate the drips more than you think you should. Baking and painting soften the effect, so bold pulls read best in the finished mask.
3. Half Mask Creepy Snowman

⏱ About 1 hour plus bakingEasier wearGood for parties
Materials Needed
- White polymer clay, about half the classic amount
- Half mask form or a cut craft mask
- Orange clay for a small nose
- Elastic cord
- Black acrylic paint and matte varnish
How to Make It
Step 1: Cover just the top half of the mask form and roll the clay to about 5 mm over the eyes and nose area.
Step 2: Cut one round hollow eye and one smaller squinting eye for an uneven, creepy look.
Step 3: Add a short orange nose and blend it in, then shape a crooked half smile at the bottom edge of the clay.
Step 4: Feather the bottom edge thin so it sits comfortably on the cheeks.
Step 5: Bake on the form per packet instructions, cool, paint, and attach elastic cord.
Tip: The half mask is the most wearable version here. It leaves the mouth free for talking, eating and drinking, which matters at a party.
4. Hollow Eyes Clay Snowman
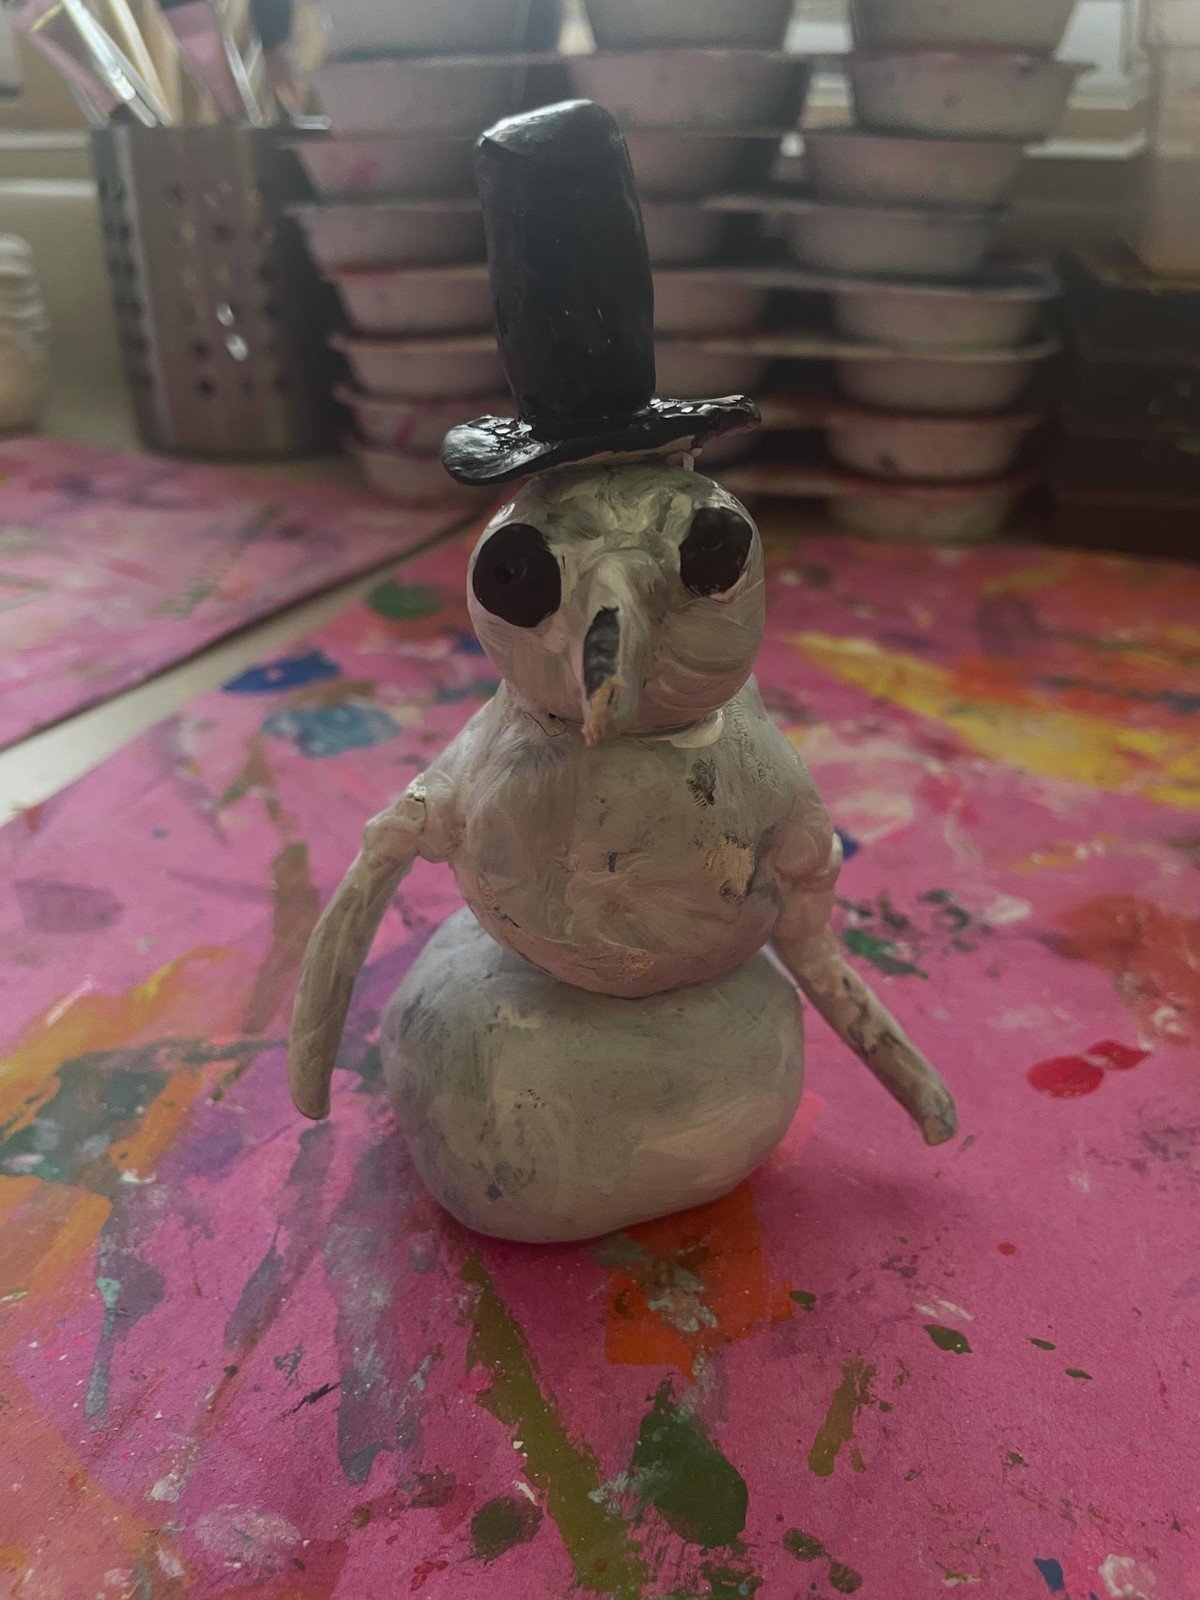
Two big hollow black eyes do all the scaring on this little clay snowman. The body stays simple and lumpy, the top hat sits tiny on top, and the pointed nose juts out like a beak. It proves a creepy snowman does not need teeth or gore, just empty eyes and a long stare.
You’ll need: gray or white clay, black clay for the eyes and hat, a short pointed cone for the nose
Best for: a small desk or classroom display piece
5. Jagged Teeth Snowman Mask

Here the grin is the monster: a wide mouth packed with jagged, bloodied teeth under mismatched eyes and a black top hat. Sculpt the teeth as separate little cones so each one casts a shadow, and paint the gums dark red so the white teeth jump out.
You’ll need: white and flesh tone clay for the face, small clay cones for teeth, dark red paint for the gums, black clay for the top hat
Best for: the scariest mask on the party table
6. Frostbite Snowman Mask with Icicle Drips
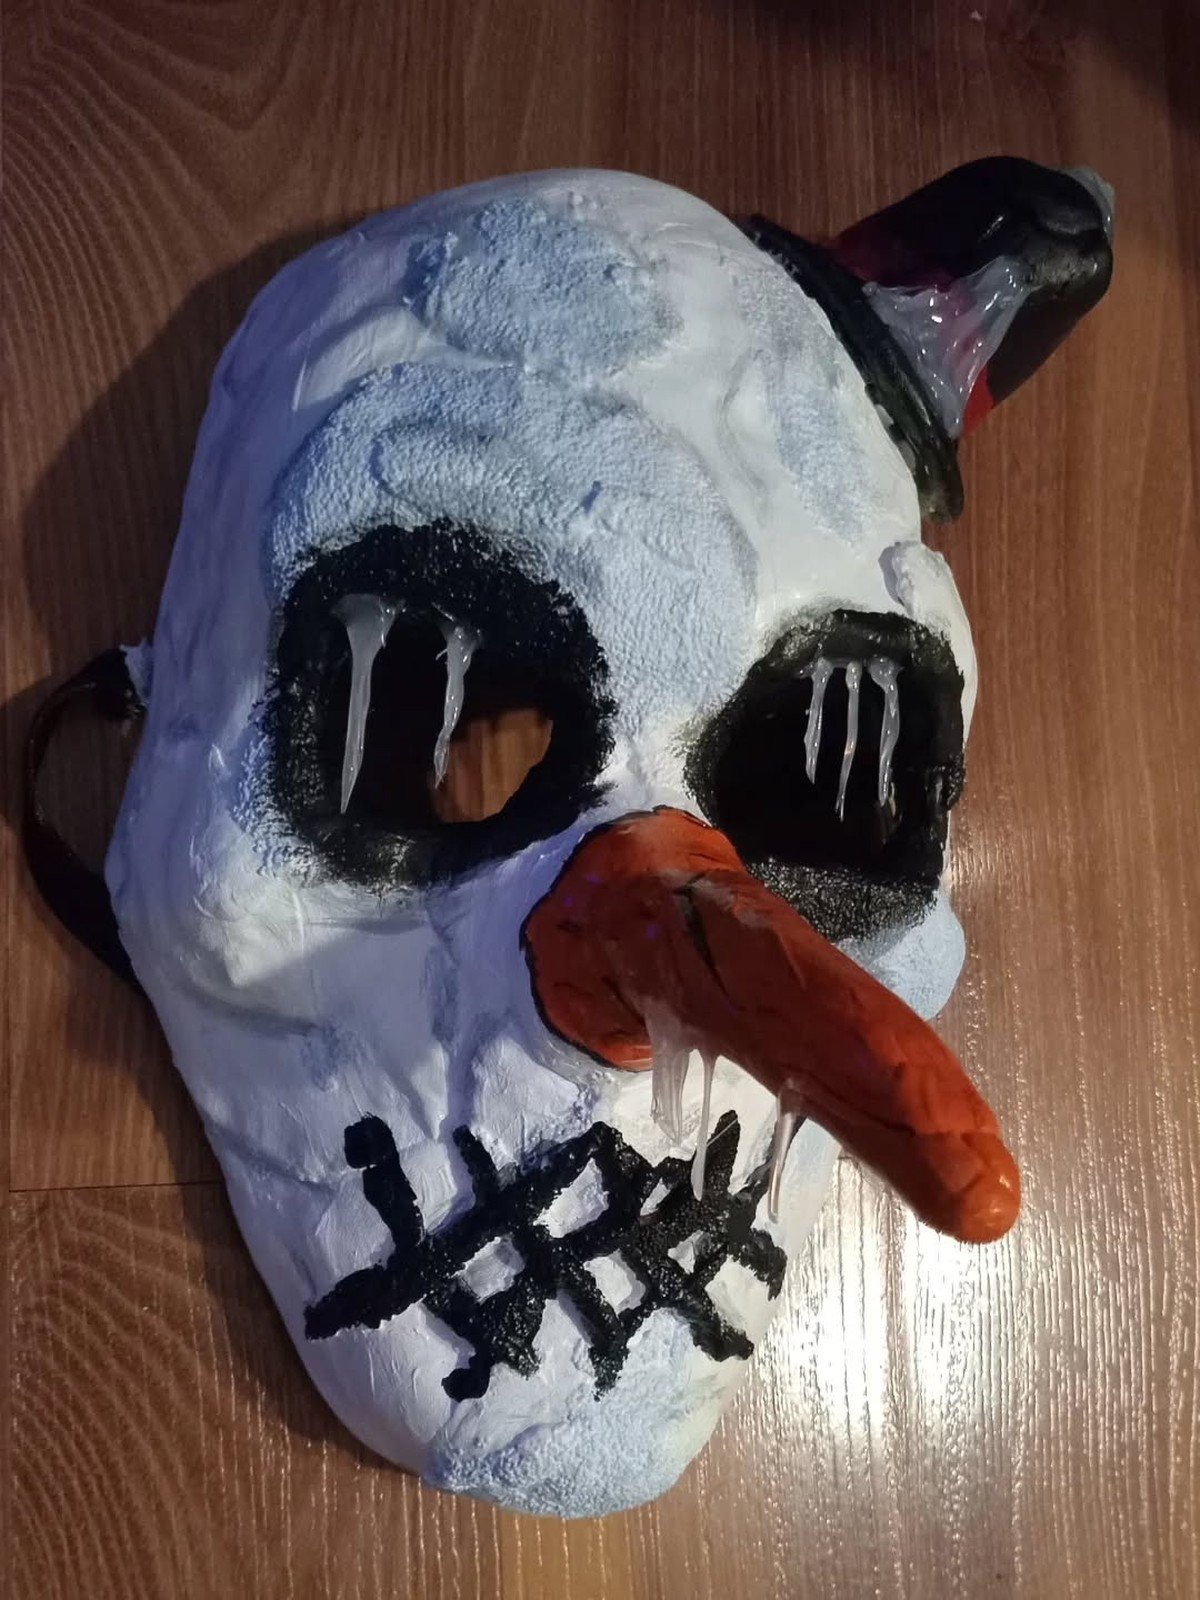
Deep freeze does the scaring here: a frosty white mask shaded with pale icy blue, huge hollow black eye sockets, and clear icicle drips hanging from the eye rims and the chunky carrot nose. The mouth is a black stitched crisscross, and a tiny top hat tilts off one side. Add the icicles after baking with clear hot glue or translucent clay so they stay glassy against the matte face.
You’ll need: white clay, pale blue and black paint for frost shading and stitches, orange clay for a chunky nose, clear hot glue or translucent clay for icicles, a small top hat shape
Best for: a frozen frostbite mask that looks fresh out of a blizzard
7. Horror Mask Wreath Display
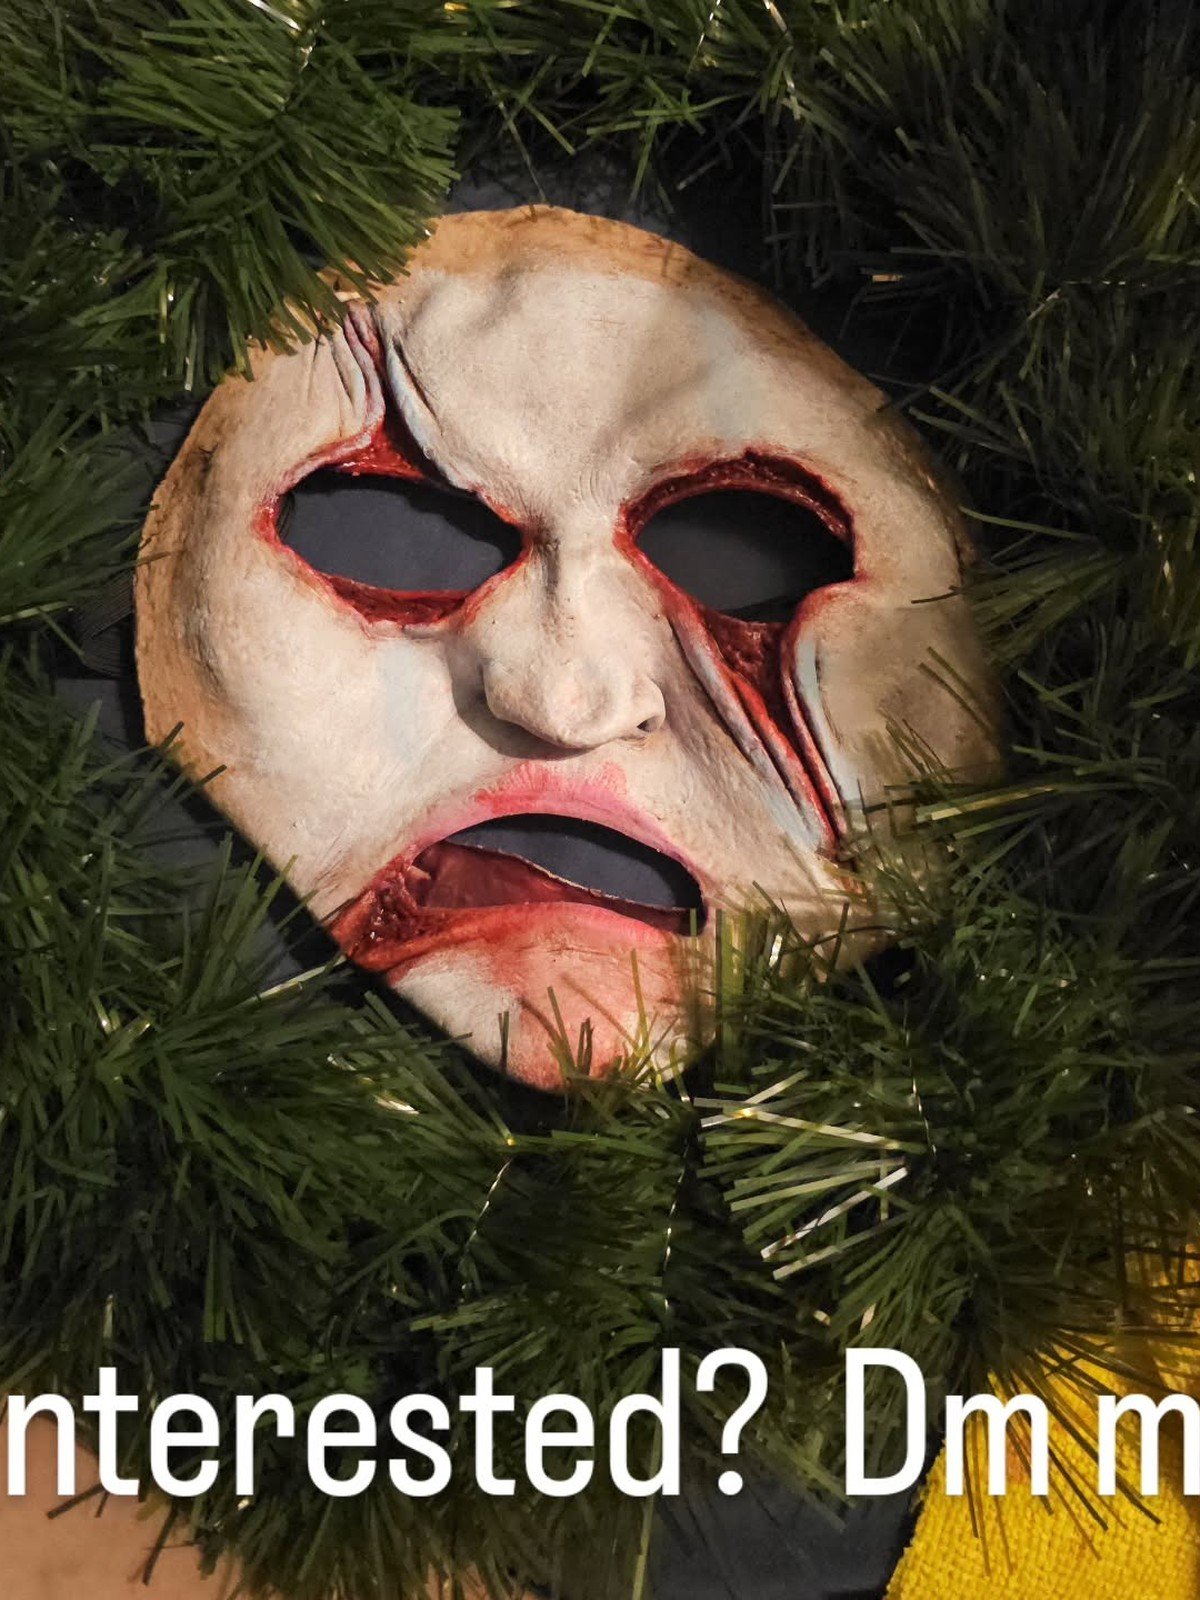
A finished mask deserves a dramatic frame. This white horror mask with red tear streaks is nested straight into a green pine wreath, so it hangs on a door or wall like the strangest ornament on the street. Wire the mask to the wreath frame at the back so it sits flat and stays put.
You’ll need: a finished horror mask, a plain pine wreath, florist wire, red paint for tear streaks
Best for: a front door or party wall display
8. Mini Creepy Mask Ornaments
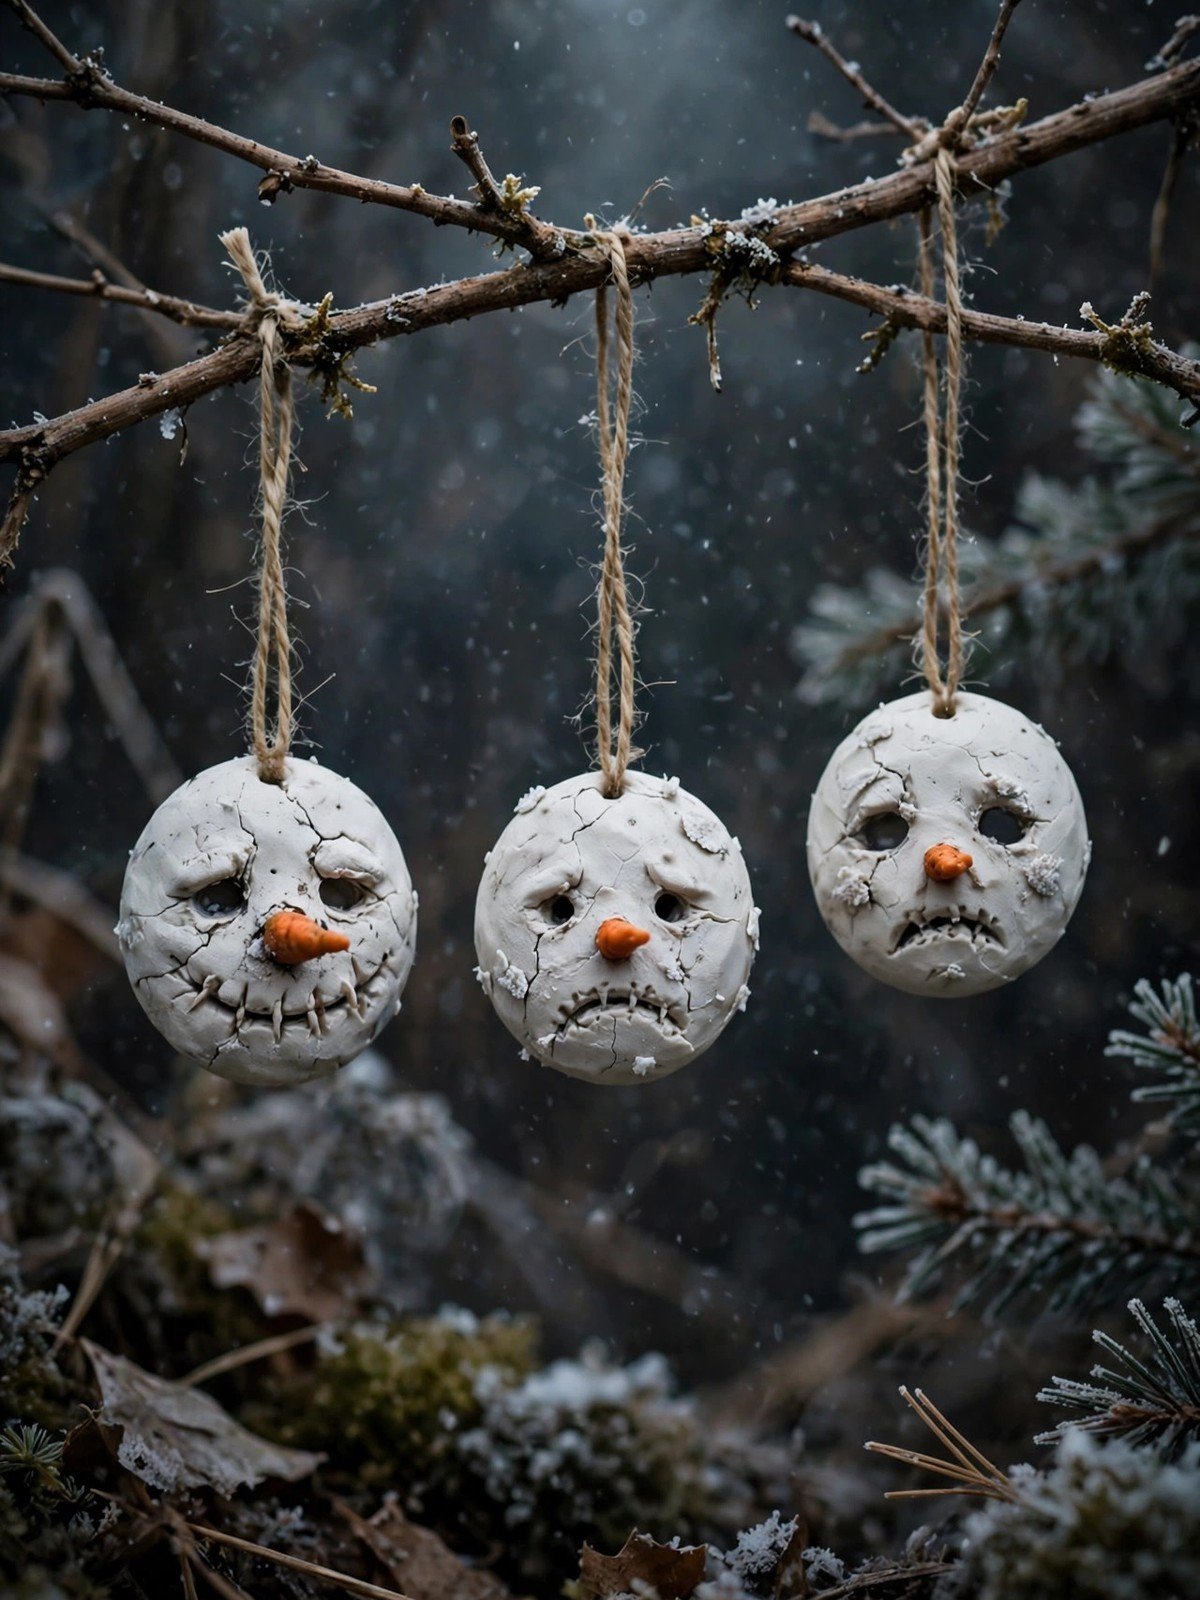
Scale the mask down to palm size, skip the elastic, and add an eye pin at the top before baking. A set of mini creepy faces on the tree among the sweet ornaments is a funny surprise, and they make memorable gifts for horror loving friends.
You’ll need: small amounts of clay, eye pins, ribbon
Best for: small gifts and tree decorations with a twist
9. Snowman Mask Photo Prop

Glue a baked half mask to a wooden dowel at one side instead of adding elastic. Guests hold it up for photos and put it down to eat and talk. Make two or three in different expressions, a grin, a melt and a frostbite, for a little photo corner set.
You’ll need: a half mask build, a wooden dowel or wide craft stick, strong glue
Best for: party photos and social pictures
10. Vintage Painted Creepy Snowman Art

Not every creepy snowman needs to be worn. This small acrylic painting of a gaunt, icy snowman with a broom hangs in an ornate gold frame, and the fancy frame makes the spooky face feel even stranger. Paint your own on a small canvas board and frame it the same way for instant haunted hallway art.
Safety note: Always sculpt polymer clay on a mask form, never on skin, and let an adult handle the oven, baking exactly as the packet directs in a ventilated kitchen. Sand and finish edges smooth before wearing, and treat a clay mask as a short wear party and display piece, not for children or long wear.
You’ll need: a small canvas board, acrylic paints in icy blues and white, an ornate gold style frame
Best for: hallway art and horror themed Christmas corners
Frequently Asked Questions
Can I sculpt the mask directly on my face?
Build it on a form, never on your face. A foil covered mask base or a cheap plain craft mask gives the shape, and the clay comes off the form after baking.
How long does a clay mask take to bake?
Bake at the packet temperature, usually 275 degrees F or 130 degrees C, for the time given per thickness. A mask shell of about 6 mm needs the full time stated for that thickness, and thick noses need a little longer.
Is a polymer clay mask comfortable to wear?
A solid clay mask is heavy and can crack at the edges. Keep the shell thin and even, back it with a layer of fabric or felt glued on after baking, and treat it as a display and short wear party piece rather than an all night mask.
How do I get the eye holes right?
Cut the eye holes before baking with a craft knife while the clay is on the form, and check the size against the wearer. Smooth the edges after baking with fine sandpaper so nothing sharp touches skin.
What paint gives the frosty creepy look?
Acrylic paint, dry brushed on after baking. White and pale blue build the frosty base, then dark paint washed into the eyes, mouth and cracks makes the creepy details stand out.
Can I reuse the mask next year?
Yes. Sealed with matte varnish and stored padded in a box, a baked clay mask lasts for years. Keep it out of damp rooms and away from anything heavy stacked on top.
Final Thoughts on DIY Polymer Clay Creepy Snowman Mask Craft
A creepy snowman mask is the twist that makes a Christmas party, a winter photo shoot or a haunted house scene unforgettable. One basic clay shell gives you every version in this list, from melting faces to frostbitten blue.
Start with the classic diy polymer clay creepy snowman mask craft build, take your time on the eyes and the smile, and the rest is paint and imagination. Frosty has never looked so unsettling.