





This post may contain affiliate links. Please read my disclosure policy.
In This Article Show
This simple DIY polymer clay Christmas hat might be the most useful shape in festive crafting. It is only three parts (a red hat, a white brim and a pom pom) yet it can become an ornament, earrings, a magnet, a keychain or a cake topper.
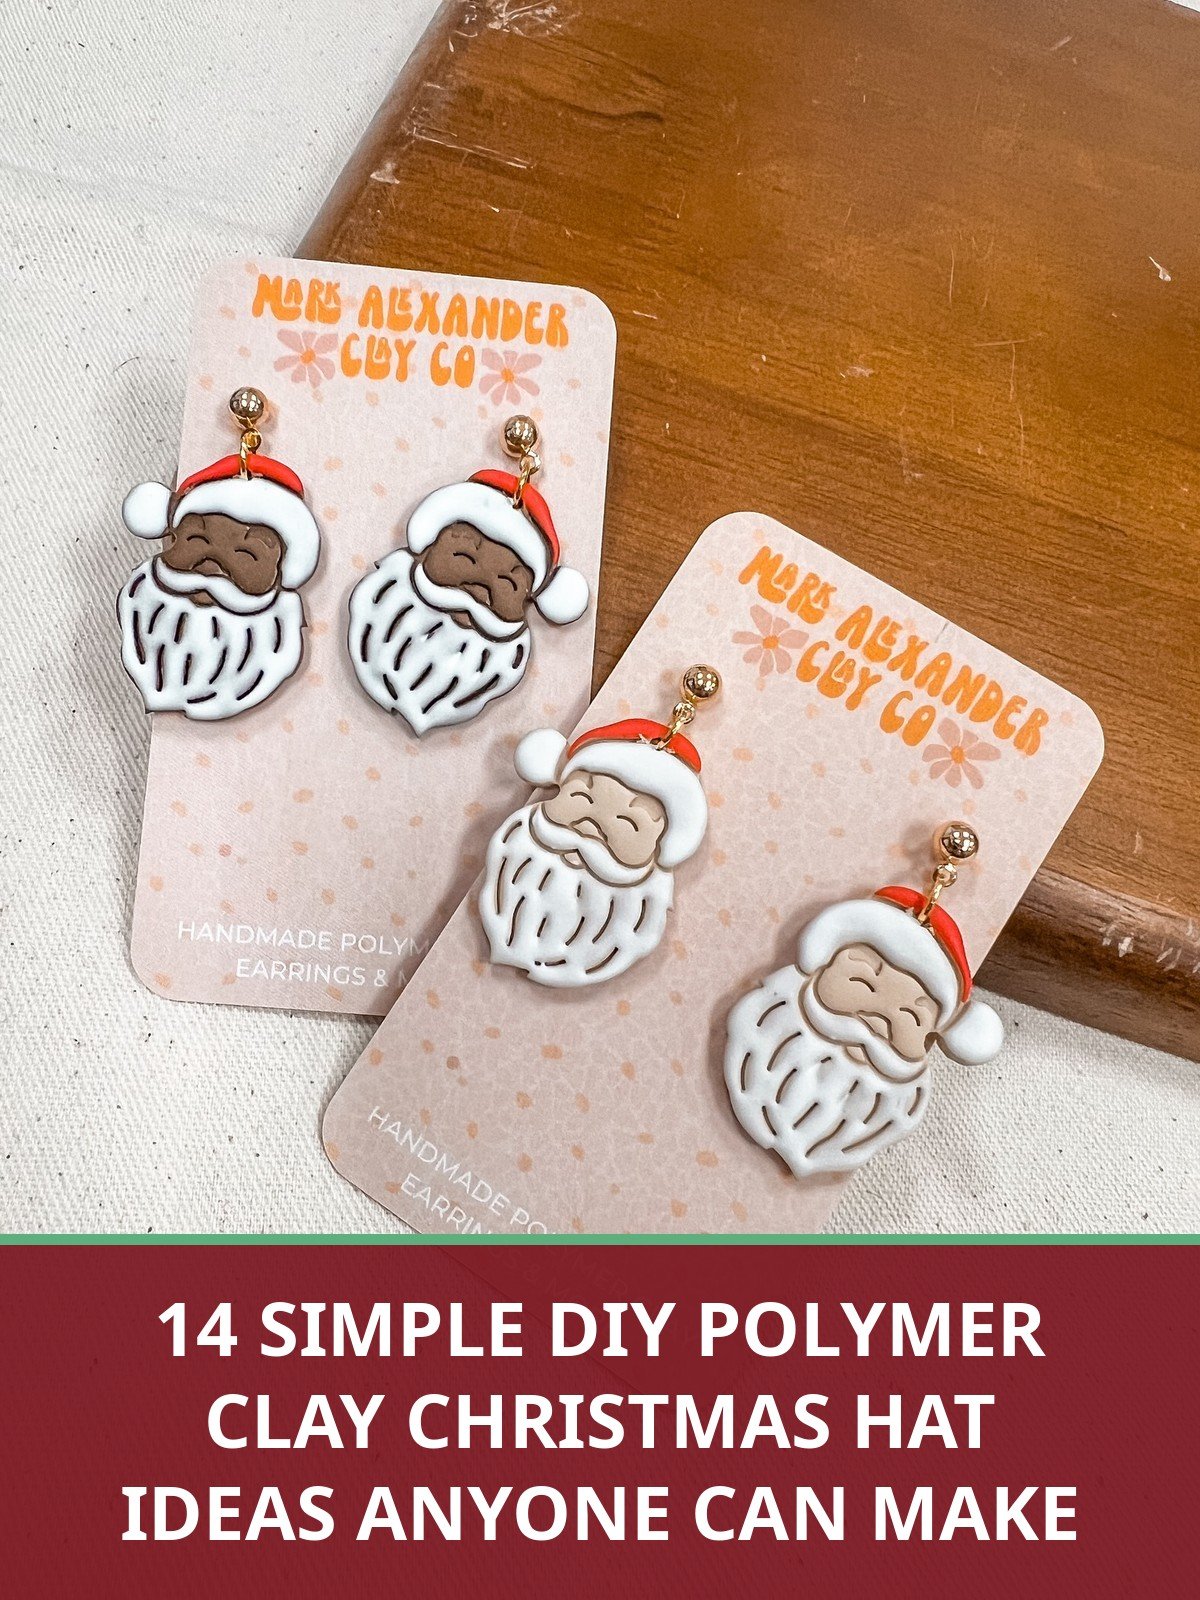
This list collects 14 ideas built on that one hat. The first three come with full materials and steps, and the rest show how other makers use the same shape in earrings, charms and playful decorations.
Everything here uses basic polymer clay skills: rolling, flattening and texturing. If you can roll a sausage of clay, you can make every project on this page.
Start with the ornament to learn the shape, then jump to whichever finished piece you want most. The hat takes minutes once your hands know the moves.
Quick Picks
- 1. Learn the shape here: Santa Hat Ornament with a Fluffy Brim (idea 1) teaches the basic three part shape.
- 2. Best small gift: Santa Hat Stud Earrings (idea 2) are the fastest wearable version of the hat.
- 3. Easiest of all: Santa Hat Fridge Magnet (idea 3) needs no findings and suits total beginners.
1. Santa Hat Ornament with a Fluffy Brim

Liquid clay is the trick for a brim that looks soft and stays put. The Liquid Sculpey classic sampler gives you white for snowy joins plus black and clear for other small Christmas makes.
⏱ 40 minutes plus baking💲 Low cost🛠 Beginner friendly
Materials Needed
- Red polymer clay
- White polymer clay
- Gold eye pin or wire loop
- Needle tool or old toothbrush for texture
- Baking tray with parchment
How to Make It
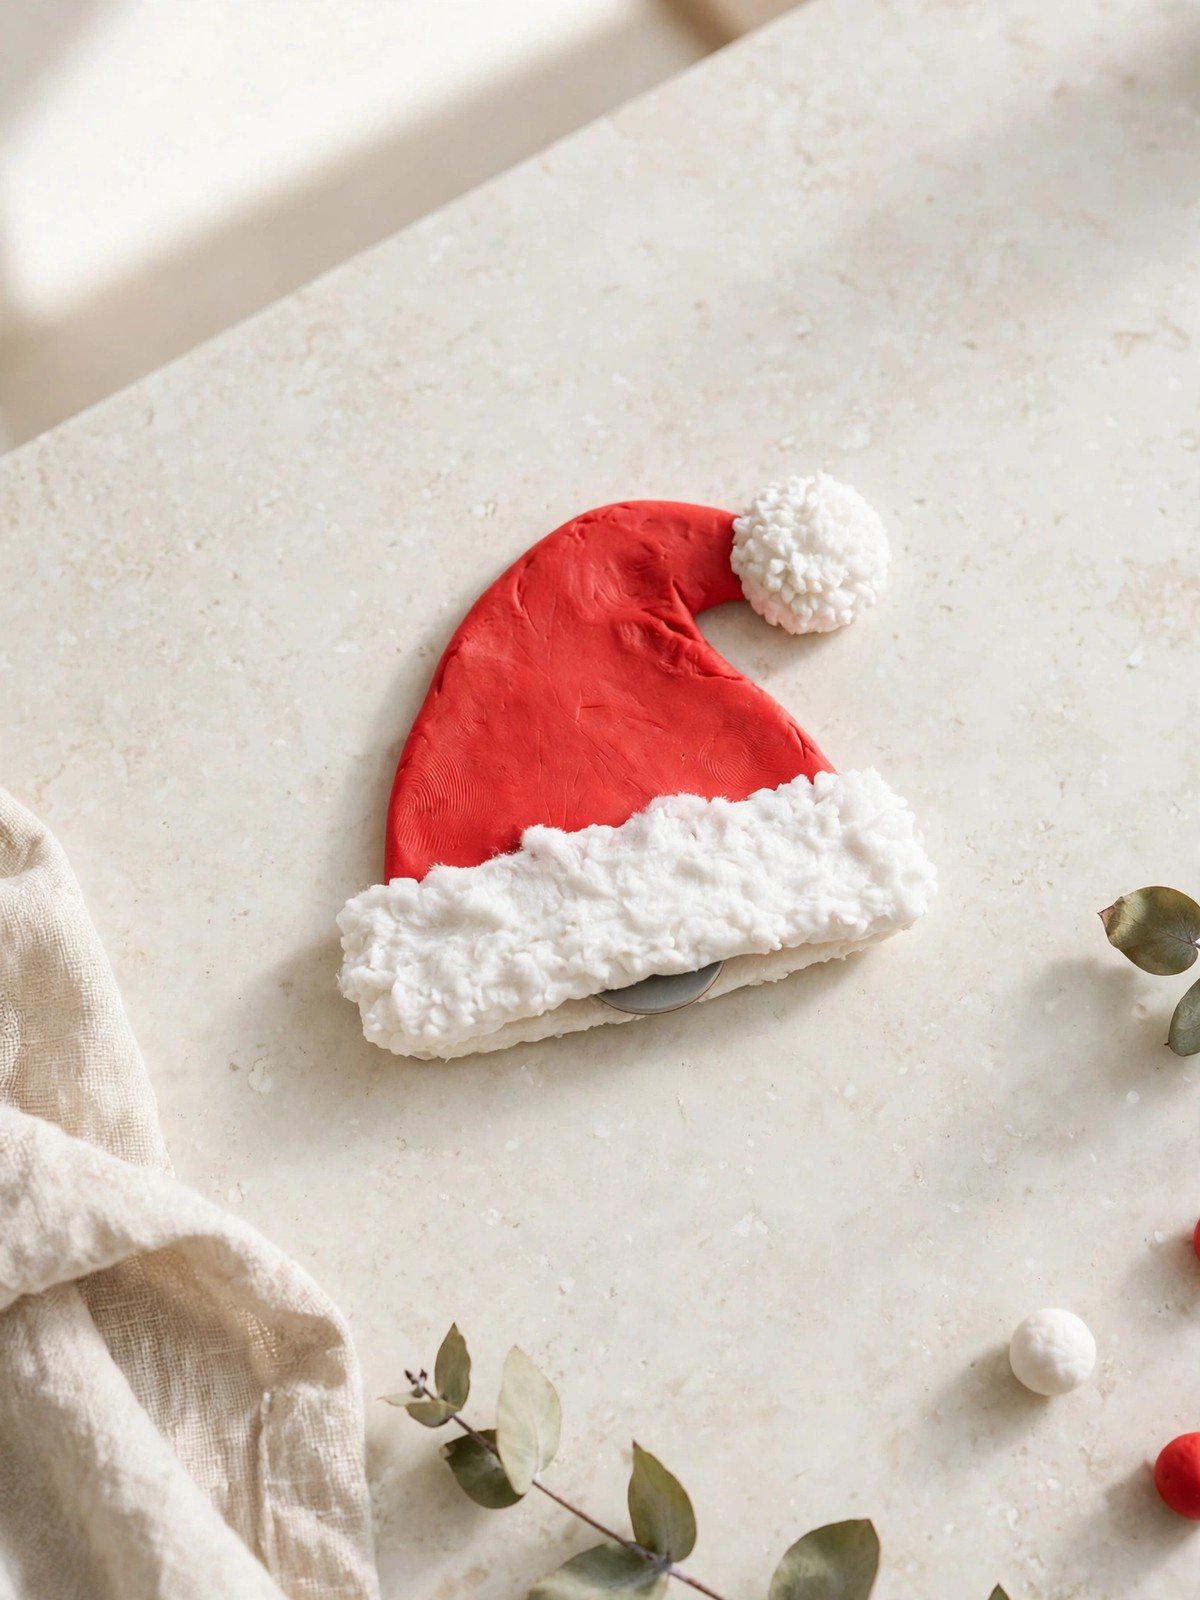
Step 1: Roll the red clay into a cone, then bend the tip over to one side so it reads as a floppy Santa hat.
Step 2: Roll a flat white band and wrap it around the base of the cone. Press gently so it hugs the red clay.
Step 3: Texture the white band and a small white ball with a toothbrush or needle tool, dabbing all over for a fluffy look.
Step 4: Press the ball onto the bent tip as the pom pom, using a tiny smear of liquid clay if the join feels weak.
Step 5: Push the eye pin into the top, bake as the package directs, cool, and thread ribbon or cord through the loop.
Tip: Bend the cone tip before adding the brim. Bending later can crack the white band away from the red clay.
2. Santa Hat Stud Earrings
⏱ 45 minutes plus baking💲 Low costWearable mini make
Materials Needed
- Red and white polymer clay
- Stud earring posts and backs
- Strong craft glue
- Needle tool for texture
- Small rolling pin
How to Make It
Step 1: Roll two small red triangles and curve each one slightly, working on both earrings at the same time so the pair matches.
Step 2: Add a thin white strip across the base of each triangle for the brim, and a tiny textured white ball at the tip.
Step 3: Flatten the back of each hat with a fingertip so the stud post will sit flat later.
Step 4: Bake the pair, let them cool fully, then glue stud posts to the backs and leave the glue to cure overnight.
Step 5: Check the pair side by side in a mirror before wearing or gifting.
Tip: Weigh each hat on a kitchen scale as you shape it. Studs that weigh the same feel the same on the ears.
3. Santa Hat Fridge Magnet
If you would rather skip the oven entirely, an air dry kit makes a fine magnet version too. The BeadHub air dry pottery kit includes clay, tools, paints and glaze in one box, and the hats simply dry overnight instead.
⏱ 35 minutes plus baking💲 Low costGreat small gift
Materials Needed
- Red and white polymer clay
- Small round magnets
- Strong craft glue
- Needle tool or toothbrush
- Rolling pin
How to Make It
Step 1: Roll the red clay into a flat triangle about 5 mm thick, keeping the back smooth and level.
Step 2: Curve the tip over, then add a textured white band across the base and a white ball on the tip.
Step 3: Press the whole hat gently onto your work surface so the back is perfectly flat for the magnet.
Step 4: Bake and cool, or air dry if you used air dry clay, then glue one or two magnets to the back.
Step 5: Leave the glue to cure for a full day before the magnet holds anything heavier than a shopping list.
Tip: Two small magnets, one near the top and one near the brim, stop a clay magnet from slowly sliding down the fridge door.
4. Rustic Santa Hat Earrings
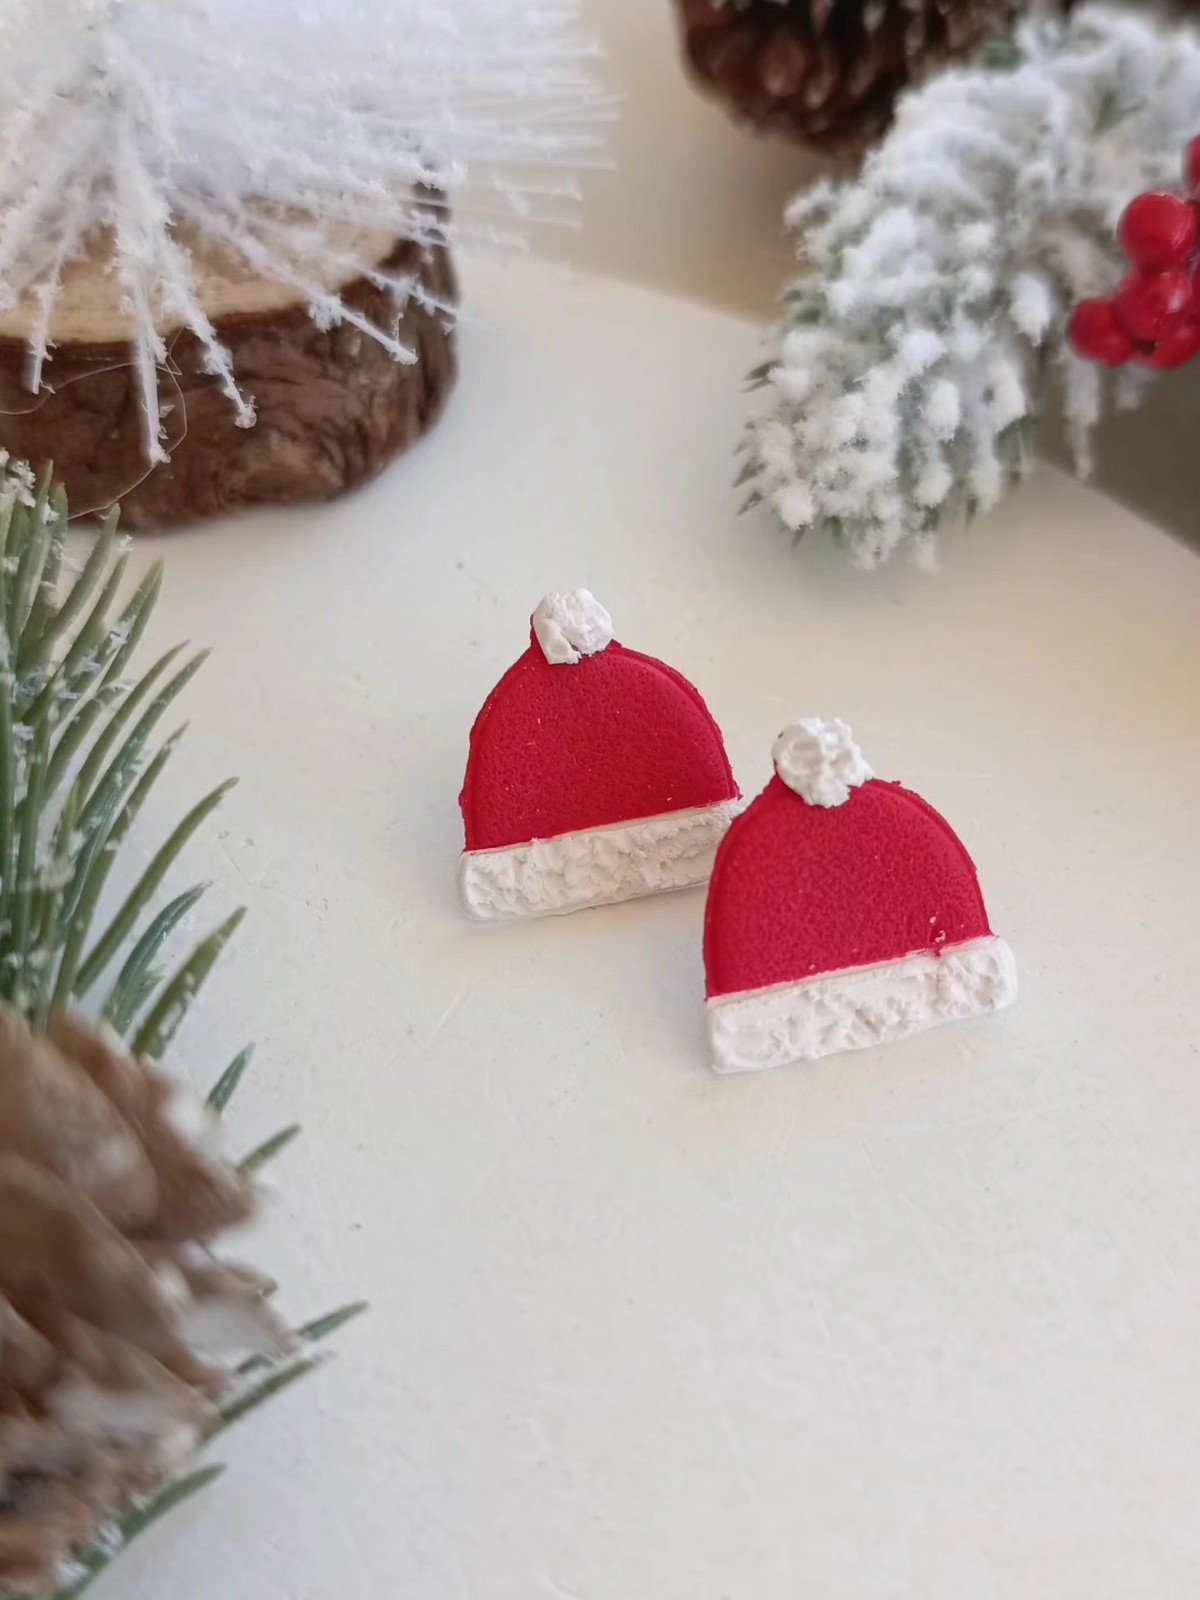
These two little hats have a slightly rustic, hand pinched look that is very forgiving for beginners. The shapes are simple, the white trim is textured, and small uneven bits read as handmade charm rather than mistakes. A good first earring project.
You’ll need: red and white polymer clay, earring hooks or posts, jump rings
Best for: a first pair of clay earrings with a soft handmade look
5. Santa Hats on Ghost Figures
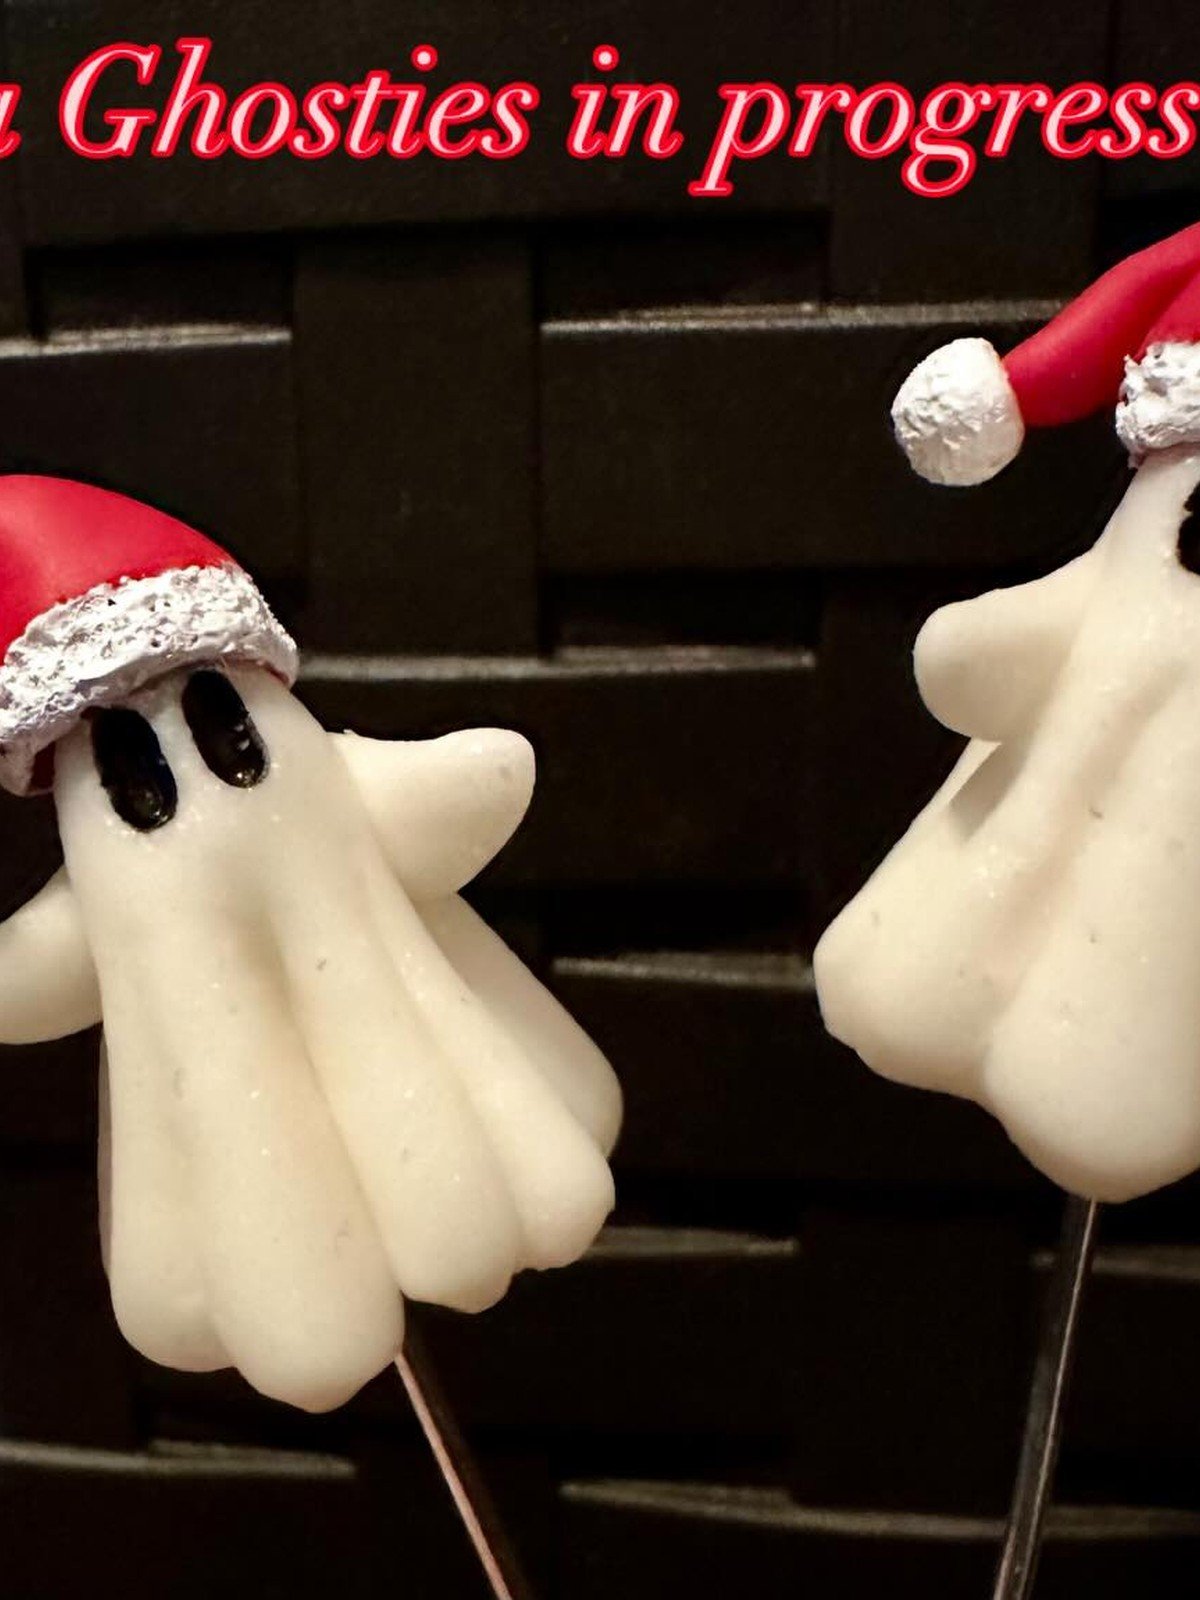
Two white ghost figures on sticks wearing red Santa hats show how useful the hat shape is beyond Santa himself. Any plain clay character becomes a Christmas decoration the moment a tiny hat goes on. Try the same trick on snowmen, penguins and gingerbread figures.
You’ll need: white clay for the ghosts, red and white clay for the hats, sticks or skewers
Best for: a playful Halloween meets Christmas crossover decoration
6. Santa Hat Dangle Earrings on an Arch Card
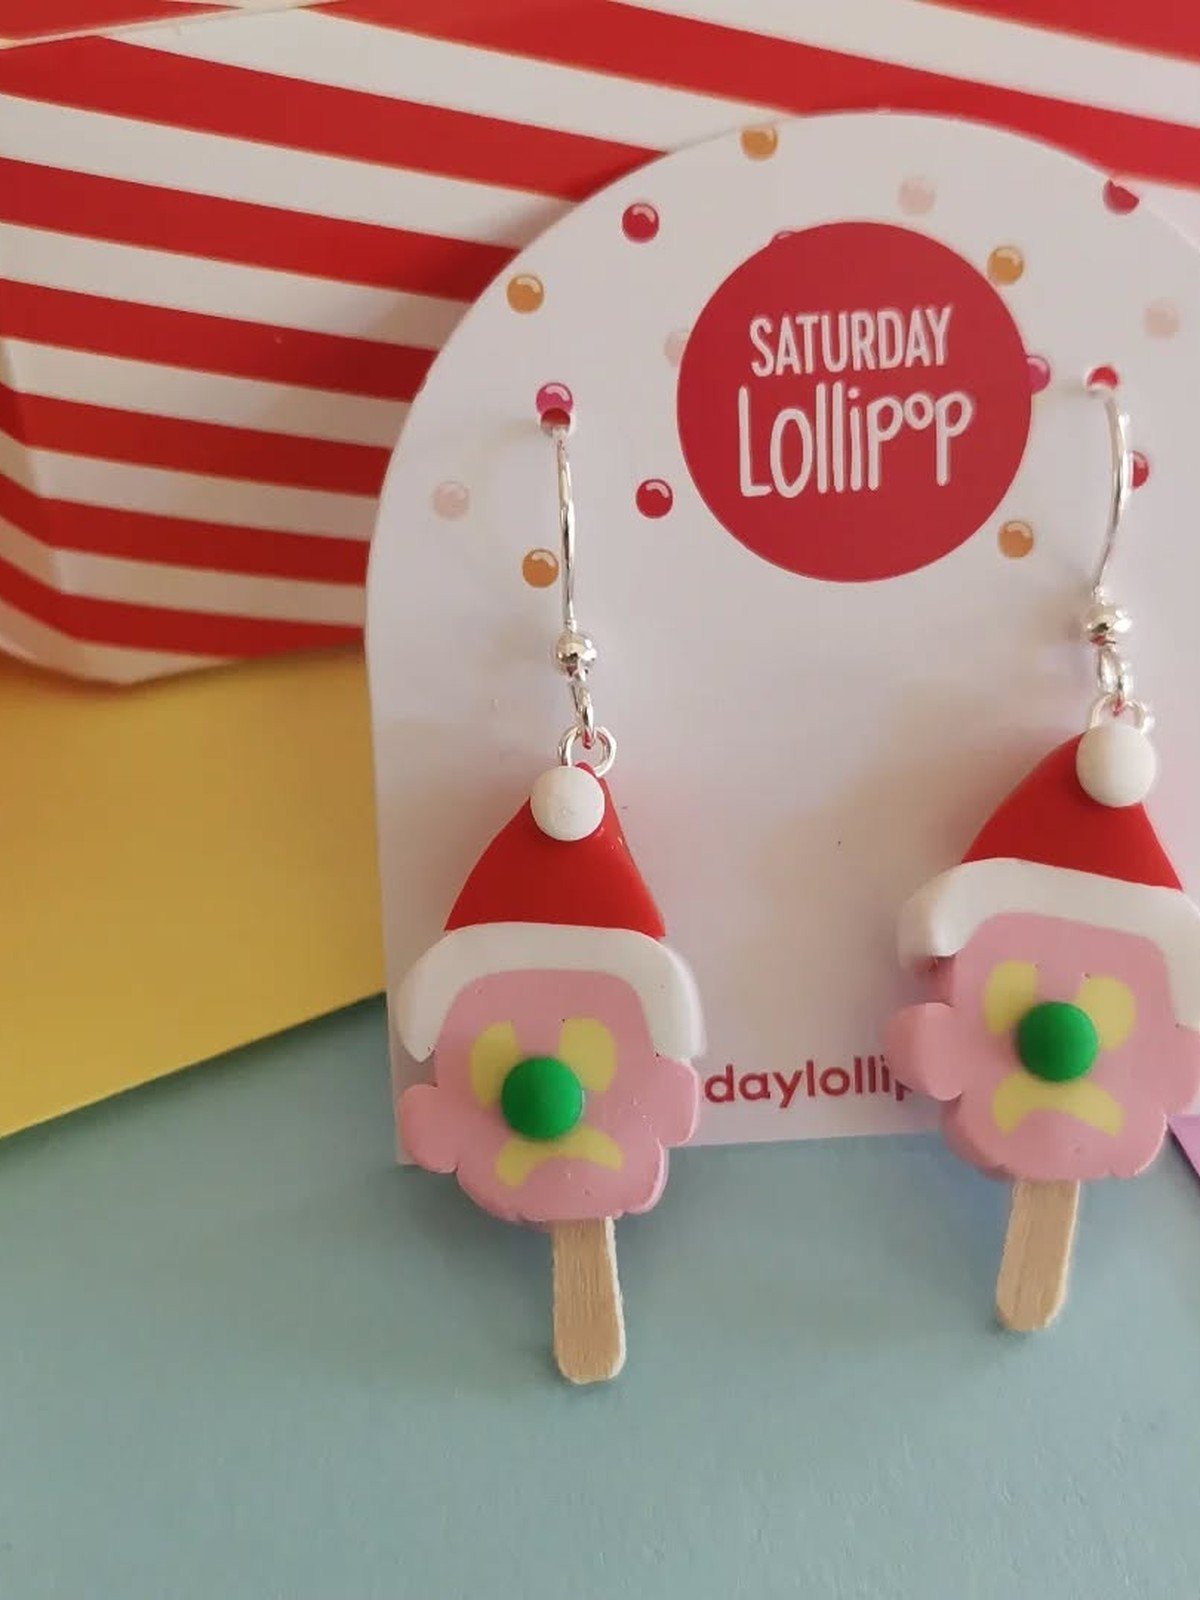
Dangle versions of the hat swing nicely and show off the bent tip shape. Presenting them on a white arch card, like this pair, makes a simple make look boutique ready for gifting or a craft stall. The card also keeps the pair together in storage.
You’ll need: red and white polymer clay, eye pins, earring hooks, display card
Best for: statement earrings for Christmas parties
7. Santa Claus Dangle Earrings
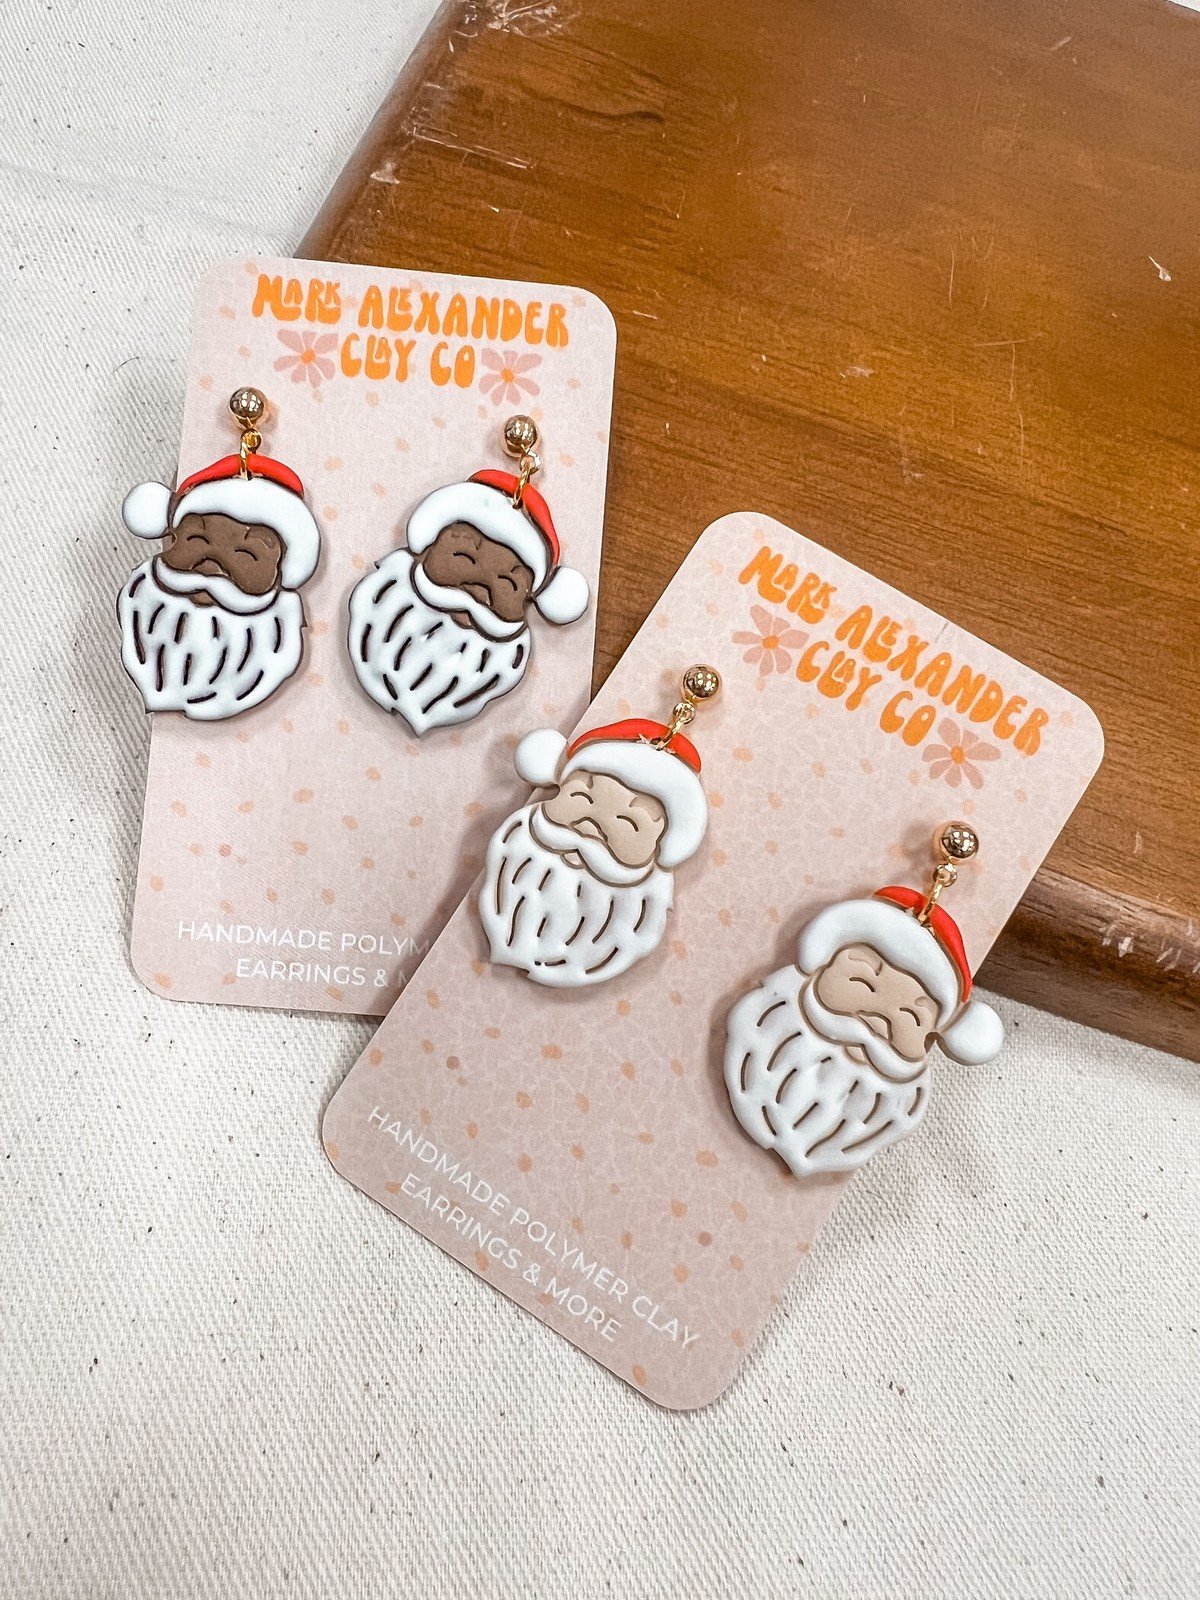
These dangles add a simple Santa face under the hat, with the white beard doing most of the work. The hat itself follows the same three part build as idea 1, just smaller. Two sets are shown, so you can see how tiny changes in the beard shape change the whole expression.
You’ll need: red, white and skin tone polymer clay, earring hooks, fine brush for details
Best for: fans of a full Santa face with the hat
8. Santa Claus Clay Charm
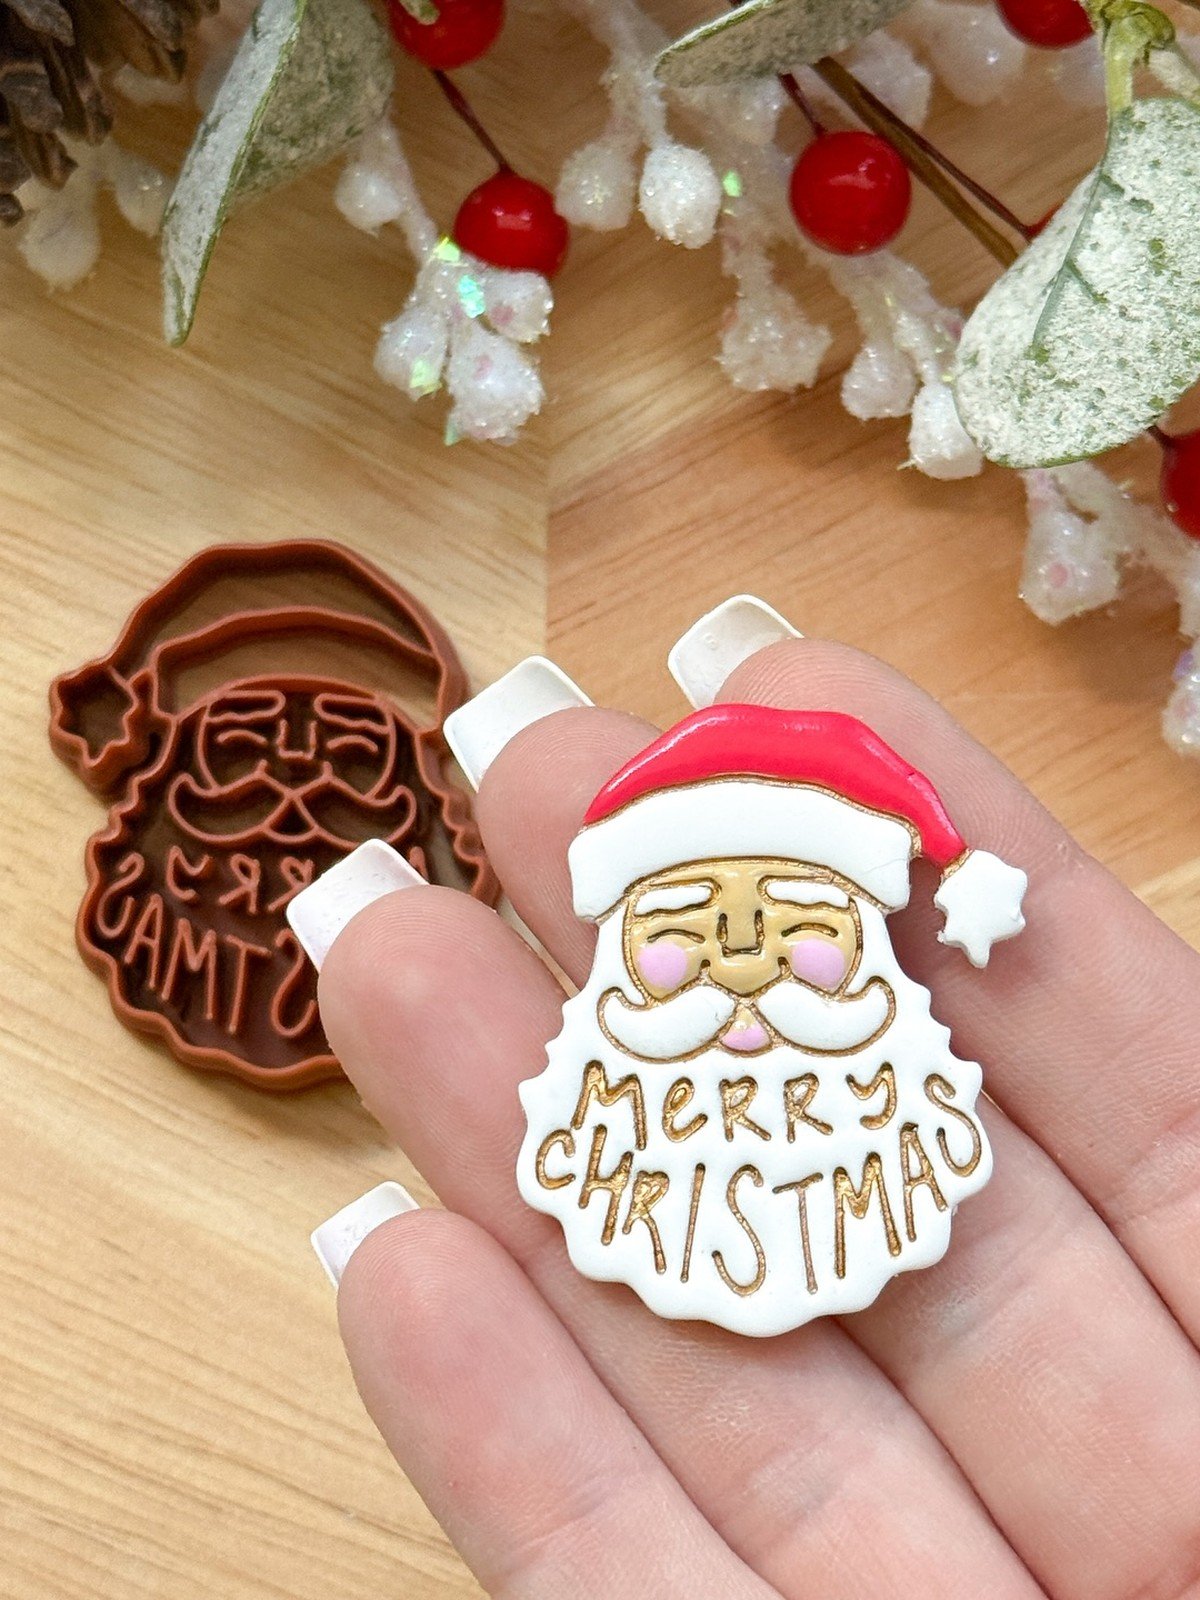
A single Santa charm built around the hat is the right size for a necklace or a bag zipper. The hat and beard frame the face, so the charm reads clearly even at small scale. A coat of gloss glaze makes the colors look rich and finished.
You’ll need: red, white and skin tone clay, eye pin, jump ring, gloss glaze (optional)
Best for: necklaces, bracelets and zipper pulls
9. Set of Santa Head Charms
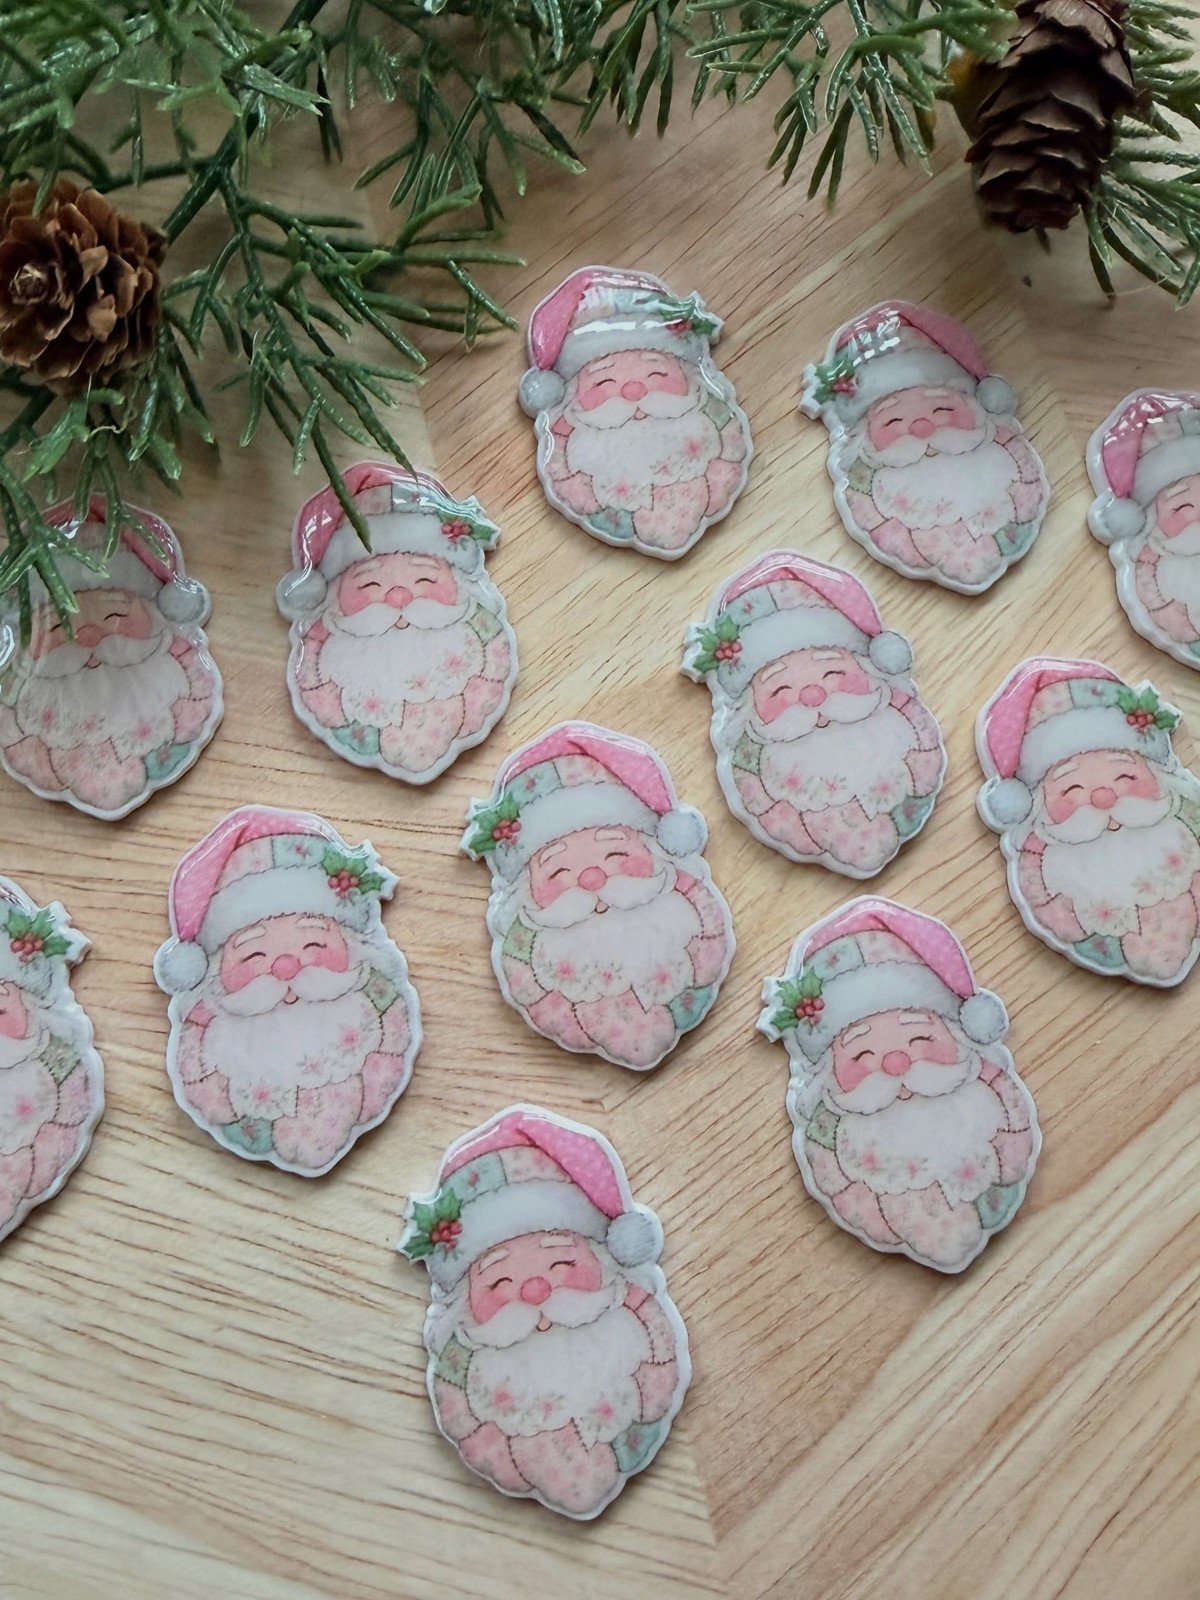
Twelve glossy Santa heads in a neat flat lay show the charm design repeated at production scale. Making heads in a batch, all the hats first, then all the beards, is faster than finishing one charm at a time and keeps the set looking consistent.
You’ll need: clay in red, white and skin tones, eye pins, baking tray
Best for: market sellers making stock in batches
10. Santa Hat Studs on a Kraft Card
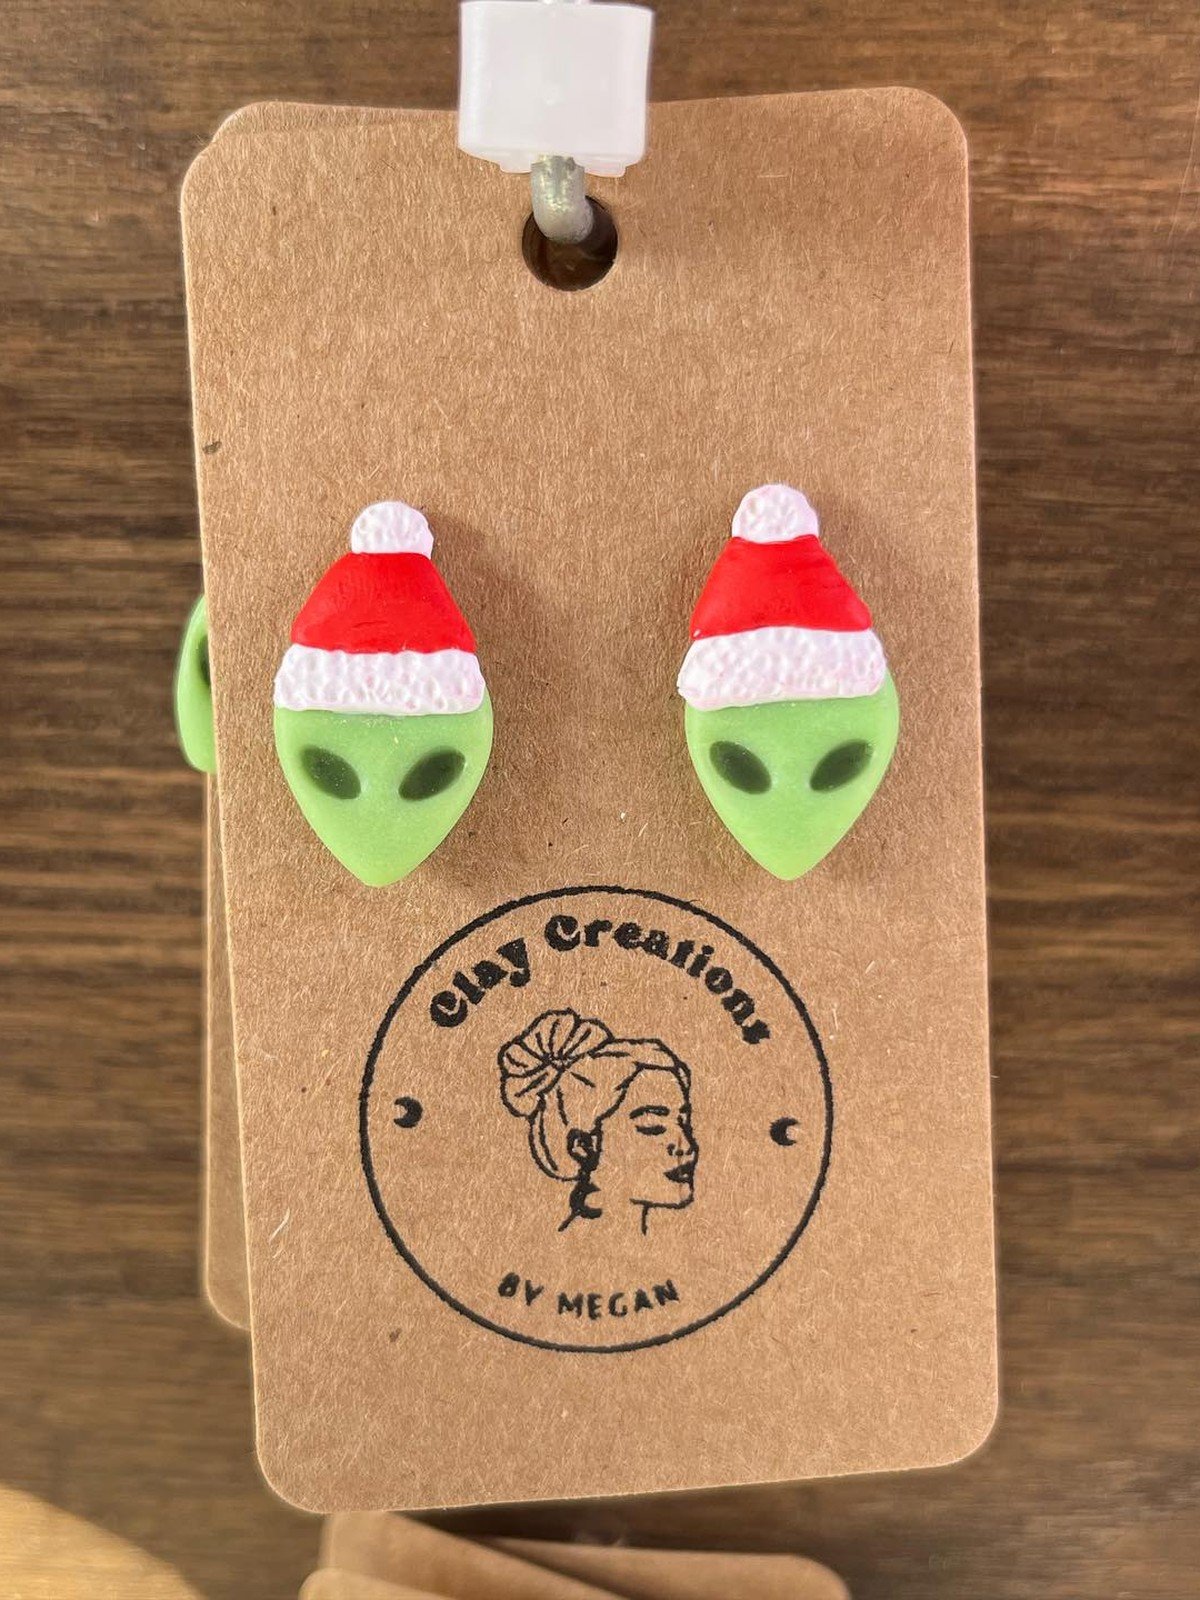
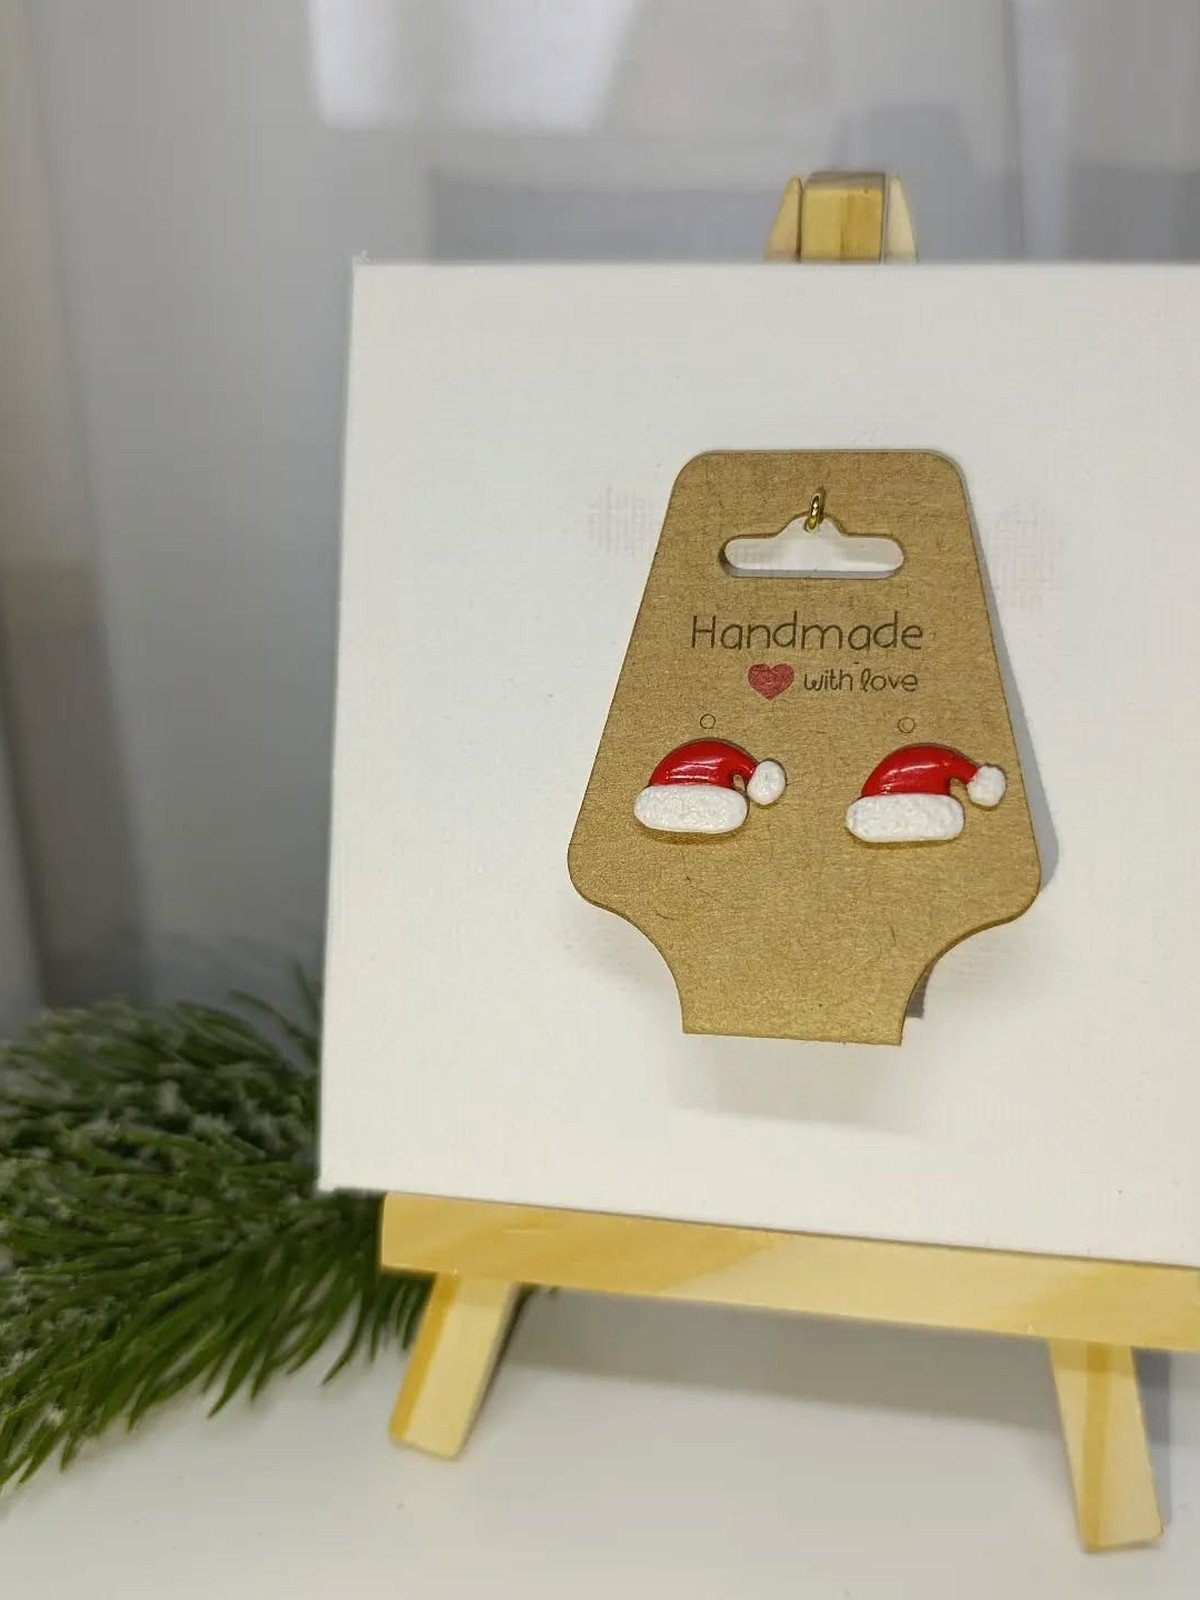
Mounting stud earrings on a brown kraft card gives them a warm, homemade feel that suits Christmas markets. The hats here are small and neat, a reminder that studs sell the design at a glance, so keep the shapes clean and the pairs well matched.
You’ll need: red and white polymer clay, stud posts, kraft display cards
Best for: earthy, natural gift presentation
11. Christmas Earring Collection with Santa Hats
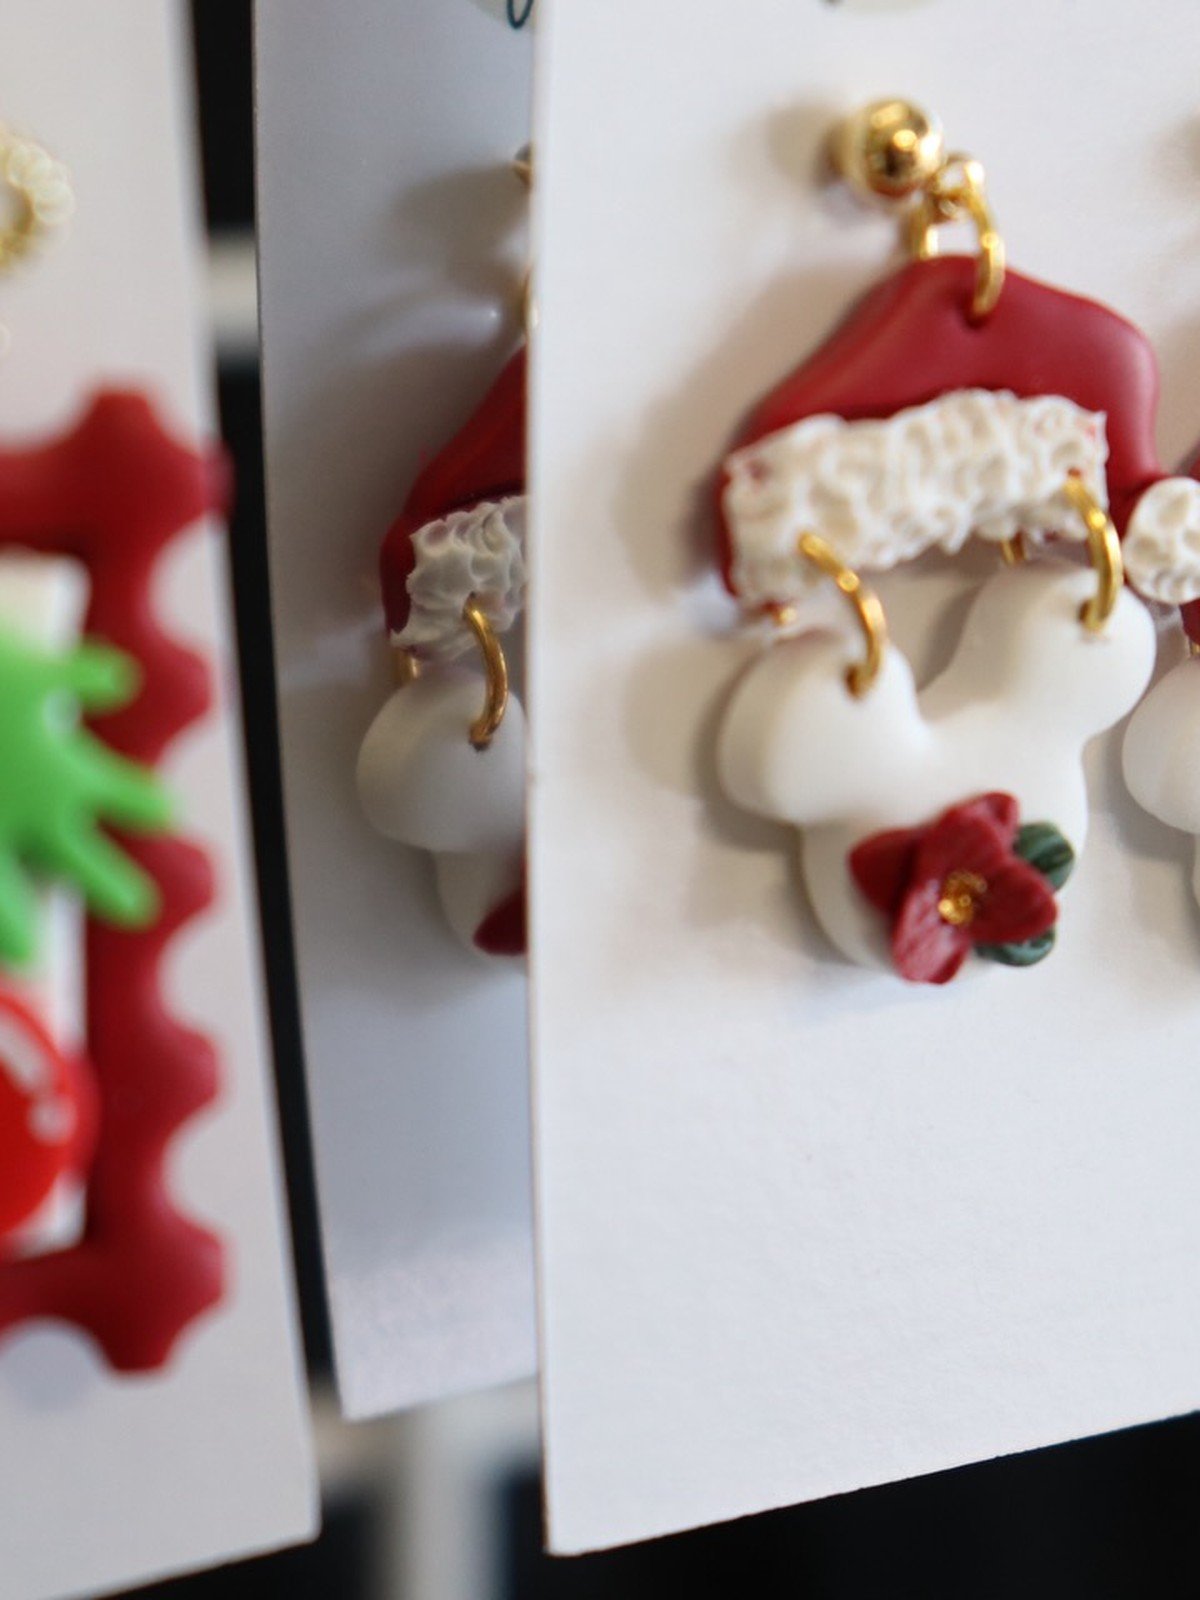
This display of Christmas earrings on white cards puts Santa hats alongside other festive designs. If you make earrings to sell or gift, a small collection card like this helps people see the hat as part of a set and often leads them to take two pairs.
You’ll need: polymer clay in Christmas colors, assorted earring findings, display cards
Best for: comparing several Christmas earring designs at once
12. Santa Hat Earrings on Pink Cards
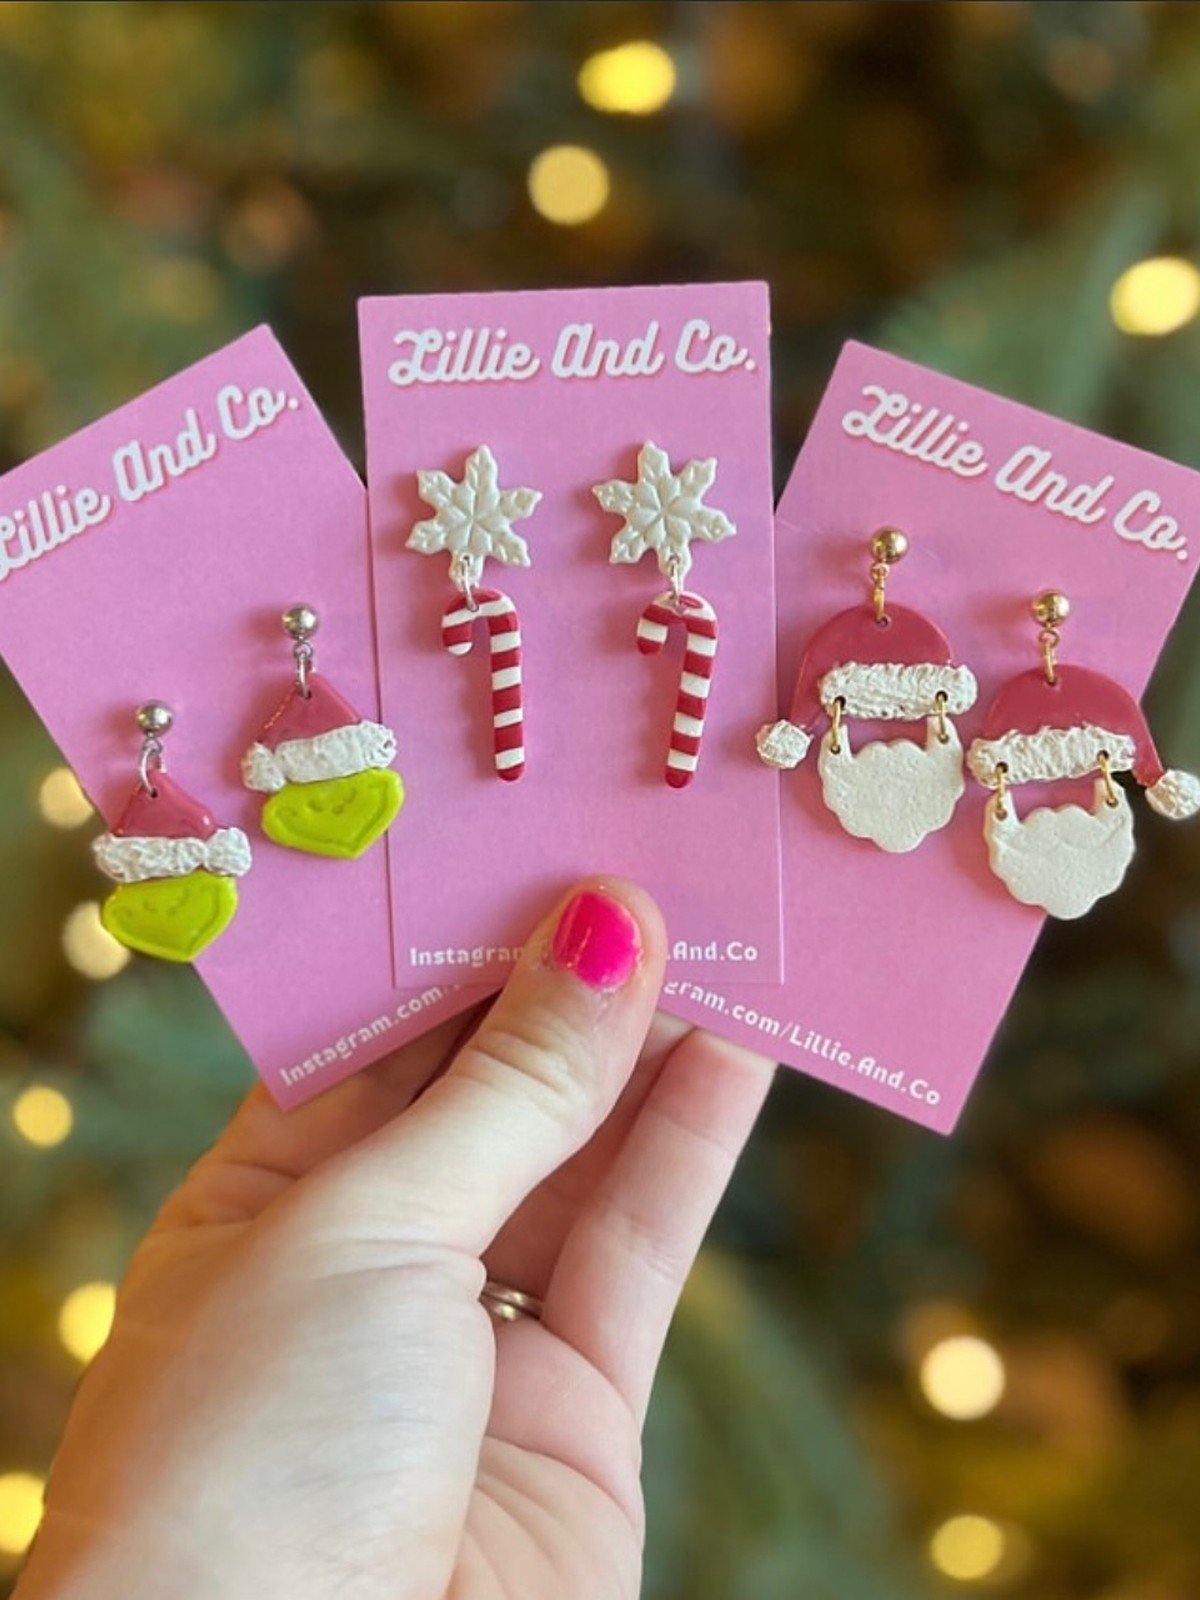
Pink display cards make the red and white hats look fresh and modern. Presentation really does change how a simple clay hat is judged, so it is worth matching your card color to the season or the person you are gifting to.
You’ll need: red and white polymer clay, earring findings, colored display cards
Best for: bright, fun presentation for younger buyers
13. Santa Hat Keychain
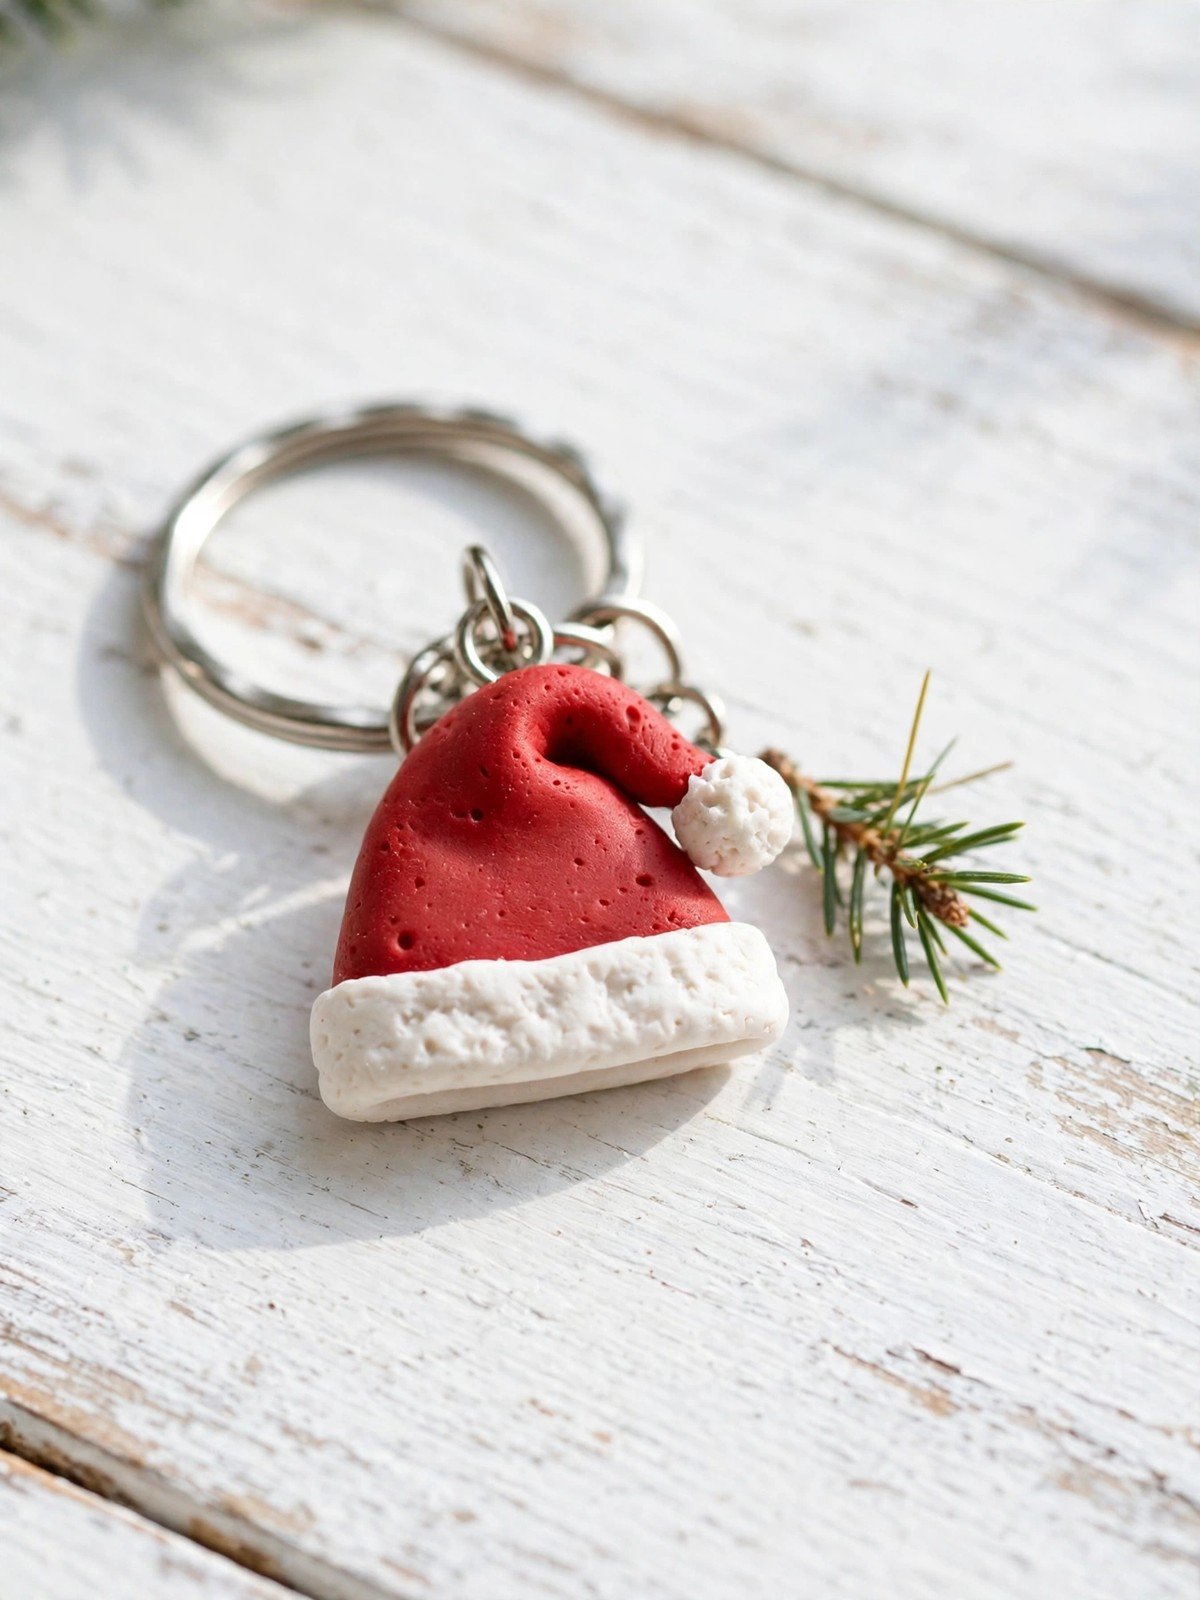
The hat shape makes a sturdy little keychain because there are no thin parts to snap off. Build the hat slightly thicker than an earring version, bake it well, and attach a short chain and split ring. It is a cheerful stocking filler that takes under an hour from start to finish.
You’ll need: red and white polymer clay, eye pin, split key ring and short chain
Best for: stocking fillers and teacher gifts
14. Santa Hat Cake Topper
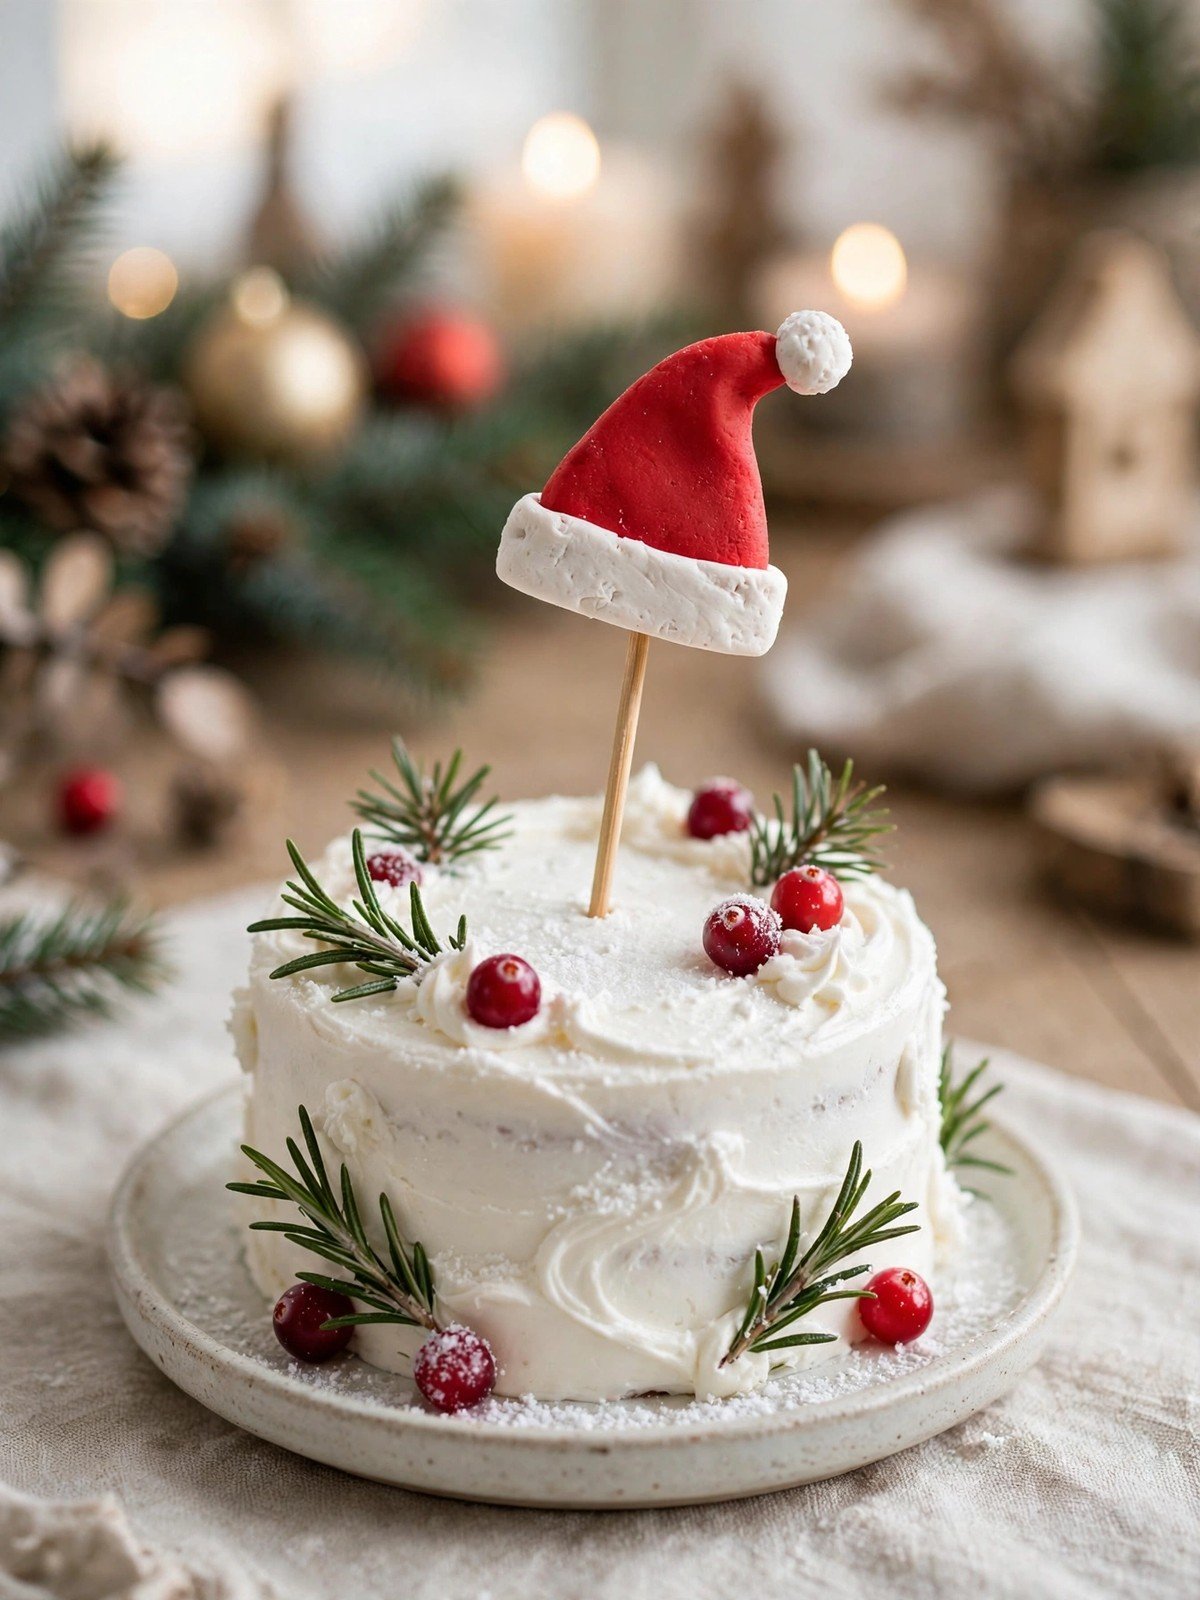
A clay hat on a skewer turns a plain frosted cake into a Christmas cake in seconds, and unlike sugar decorations it can be washed and reused next year. Make the hat a little larger than ornament size so it reads well in photos, and push the skewer in only when serving is close.
Safety note: An adult should handle the oven step, and clay should be baked only at the temperature on its own package. Cake toppers made from polymer clay are decoration only and are not food safe, so remove them before serving slices to children.
You’ll need: red and white polymer clay, wooden skewer, strong glue
Best for: party cakes and Christmas bakes
Frequently Asked Questions
What is the basic shape of a polymer clay Santa hat?
The hat is three parts: a red cone or triangle body, a white band rolled flat for the brim, and a small white ball for the pom pom. Texture the white parts with a toothbrush or a ball tool so they read as fluffy trim.
How big should a clay Santa hat be?
For ornaments and magnets, 4 to 6 cm tall is a good size. For earrings and charms, keep the hat around 2 to 3 cm so the finished piece stays light enough to wear.
How long do small clay hats need in the oven?
Bake at the temperature on the clay package, usually around 275°F (130°C), at roughly 15 minutes per quarter inch of thickness. Small earring sized hats are done quickly, so watch the first batch closely.
Can I turn the hat into a fridge magnet?
Yes. Roll the back flat before baking so it sits flush, then glue a magnet on with strong craft glue after baking and cooling. Two small magnets hold better than one on thicker hats.
How do I add a hanging loop to a clay ornament?
Press the eye pin in before baking so it bakes in place. If you forgot, drill a tiny hole after baking with a hand drill, or glue a flat bail onto the back instead.
What is the easiest way to make the pom pom?
Condition a small piece of white clay and roll it into a ball, then press it onto the tip with a dab of liquid clay. Poking the surface all over with a needle tool gives it the fluffy pom pom texture.
Final Thoughts on Simple DIY Polymer Clay Christmas Hat
The Santa hat is the hardest working shape in Christmas clay. Learn it once and you can decorate ears, fridges, keys, cakes and the whole tree.
Keep the three parts the same every time (red hat, textured white brim, pom pom ball) and change only the finding. That one habit turns a single design into a full handmade collection.