Are you tired of struggling with a stubborn delta shower handle that just won’t budge? Frustrated by the constant dripping and lack of control over your water temperature? Well, you’ve come to the right place. In this guide, we will walk you through step-by-step instructions on how to remove a delta shower handle, allowing you to regain control over your shower experience.
Whether you’re a seasoned DIY enthusiast or a novice homeowner, removing a delta shower handle may seem like a daunting task. But fear not! With our comprehensive guide, we will break down the process into simple and easy-to-follow steps, ensuring that you can successfully remove your delta shower handle without any stress or hassle. From gathering the necessary tools to understanding the inner workings of your shower handle, we will cover all the bases to ensure a smooth and successful removal process. So, get ready to bid farewell to that troublesome delta shower handle and say hello to a more enjoyable and convenient showering experience.
How to Remove Delta Shower Handle
- Turn off the water supply to the shower.
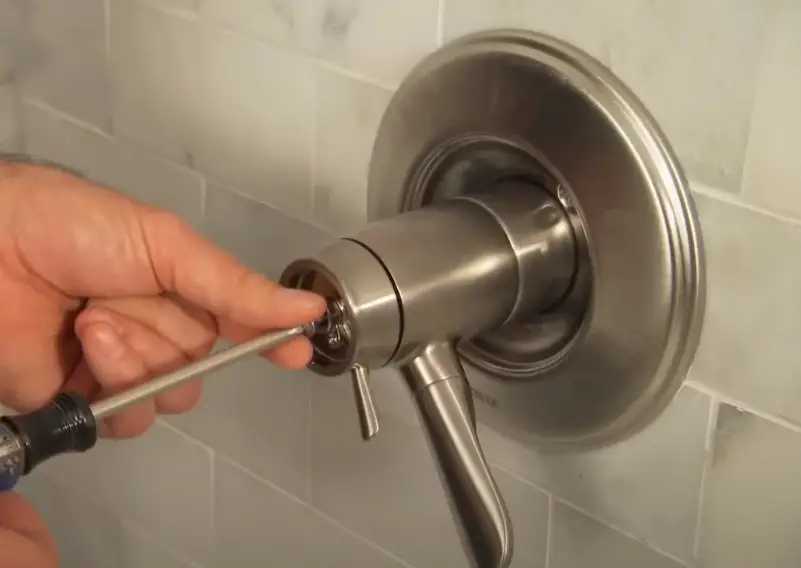
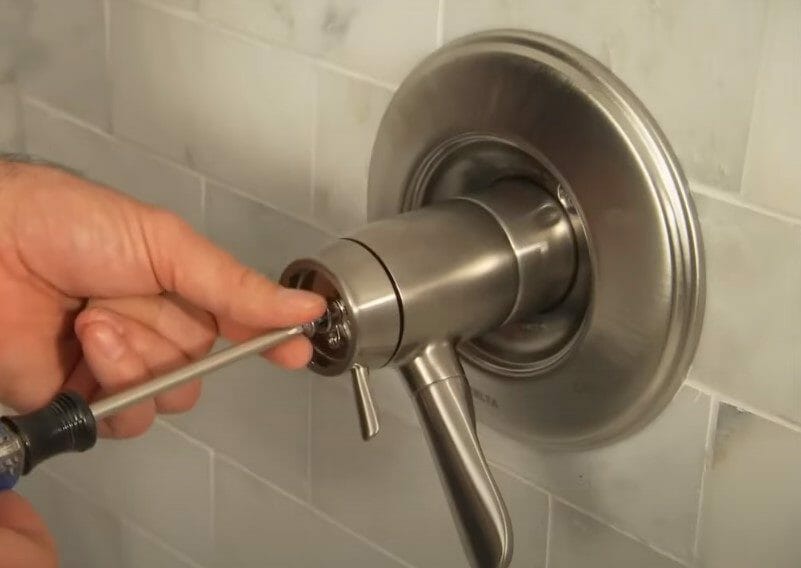
- Use a screwdriver to remove the screw located on the underside of the handle.
- Gently pull the handle off the valve stem.
- If the handle is stuck, use a handle puller tool for leverage.
- Inspect the cartridge for any damage or wear and replace if necessary.
- Reassemble the handle and turn on the water supply to test.

In this step-by-step guide, we will walk you through the process of removing a Delta shower handle. Whether you want to replace a worn-out handle or simply want to clean it, removing the handle is the first step. With the right tools and a little bit of patience, you can easily remove your Delta shower handle and complete this task in no time.
Step 1: Gather the Necessary Tools
Before you begin, it is important to gather all the necessary tools and materials. For this task, you will need an adjustable wrench, a screwdriver (either Phillips or flathead depending on your handle), and a towel or rag to protect the surface of your shower.
Make sure you have these tools handy before starting the removal process to avoid any unnecessary disruptions or delays.
Step 2: Turn Off the Water Supply
Before removing the handle, it is crucial to turn off the water supply to your shower. Locate the shut-off valve for your shower and turn it clockwise until it is fully closed. This will prevent any water from flowing while you work on removing the handle.
Once the water supply is turned off, turn on the shower to release any remaining pressure in the pipes. This will help prevent any water from spilling out when you remove the handle.
Read More: Dual Shower Head Plumbing Diagram
Step 3: Remove the Handle Screw
Using a screwdriver, locate the screw holding the handle in place. This screw is usually located on the side or front of the handle. Insert the screwdriver into the screw and turn it counterclockwise to loosen and remove it.
If the screw is difficult to loosen, try applying some penetrating oil to help loosen any rust or debris that may be causing resistance. Allow the oil to sit for a few minutes before attempting to remove the screw again.
Step 4: Slide Off the Handle
Once the screw is removed, you can now slide off the handle from the valve cartridge. Gently wiggle the handle back and forth while pulling it away from the wall to release it from the cartridge.
If the handle is stubborn and does not come off easily, you can use a handle puller tool specifically designed for this purpose. Follow the manufacturer’s instructions for using the tool and safely remove the handle.
Step 5: Clean or Replace the Handle
With the handle removed, you can now clean it thoroughly or replace it with a new one if desired. Use a mild cleaner and a soft cloth to remove any dirt or debris from the handle. Rinse it with water and dry it completely before reattaching it.
If you are replacing the handle, make sure to purchase a compatible replacement that matches the Delta shower system. Follow the manufacturer’s instructions for installing the new handle and secure it in place using the screw you removed earlier.
Step 6: Turn On the Water Supply
Once you have cleaned or replaced the handle, it’s time to turn on the water supply. Make sure the handle is securely attached to the valve cartridge and turn the water supply valve counterclockwise to open it.
Check for any leaks or drips around the handle and ensure that it operates smoothly. If everything looks good, congratulations! You have successfully removed and replaced your Delta shower handle.
Step 7: Clean Up and Test
Before finishing up, clean up any tools or materials used during the process and wipe down the shower area. Test the handle by turning on the water and adjusting the temperature to ensure everything is functioning properly.
If you encounter any issues or difficulties during the removal process, it is recommended to consult a professional plumber for assistance. They have the expertise and knowledge to guide you through the process and ensure a successful handle removal.
Video
Frequently Asked Questions
Here are some commonly asked questions about how to remove a Delta shower handle:
Q: How do I remove a Delta shower handle?
To remove a Delta shower handle, start by turning off the water supply to the shower. Then, use a screwdriver to remove the screw located in the center of the handle. Once the screw is removed, you can gently pull the handle off the valve stem. If the handle is stuck, you may need to use a handle puller tool to help loosen it. Be sure to consult the manufacturer’s instructions for your specific Delta shower handle model.
After the handle is removed, you may need to unscrew any additional parts to fully access the valve assembly. It’s a good idea to take note of the order in which you remove the parts, as you’ll need to reassemble them in the same order later. If you’re unsure about any step or encounter any difficulties, it’s recommended to seek professional plumbing assistance.
Q: What tools do I need to remove a Delta shower handle?
To remove a Delta shower handle, you’ll typically need a few basic tools. These include a screwdriver, preferably a Phillips-head screwdriver, to remove the handle’s screw. Additionally, you may need an adjustable wrench or pliers to loosen and remove any other parts, such as the escutcheon plate or cartridge assembly, that may be covering the valve stem. It’s important to use the right tools for the job to avoid damaging the handle or other components.
If you don’t have the necessary tools or are unsure about using them, it’s best to consult a professional plumber who has the expertise and proper tools to safely remove your Delta shower handle.
Q: Can I remove a Delta shower handle without turning off the water?
No, it is not recommended to remove a Delta shower handle without turning off the water supply first. The water supply should always be shut off before attempting any work on a plumbing fixture to avoid potential accidents or damage. Turning off the water supply ensures that no water will be flowing when you remove the handle, reducing the risk of leaks or excessive water flow.
Always locate the shut-off valve for your shower’s water supply and turn it off before proceeding with any handle removal or other maintenance tasks. If you’re unsure about the location of the shut-off valve or how to turn it off, consult a professional plumber for assistance.
Q: How do I know if my Delta shower handle is stuck?
If your Delta shower handle is difficult to turn or won’t budge at all, it may be stuck. This can happen due to mineral deposits, corrosion, or other factors that affect the movement of the handle. To determine if your handle is stuck, try gently turning it in both directions. If it doesn’t move smoothly or feels resistant, it’s likely stuck.
To help loosen a stuck Delta shower handle, you can try using a handle puller tool. This tool applies even pressure around the handle to help release it from the valve stem. If using a handle puller doesn’t work, it’s recommended to seek professional plumbing assistance to avoid causing further damage.
Q: Can I remove a Delta shower handle without any prior plumbing experience?
Removing a Delta shower handle can be a relatively simple task, but it does require some basic plumbing knowledge and tools. If you have no prior plumbing experience, it’s recommended to proceed with caution or seek professional assistance to avoid potential mistakes or damage to your plumbing system.
However, if you’re comfortable working with basic tools and following instructions, you may be able to remove a Delta shower handle yourself. Just be sure to consult the manufacturer’s instructions for your specific model and take proper safety precautions. If you encounter any difficulties or are unsure about any step, it’s best to consult a professional plumber for guidance.
In conclusion, removing a Delta shower handle may seem like a daunting task at first, but with the right tools and careful steps, it can be accomplished successfully. By following the step-by-step guide provided, you can confidently tackle this DIY project and regain control over your shower’s functionality.
Remember, safety should always be a priority when working with plumbing fixtures. Take the time to gather all necessary tools and materials, and consult the manufacturer’s instructions if needed. With patience and attention to detail, you can confidently remove your Delta shower handle and address any issues that may be affecting its performance.
In the end, learning how to remove a Delta shower handle can save you time and money by allowing you to address any underlying issues without the need for professional help. Whether you’re a seasoned DIY enthusiast or a beginner, this guide will equip you with the knowledge and skills necessary to tackle this task with confidence. So go ahead, roll up your sleeves, and take control of your shower’s functionality – your future self will thank you!

