
This post may contain affiliate links. Please read my disclosure policy.
In This Article Show
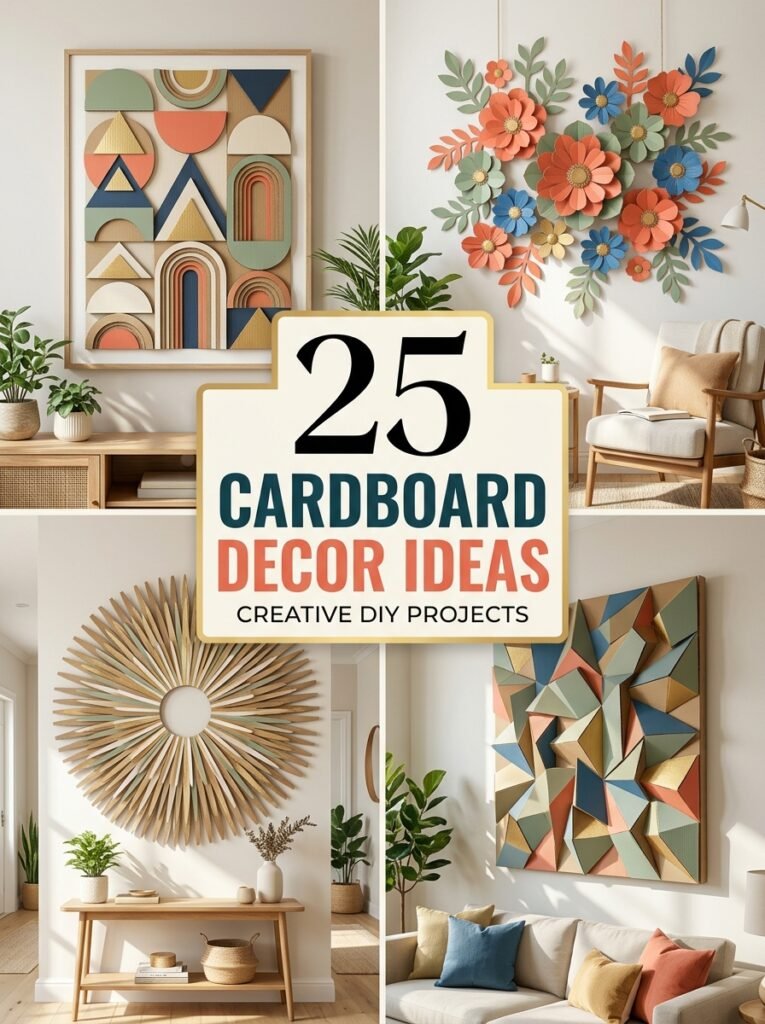
Looking for affordable ways to decorate your home without spending too much money? Cardboard is one of the easiest materials to turn into beautiful wall art, stylish room accessories, decorative shelves, and handmade ornaments. With a few cardboard boxes, scissors, glue, paint, and a little creativity, you can make decorations that look surprisingly modern and attractive. These cardboard crafts decoration ideas are suitable for bedrooms, living rooms, classrooms, creative workspaces, and seasonal celebrations. Whether you prefer minimalist aesthetics, colorful DIY projects, ocean-inspired artwork, music themes, or handmade festive decorations, you will find plenty of inspiration here.
1. Aesthetic Geometric Cardboard Wall Art
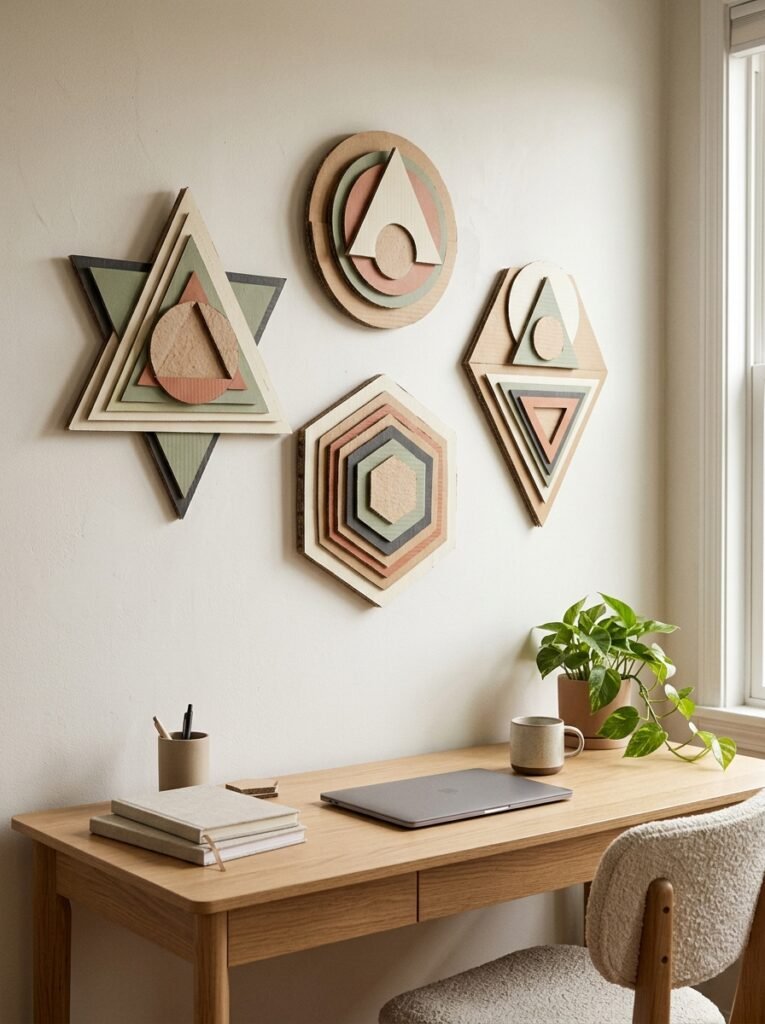
Geometric wall art is a simple way to give an empty wall a modern makeover. Cut cardboard into triangles, circles, hexagons, and other geometric shapes, then arrange them in a balanced pattern. Paint the pieces in cream, sage green, terracotta, black, or your favorite accent colors. You can add raised layers to create depth and shadows. This design looks especially beautiful above a bed, desk, or sofa and works well with contemporary wall art home decorating ideas.
2. DIY Cardboard Flower Wall Hanging
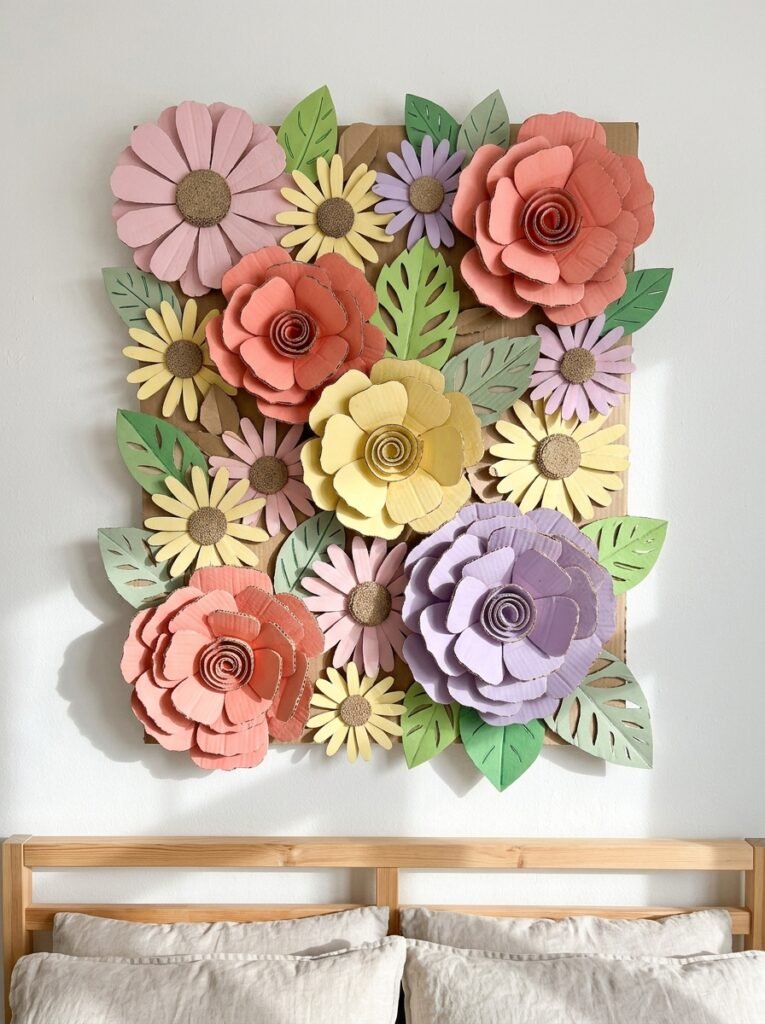
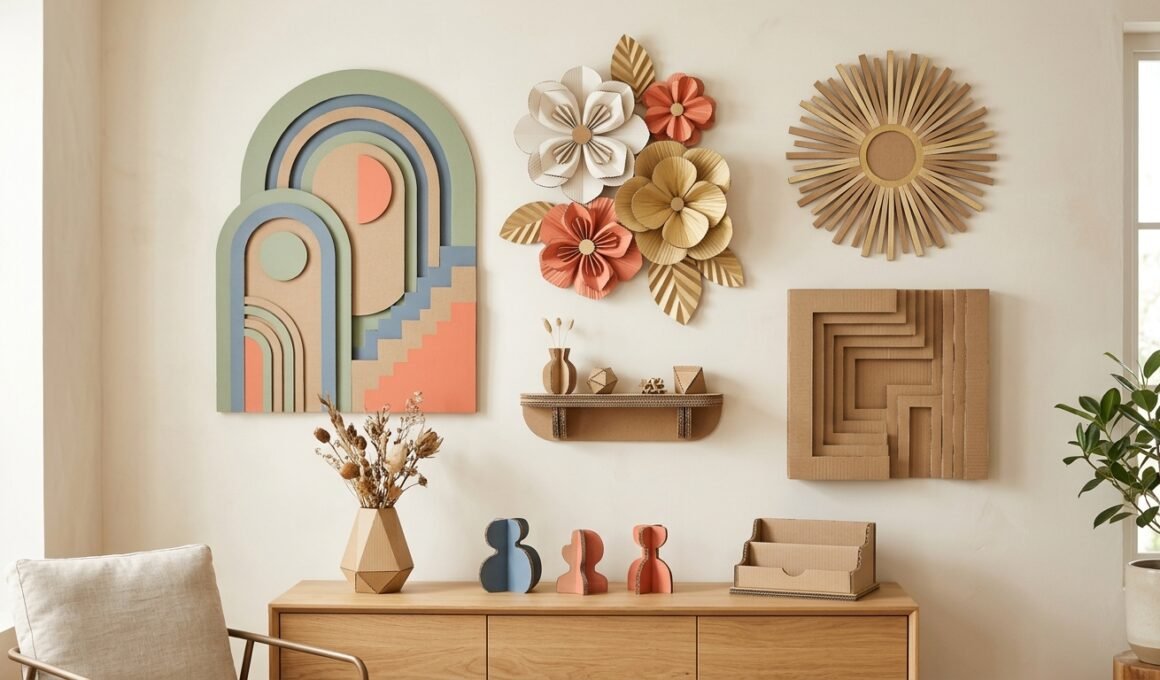
A cardboard flower wall hanging can make a plain wall feel cheerful and welcoming. Cut petals in different sizes, layer them to create dimensional flowers, and paint each flower in complementary shades. You can combine daisies, roses, and simple abstract blooms to create a colorful arrangement. Add green cardboard leaves and arrange the flowers on a circular backing for a balanced finish. This project is ideal for bedrooms, craft corners, and spring-inspired wall decor.
3. Layered Cardboard Wall Art with Abstract Shapes
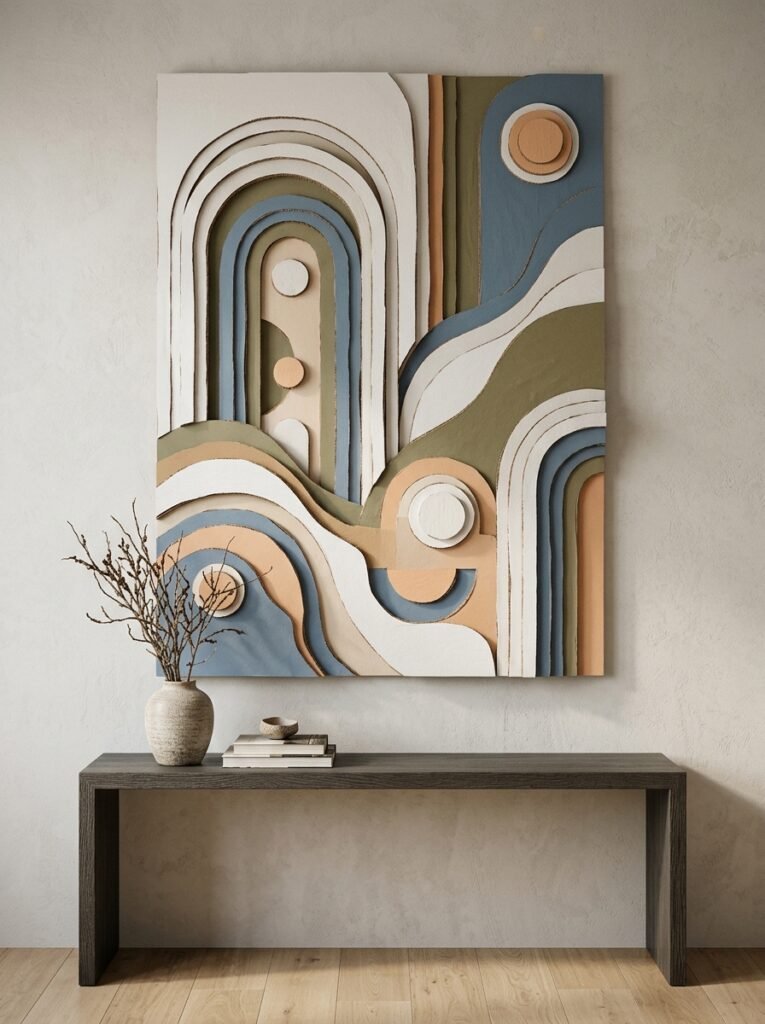
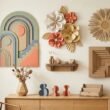
If you enjoy creative wall art, try building an abstract composition from several cardboard layers. Cut wavy lines, arches, circles, and irregular shapes, then overlap them to create a gallery-style piece. Use two or three coordinated colors instead of painting every piece differently. Adding a few raised sections creates an artistic shadow effect without expensive materials. This project suits living rooms, home offices, and minimalist interiors where a single statement piece can make the space feel more complete.
4. DIY Paper and Cardboard Wall Art
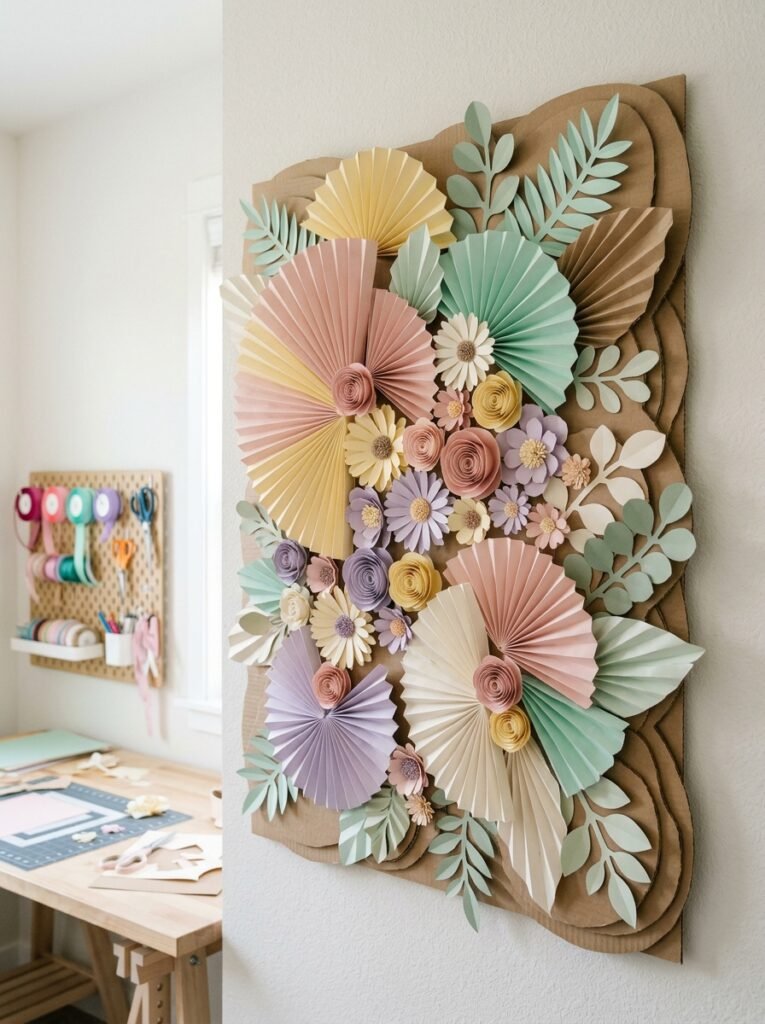
Combine thin cardboard and colored paper to create delicate wall art with multiple textures. Cut the cardboard into a frame or background, then add folded paper leaves, paper fans, small flowers, or abstract shapes. The cardboard gives the design structure while paper adds softness and detail. Choose matching colors for a polished look, or create a bright rainbow composition for a playful room. This is a useful option when exploring wall art DIY paper projects on a small budget.
5. Round Cardboard Sunburst Wall Decor
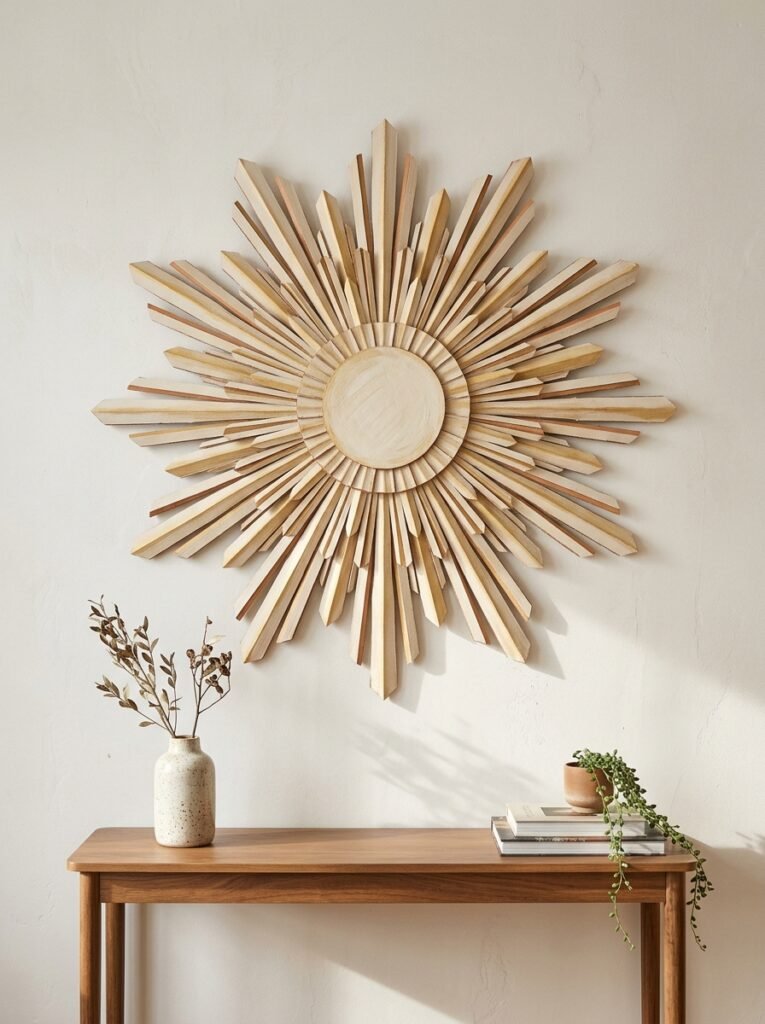
Round wall decorations work beautifully above beds, reading corners, and small entryway tables. Cut a large circle from sturdy cardboard and surround it with narrow triangular rays or rounded strips. Arrange the pieces evenly and paint the entire design in gold, white, terracotta, or a combination of colors. You can create a sun-inspired design or a more minimal circular sculpture. This easy project adds visual interest without requiring a large wall or expensive decorative accessories.
6. Minimalist Cardboard Wall Decor for a Bedroom
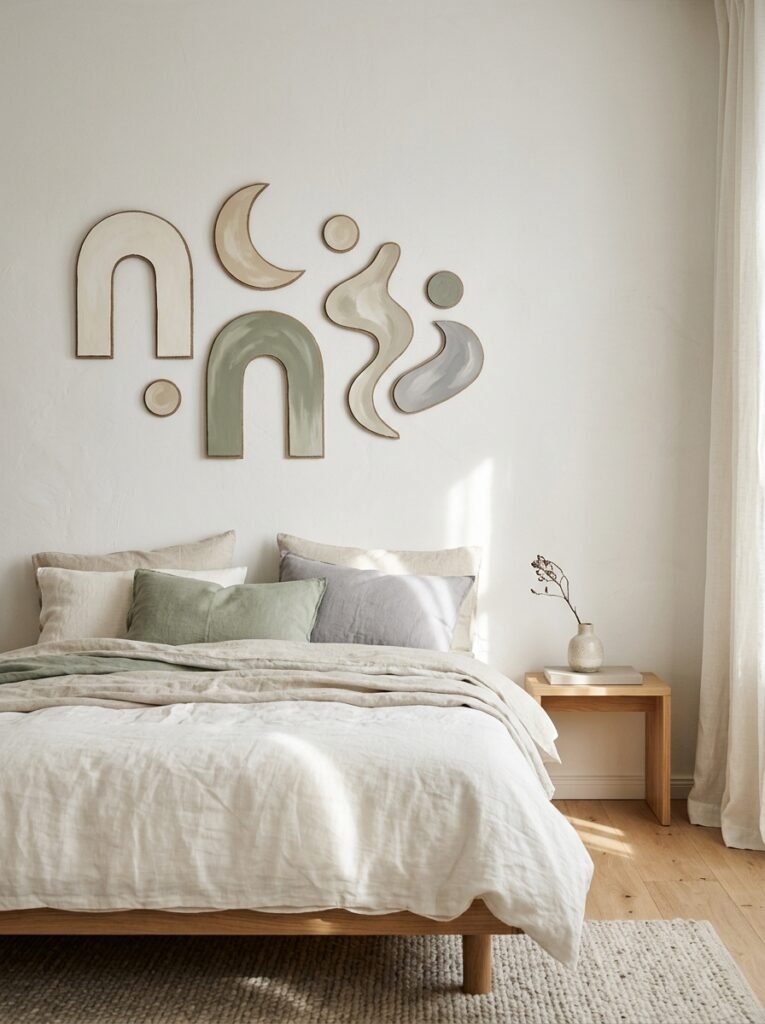
Minimalist decorations are perfect if you want your room to look stylish without feeling crowded. Cut cardboard into simple arches, moons, circles, or abstract line shapes and paint them in two or three neutral shades. Arrange the pieces with plenty of space between them, especially above a bed or study table. You can also mount the shapes on a larger cardboard panel to create a framed appearance. This design is affordable, easy to customize, and suitable for a peaceful bedroom aesthetic.
7. Cardboard Wall Hanging with a Boho-Inspired Design
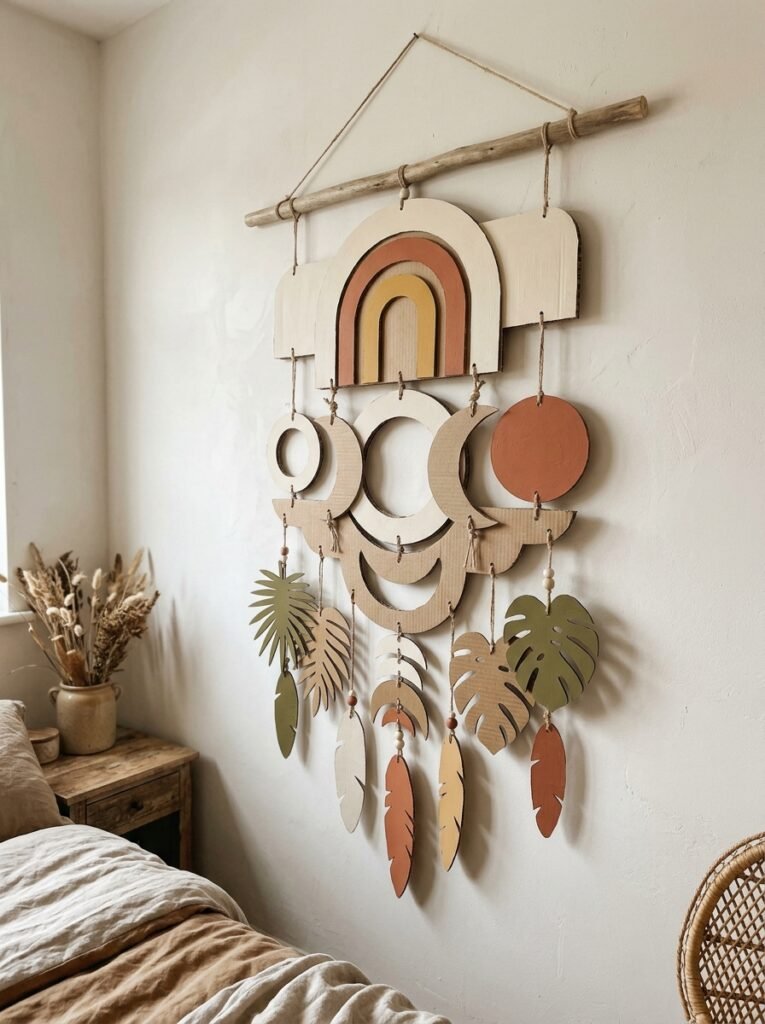
A boho-inspired wall hanging can bring warmth and personality to a bedroom or creative corner. Cut cardboard into arches, half circles, feathers, or layered leaf shapes, then paint them in earthy shades such as cream, rust, muted green, and mustard. You can attach several shapes to a cardboard bar using string to create a hanging decoration. Keep the arrangement balanced and use consistent colors for a finished look. The result is a lightweight decorative piece with an artistic, handcrafted feel.
8. Cardboard Floating Shelf for Lightweight Decorations
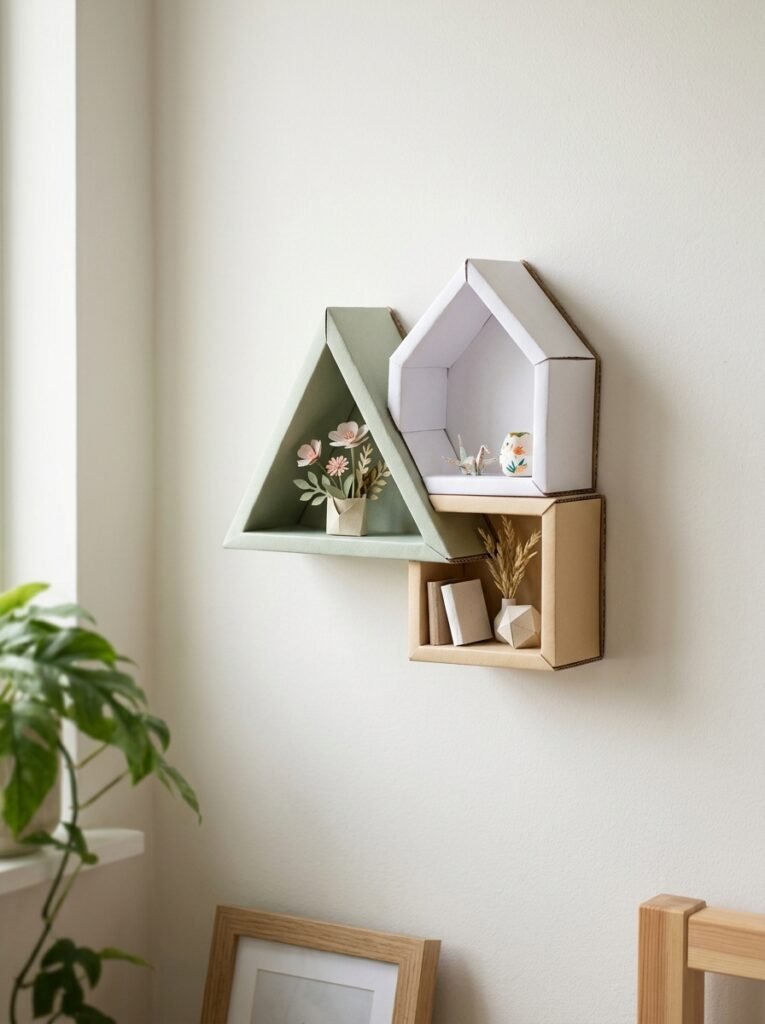
A cardboard shelf can be a creative DIY project for displaying lightweight decorative items. Build a compact box-shaped shelf using multiple layers of sturdy corrugated cardboard, reinforce the corners, and cover the exterior with decorative paper or paint. Use it to display paper flowers, tiny handmade ornaments, or other lightweight craft pieces. It is best suited to decorative use rather than heavy storage. Before mounting it, make sure the structure is secure and supported appropriately.
9. Decorative Cardboard Wall Frames
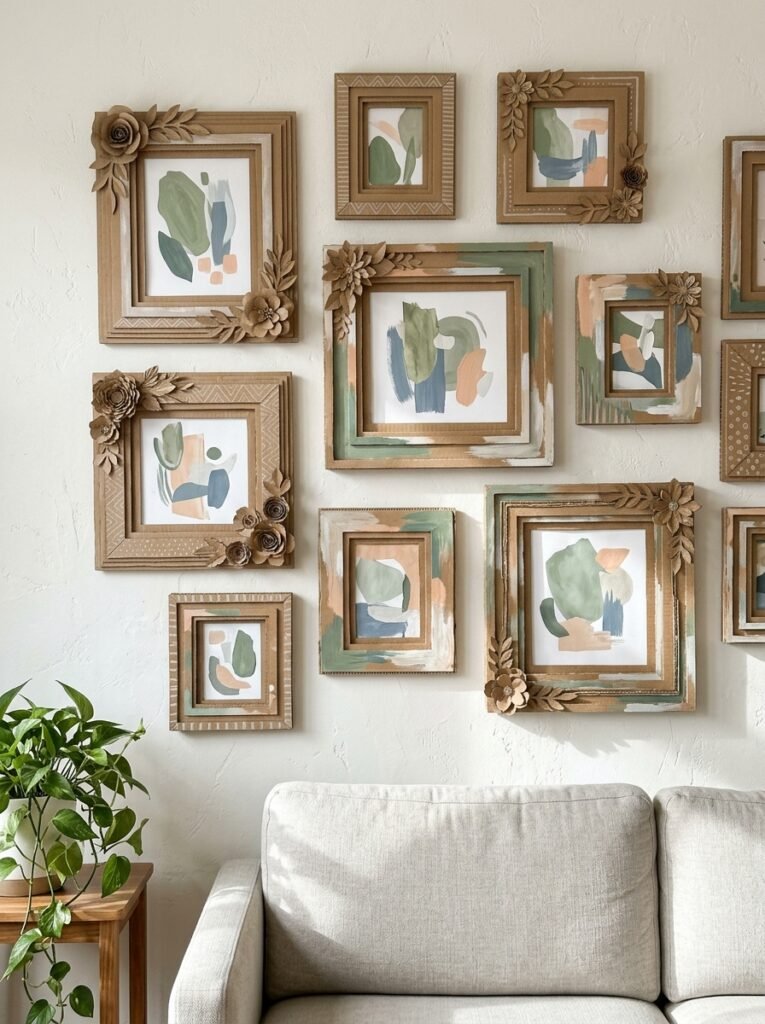
Turn ordinary cardboard into attractive frames for your favorite artwork, photographs, or handmade prints. Cut two matching rectangles, create an opening in the front piece, and layer the edges to give the frame a thicker appearance. Decorate it with painted lines, small cardboard flowers, or simple geometric patterns. You can make several frames in different sizes and arrange them together as a gallery wall. This is an easy way to personalize a room while keeping the overall design coordinated.
10. Cardboard Ocean-Themed Wall Art
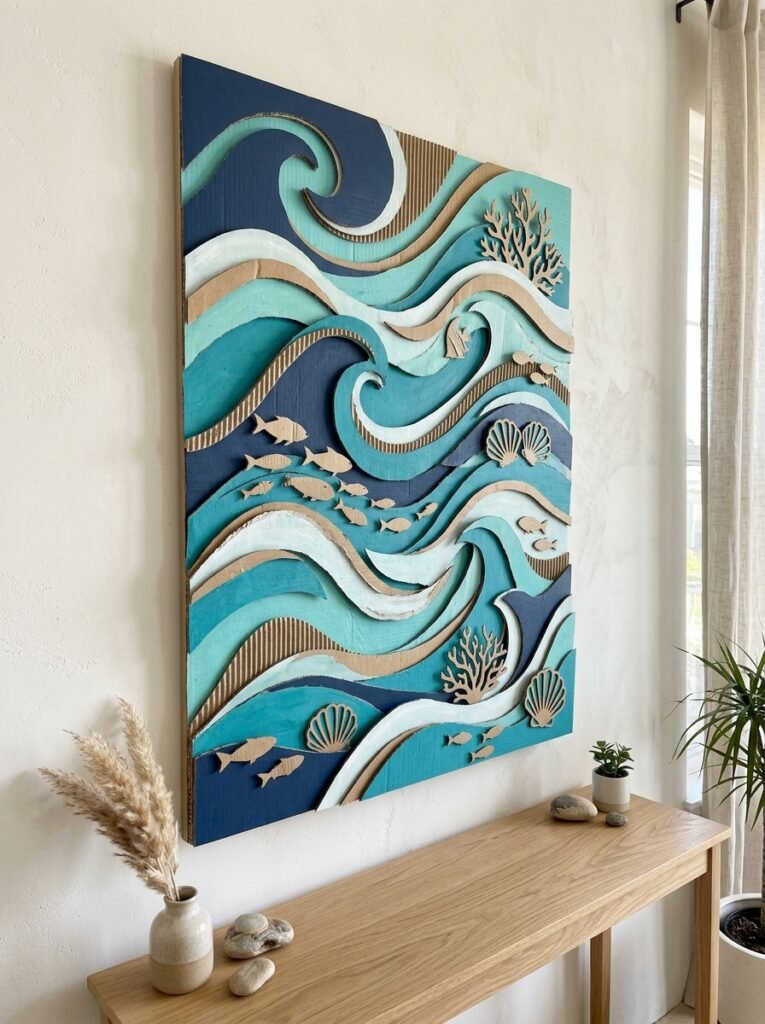
Bring a peaceful coastal feeling into your home with ocean-inspired cardboard art. Cut several wavy strips to represent ocean layers, then paint them in turquoise, deep blue, seafoam green, and white. Add small fish silhouettes, shells, or coral shapes made from cardboard to create extra detail. Overlapping the waves creates a layered underwater effect. This design works particularly well in a child’s bedroom, bathroom, study corner, or any space where you want fresh colors and a calming atmosphere.
11. Cardboard Music-Themed Wall Decor
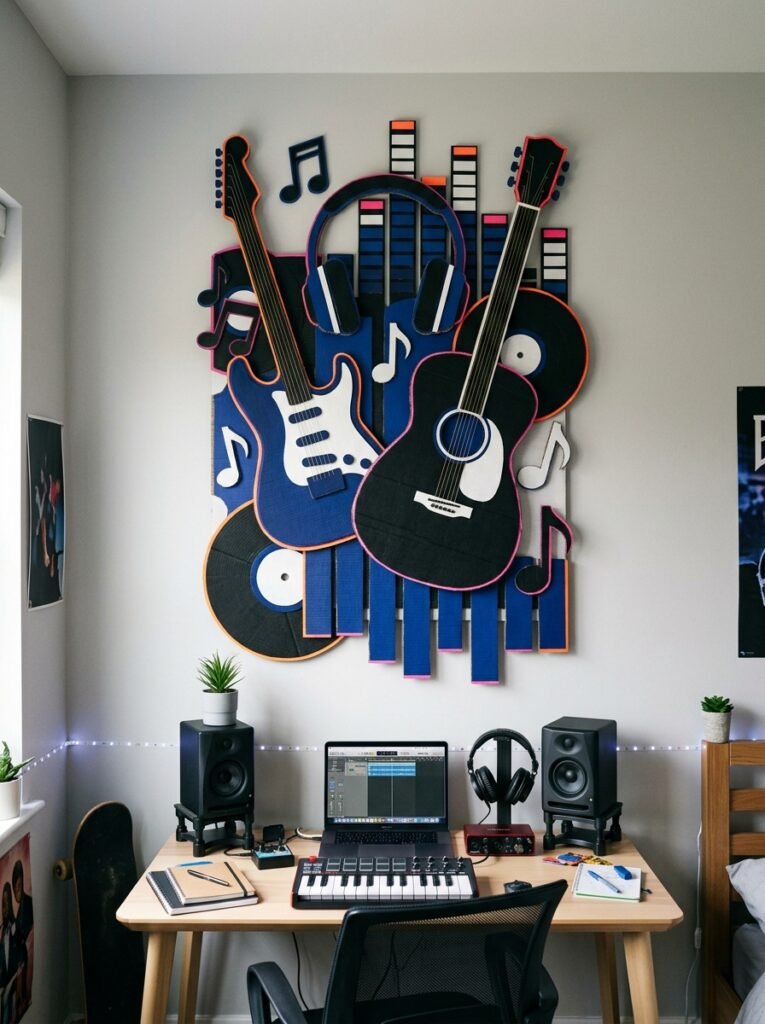
Music lovers can use cardboard to create wall decorations inspired by their favorite instruments and sounds. Cut out simple guitar silhouettes, musical notes, headphones, records, or equalizer bars. Arrange them around a central circular design or spread them across a desk wall. Paint the pieces in black, white, electric blue, or vibrant colors for a studio-inspired appearance. This is a fun decoration for a teenager’s bedroom, music practice area, or creative workspace.
12. Grunge-Inspired Cardboard Wall Art
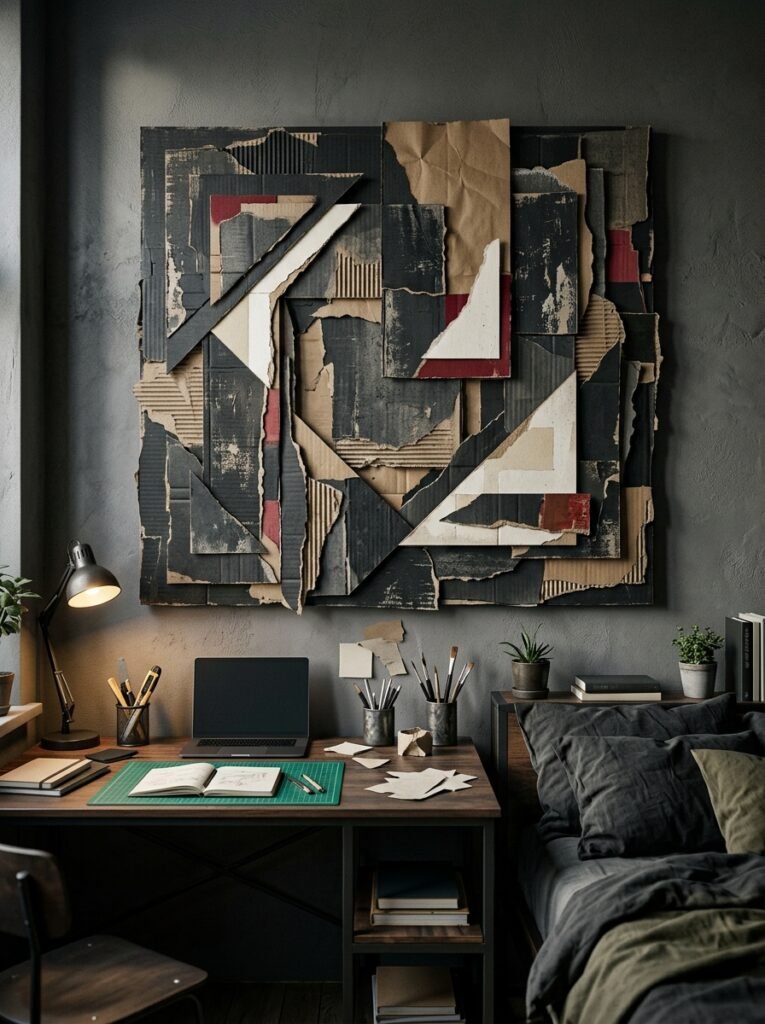
For a bold bedroom aesthetic, create grunge-inspired cardboard art with layered torn-paper effects, rough geometric shapes, distressed-looking paint, and high-contrast colors. Use black, gray, off-white, and small red accents to build a dramatic composition. You can combine abstract shapes with original handwritten-style marks drawn by hand, rather than copying existing band logos or artwork. Keep the arrangement intentional so it feels artistic instead of messy. This project is ideal for a personal study corner or a creative teen room.
13. Anime-Inspired Cardboard Wall Decor
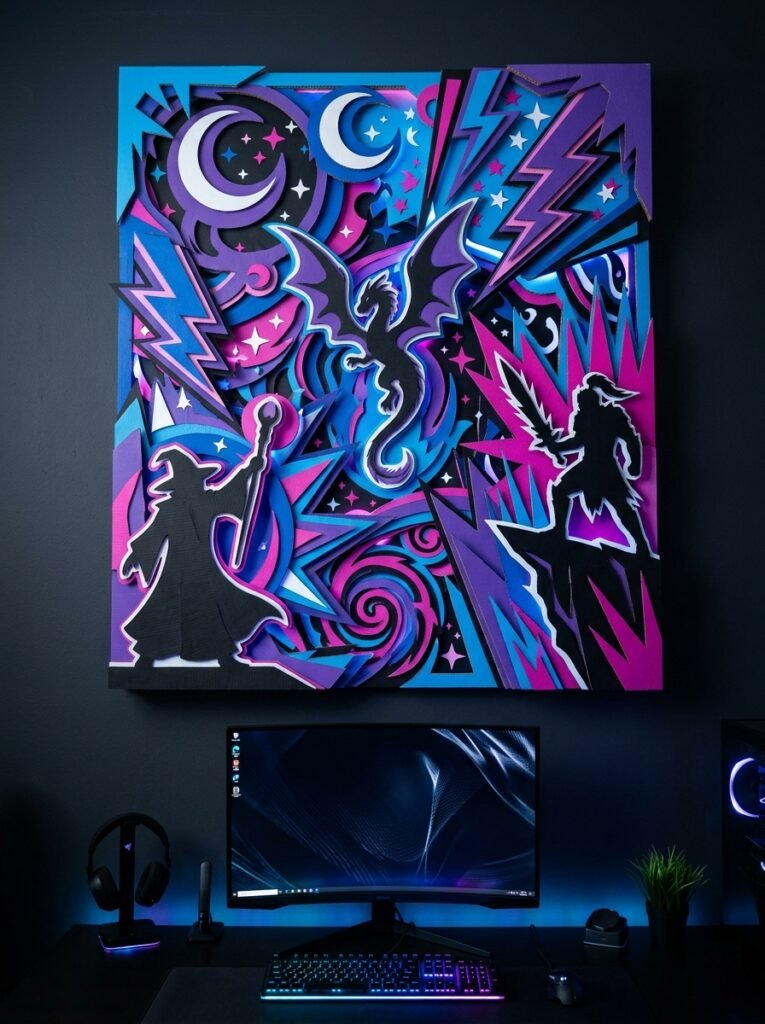
Create a colorful wall display inspired by anime aesthetics without needing complicated materials. Cut cardboard into stars, lightning shapes, dramatic panels, moons, and speech-bubble-inspired silhouettes. Add original character-inspired colors or draw your own simple fantasy figures on separate paper pieces and attach them to the backing. Use bold contrasts such as black and purple, pink and blue, or red and white. This approach allows you to personalize a bedroom with an energetic, fandom-inspired style while keeping the artwork original.
14. Cardboard Diwali Wall Decoration
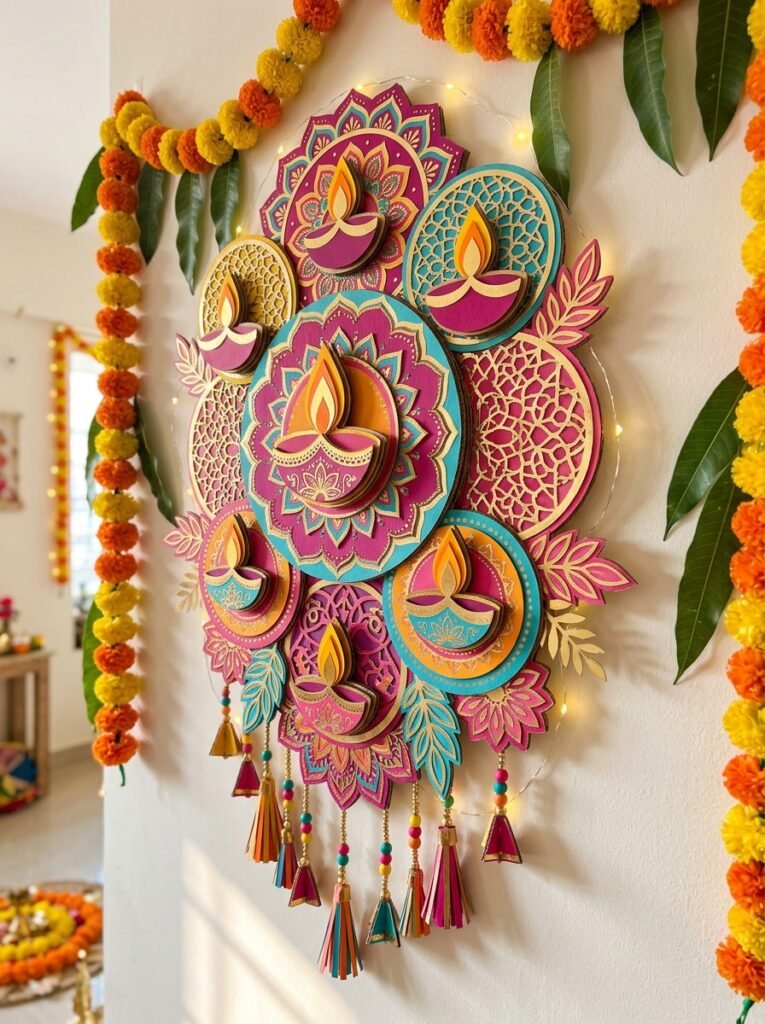
Handmade cardboard decorations can add a personal touch to Diwali celebrations. Create layered diyas, circular mandala-inspired patterns, decorative leaves, and floral shapes from cardboard. Paint them in bright colors such as magenta, saffron, turquoise, pink, and gold. Arrange the pieces on a wall near your celebration area or use them as part of a festive display. You can add paper details to create a richer appearance. Keep cardboard away from real flames, candles, and hot oil lamps; use LED lights for a safer decorative setup.
15. Ganpati-Inspired Cardboard Decoration
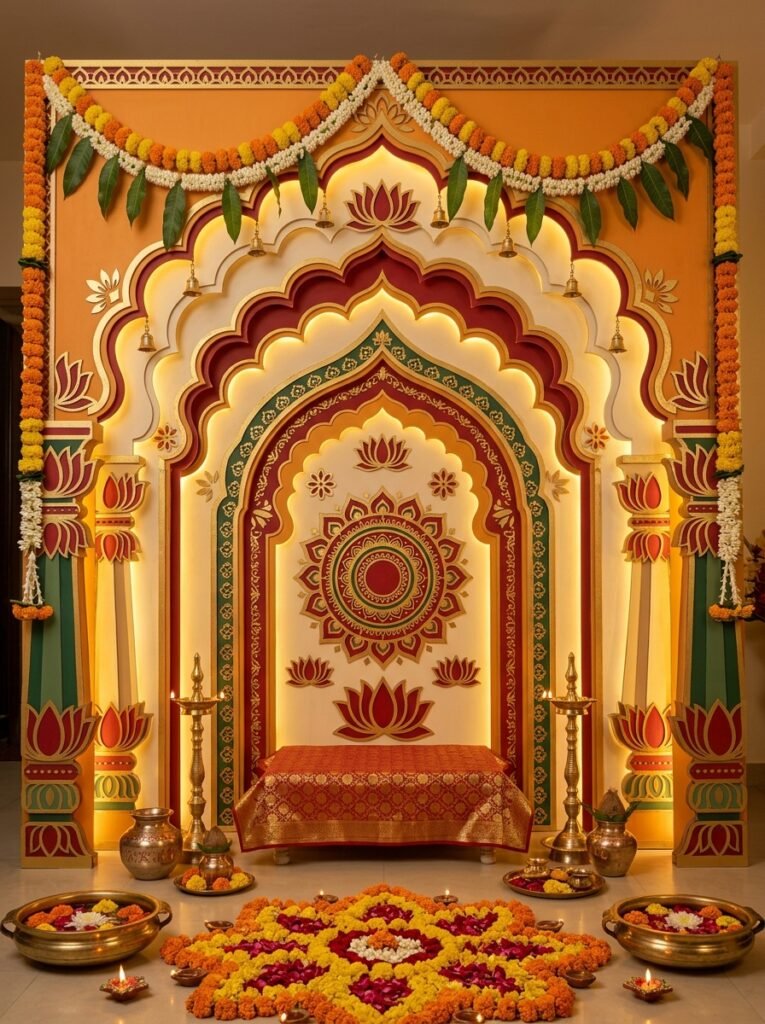
For Ganpati celebrations, create a decorative backdrop using layered arches, floral patterns, lotus-inspired shapes, and symmetrical cardboard motifs. Choose a respectful color palette such as saffron, red, gold, ivory, and green. You can use the shapes to frame a clean, dedicated prayer or celebration area. If including a depiction of Lord Ganesha, keep it respectful and thoughtfully placed, with the artwork made from your own simple design. Use stable supports and LED lighting, and keep all cardboard away from open flames.
16. Christmas Cardboard Wall Decorations
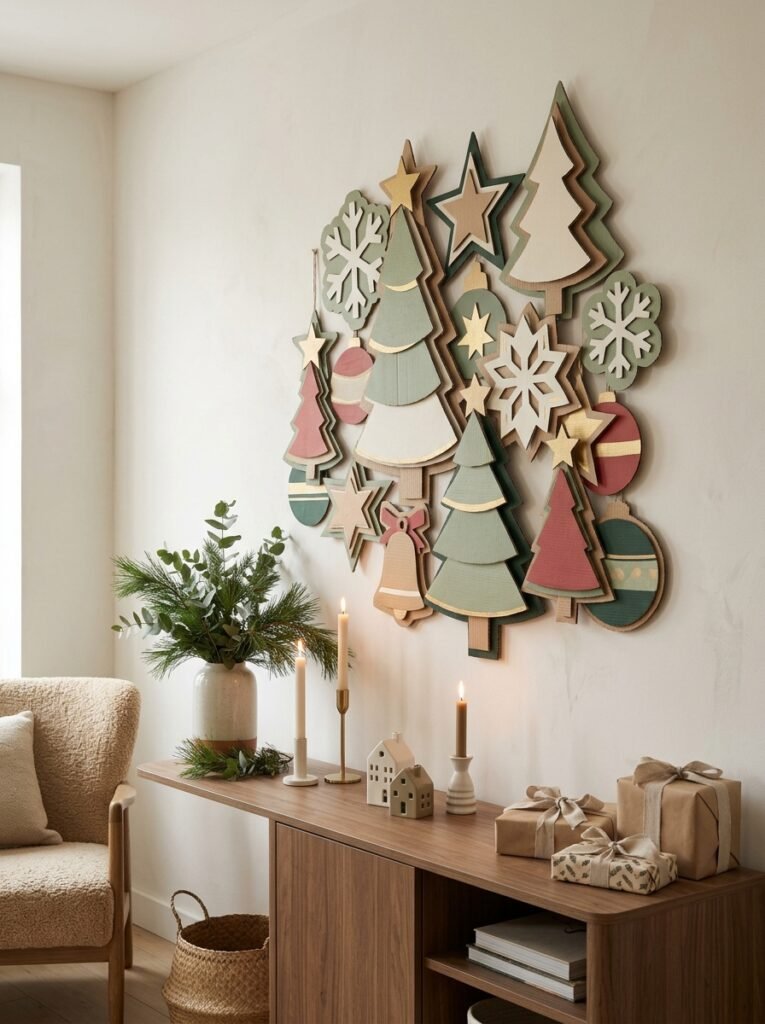
Christmas is a wonderful opportunity to turn leftover cardboard into festive decorations. Cut out Christmas trees, stars, snowflakes, bells, and ornaments, then layer them to create a dimensional wall display. Paint the shapes green, white, red, and gold, or choose a modern combination of sage green and cream. Arrange the pieces around a central tree shape or create a small festive gallery wall. These lightweight decorations are easy to store after the holiday season and can be reused next year.
17. Cardboard Butterfly Wall Art
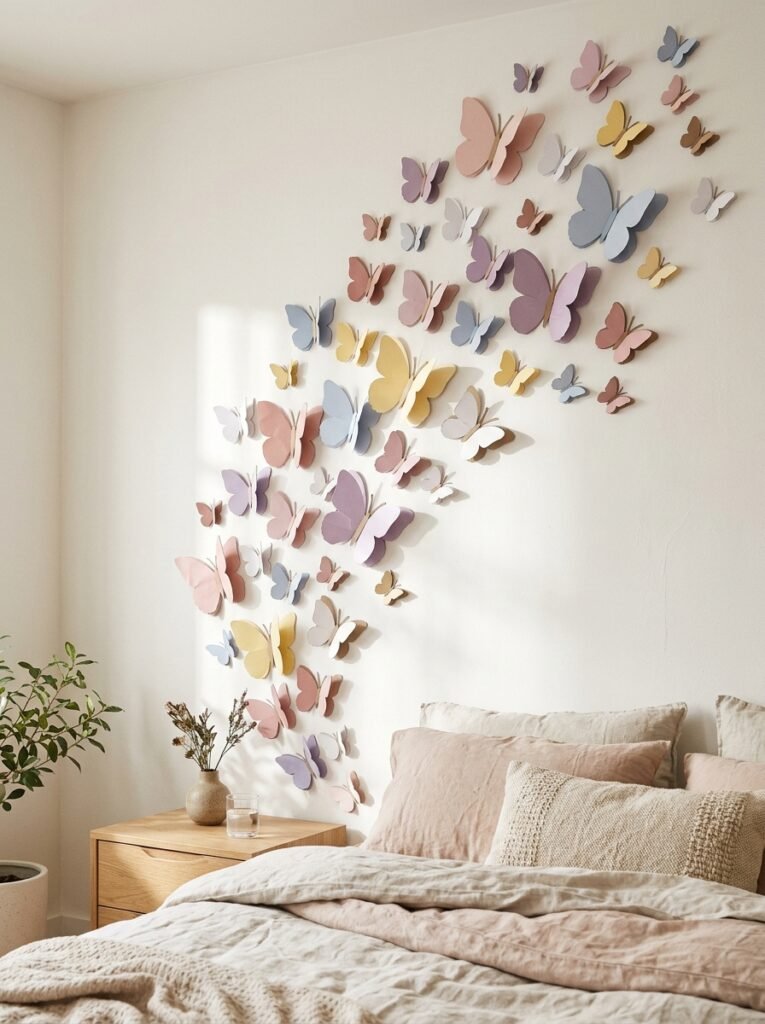
Butterfly wall art adds a light, playful feeling to bedrooms, nurseries, and craft corners. Cut butterflies in several sizes, fold their wings slightly, and attach small cardboard bodies to create a raised effect. You can arrange them as if they are flying upward from one corner of the wall. Choose a monochromatic palette for an elegant look or use pink, lilac, yellow, and blue for a cheerful display. The arrangement can be expanded easily whenever you want to add more decoration.
18. Cardboard Photo Collage for Your Room
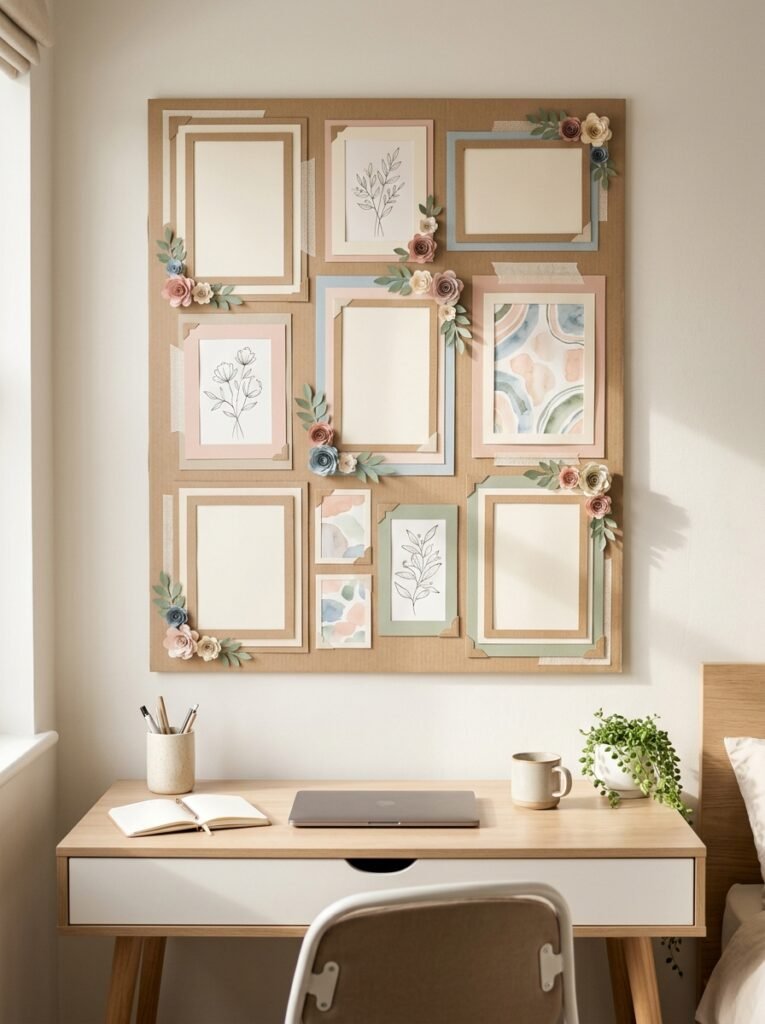
A handmade cardboard photo collage helps turn personal memories into decorative wall art. Create a large backing panel and divide it into smaller spaces for printed photos, original drawings, mini paper flowers, and decorative shapes. Use matching borders or a consistent color scheme so the display looks organized. You can create a square collage above your desk or a vertical arrangement beside your bed. Leave a few empty spaces so you can add new memories and artwork later.
19. Cardboard Wall Clock Decoration
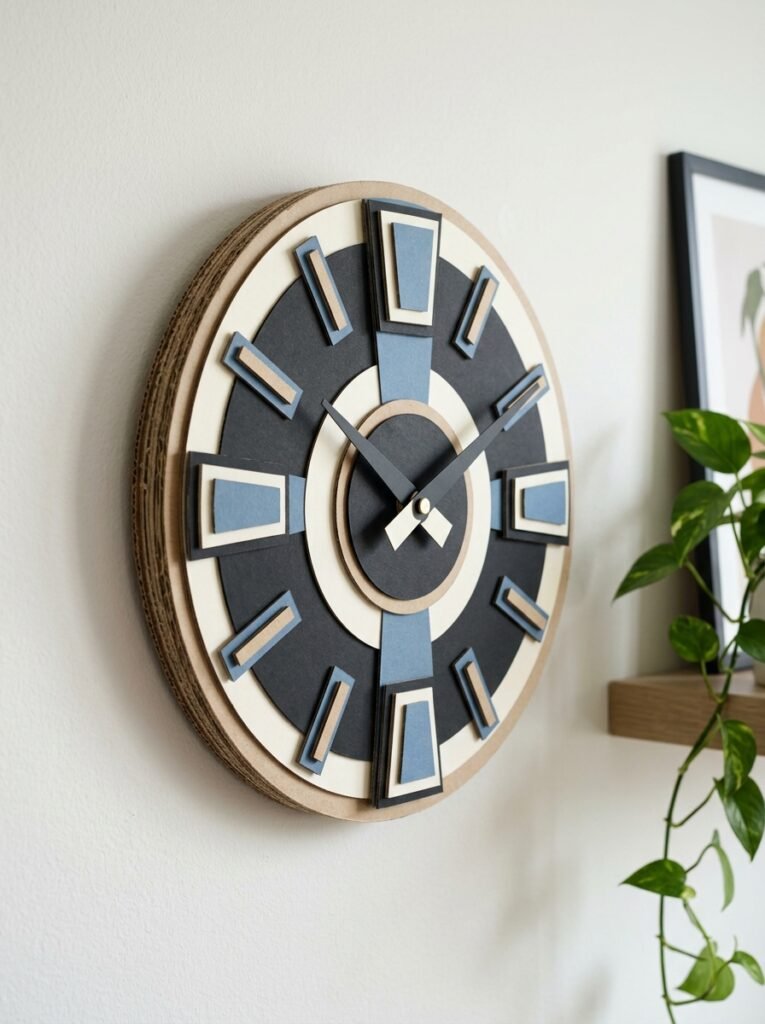
A decorative cardboard clock can become a creative focal point in a living room, bedroom, or study. Cut a large circular base and add layered geometric markers, raised numbers, or simple decorative shapes around the edge. Paint the design to match your room, using black and white for a modern look or blue and cream for a softer finish. If you want a functional clock, install a suitable clock mechanism securely through the center. Test the hands for free movement before hanging it.
20. Cardboard Table Centerpiece
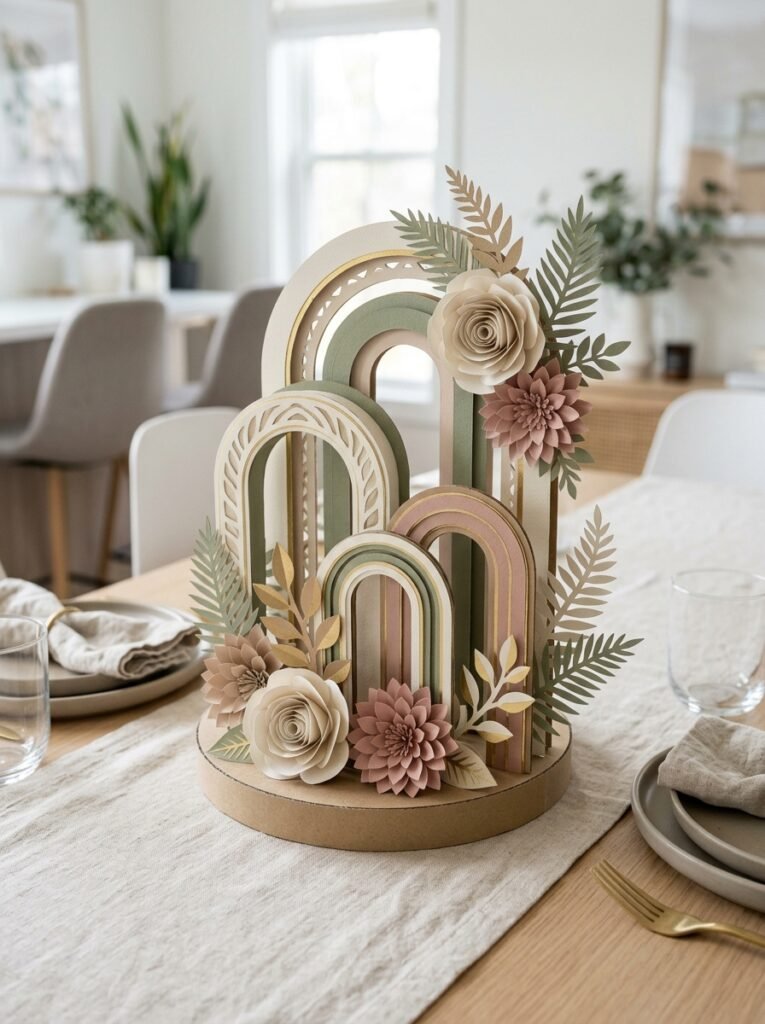
Cardboard is useful for creating lightweight centerpieces for dining tables, coffee tables, or celebration tables. Build a low circular or rectangular base, then add layered flowers, abstract arches, decorative leaves, or sculptural shapes. Paint everything in a coordinated palette so the centerpiece feels intentional. For a festive occasion, you can add paper ornaments and LED tea lights placed safely away from the cardboard. Keep the design low enough that people can see across the table comfortably.
21. Cardboard Classroom Wall Display
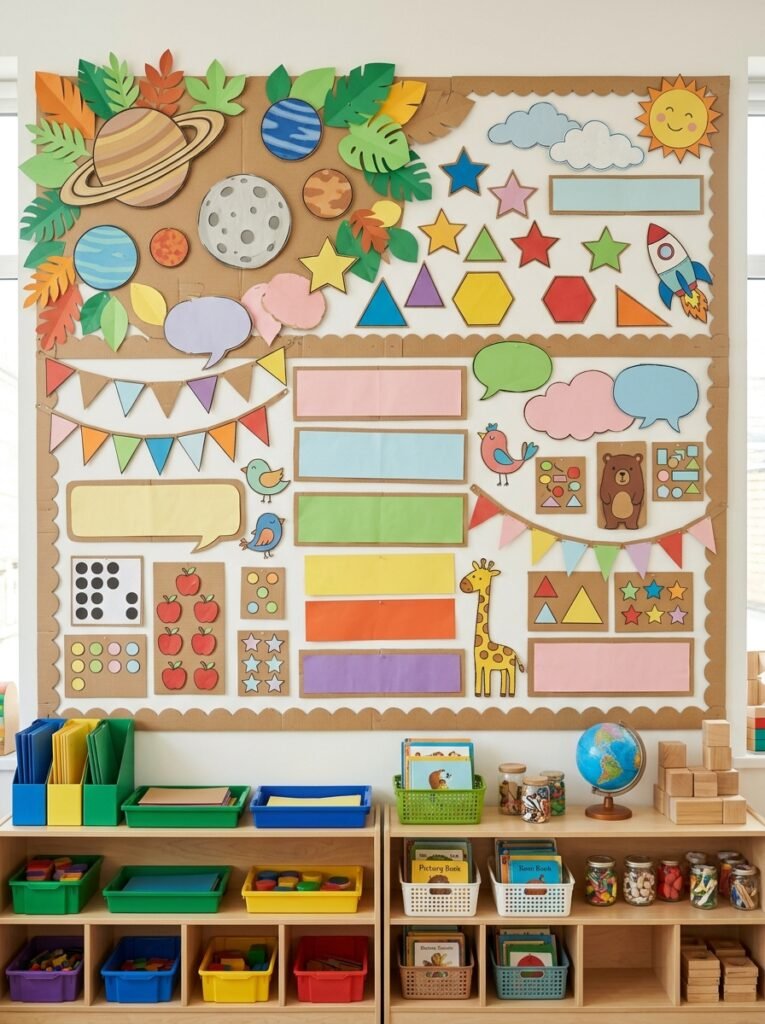
Teachers and students can use cardboard to create colorful classroom decorations that support learning. Cut out letters, numbers, shapes, planets, leaves, or themed icons and arrange them on a large backing panel. Color-code the sections to make the display visually clear and easy for children to follow. You can also make a seasonal board for science, reading, art, or classroom celebrations. Keep small detachable pieces out of reach of very young children, and have adults supervise cutting and assembly.
22. Cardboard Room Nameplate and Door Decor
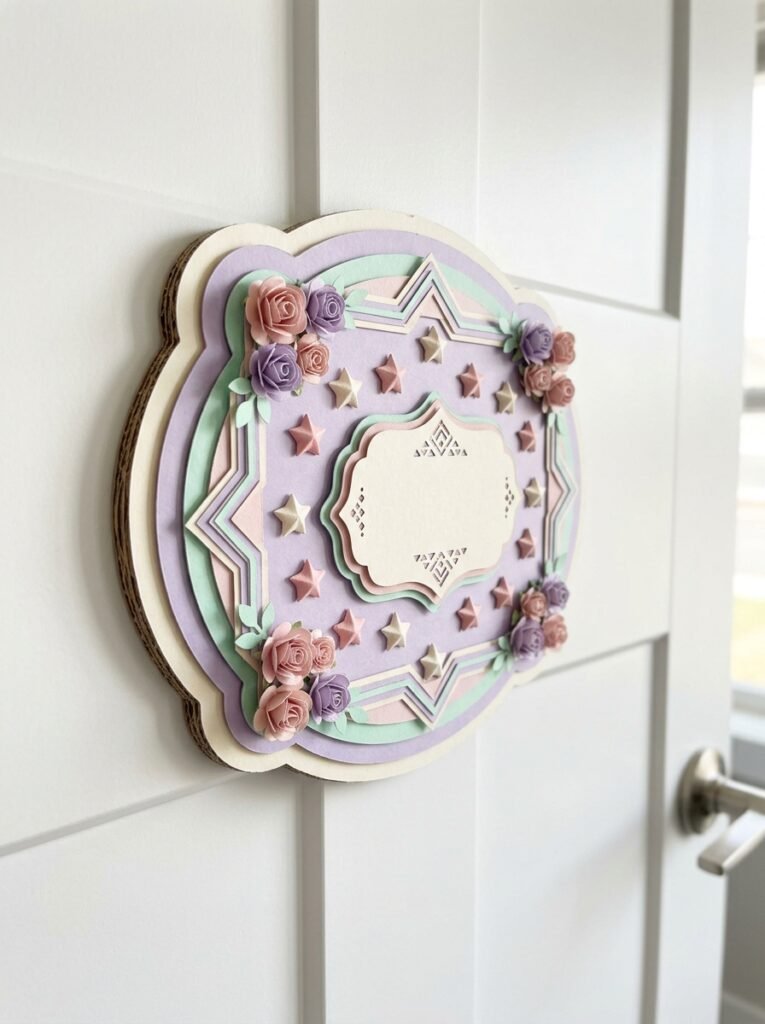
A personalized cardboard nameplate can make a bedroom or study area feel more welcoming. Cut a rectangular, circular, or cloud-shaped base, then decorate it with raised borders, flowers, stars, geometric patterns, or favorite colors. Add a name or room label using hand-drawn letters or separate paper lettering. You can also make a door decoration for a shared bedroom or craft corner. Seal the finished piece with an appropriate clear craft coating if needed, and hang it securely without damaging the door.
23. Cardboard Decorative Storage Boxes
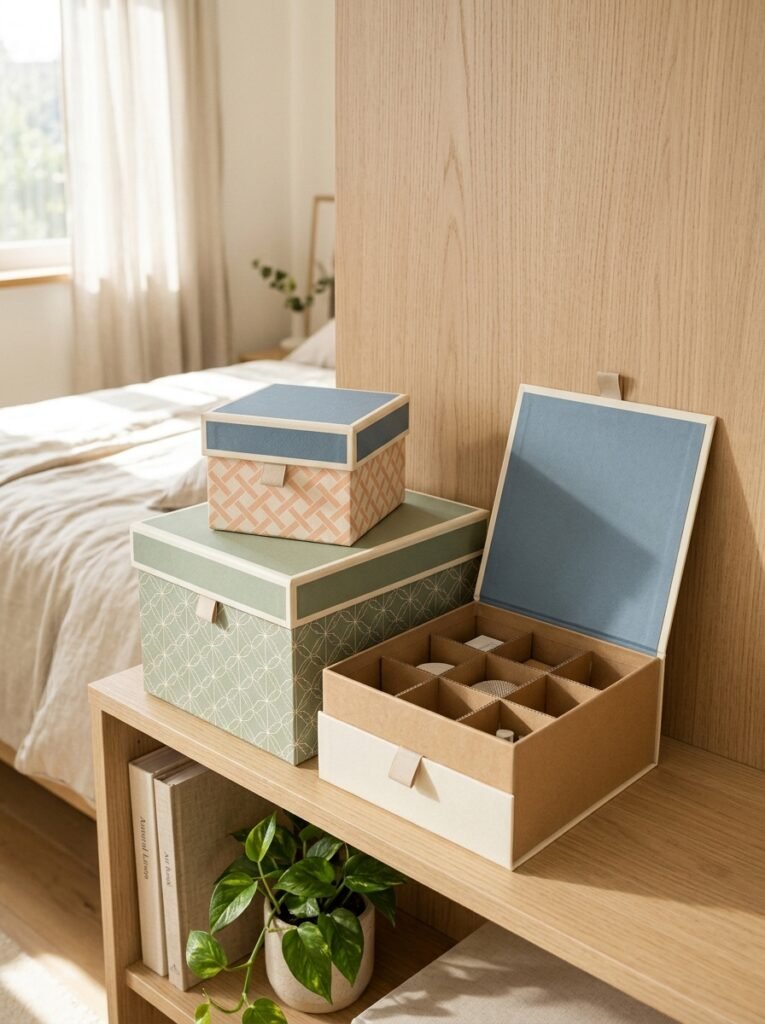
Decorative storage boxes combine beauty with everyday usefulness. Reuse sturdy cardboard boxes, reinforce their corners, and cover them with patterned paper, fabric scraps, or neatly painted designs. Add cardboard dividers inside for organizing stationery, craft supplies, accessories, or small household items. Create matching boxes in different sizes to keep a shelf looking coordinated. This project is especially useful for small rooms where storage needs to look attractive rather than cluttered.
24. Cardboard Mirror Frame Decoration
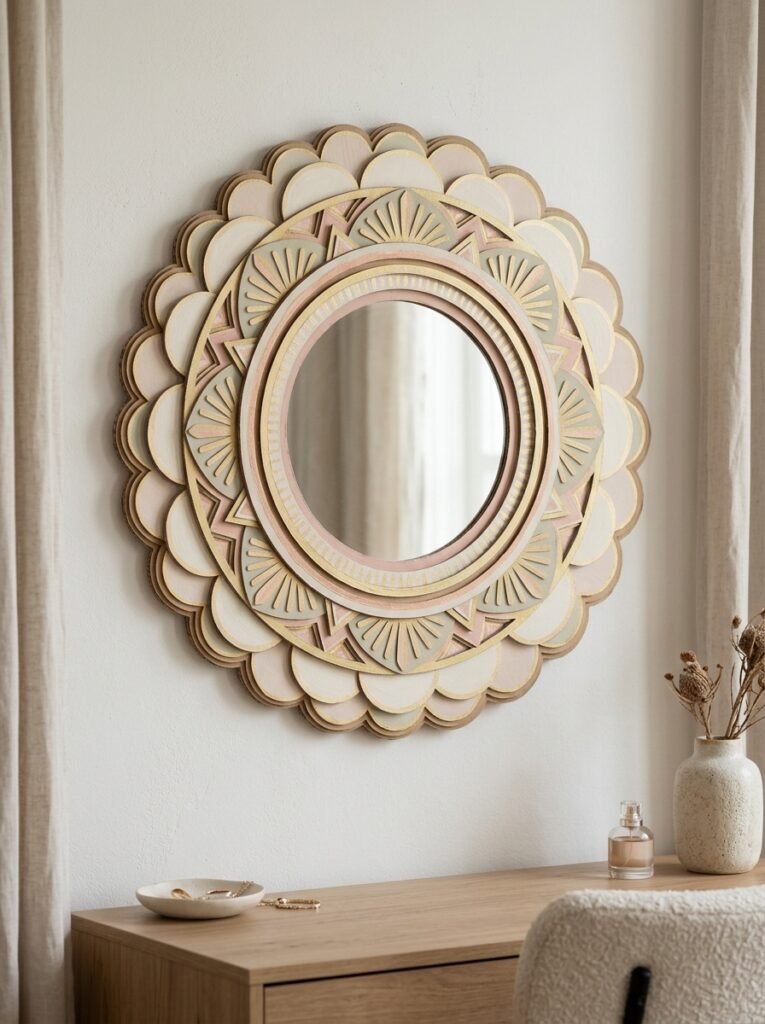
A decorative cardboard mirror frame can transform a plain mirror into a statement accessory. Cut repeated petals, circles, arches, or geometric pieces and attach them around a suitable mirror backing. Layer the pieces to create a sunburst or floral effect, then paint the frame in white, gold, pastel colors, or a bold accent shade. Make sure the mirror itself is securely supported and that the cardboard frame does not interfere with its mounting. Keep the finished piece away from damp areas that could weaken the cardboard.
25. Cardboard 3D Wall Sculpture
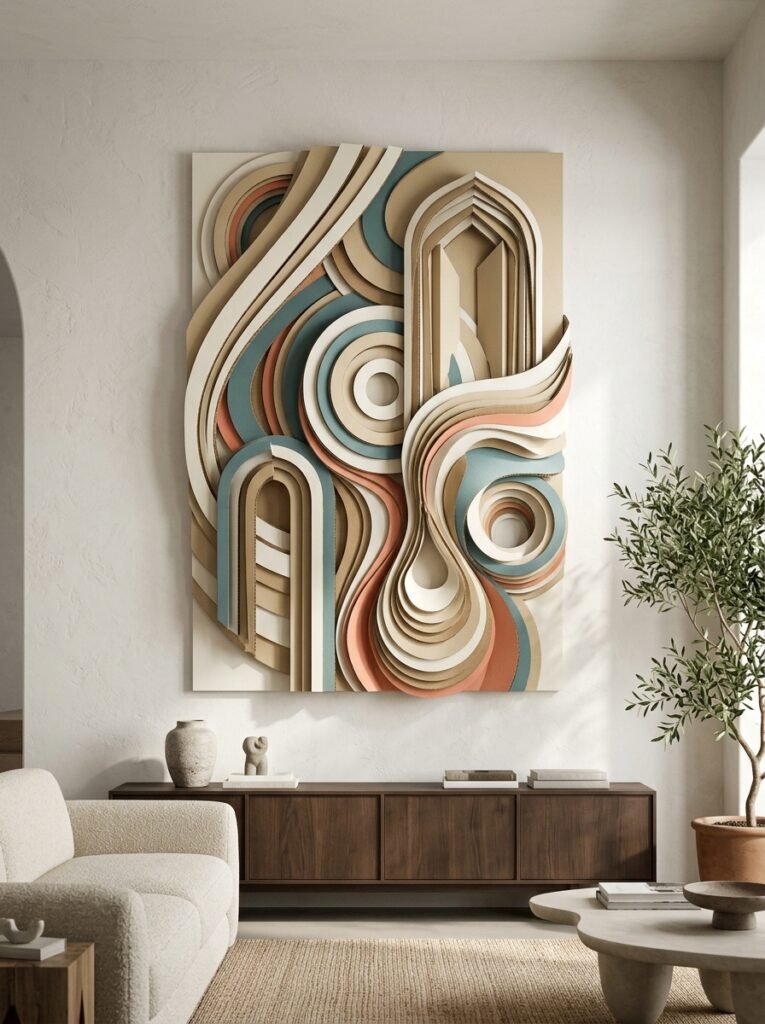
For a more artistic project, create a three-dimensional wall sculpture using multiple cardboard layers. Cut curved strips, rings, arches, and folded shapes, then arrange them at different heights on a sturdy backing board. Use a limited palette such as white and beige for a minimalist effect, or combine blue, green, and coral for a more expressive piece. The overlapping layers create interesting shadows that change throughout the day. This is a striking choice for a living room, hallway, or home office feature wall.
How to Make Cardboard Crafts Decoration Step by Step
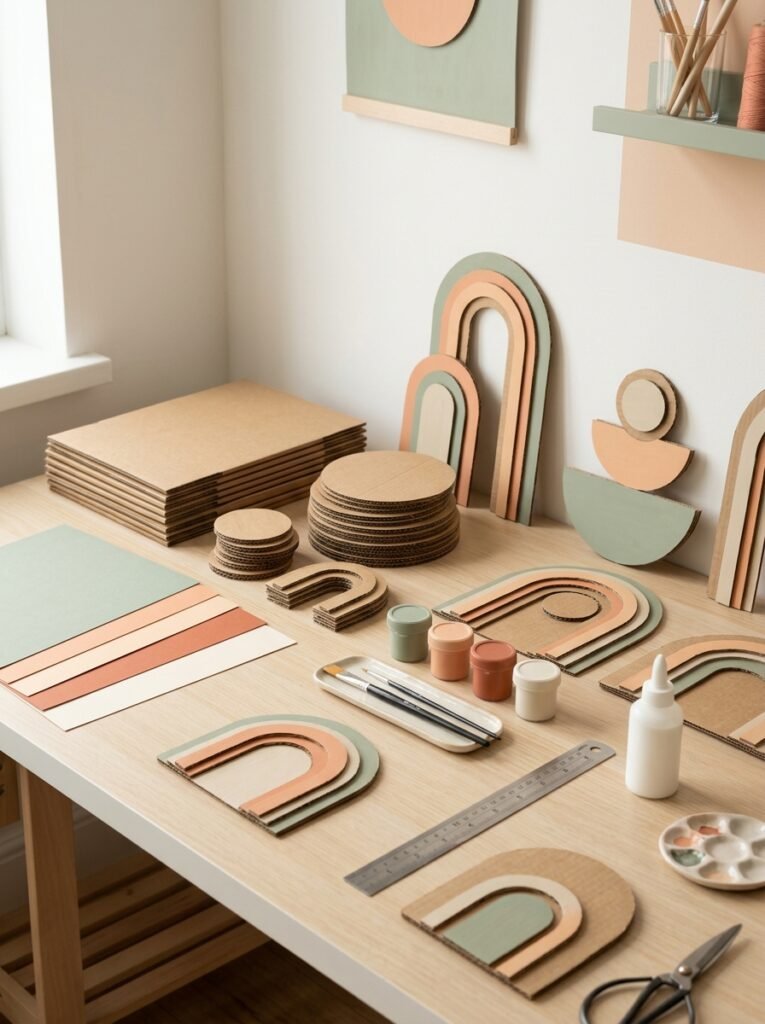
You can use this simple process for most cardboard wall art, room decorations, table accessories, and handmade ornaments. Start with a design that matches your space, then build it gradually instead of cutting all the pieces at once.
Step 1: Choose Your Design
Decide whether you want wall art, a hanging ornament, a decorative shelf, a table centerpiece, or seasonal decor. Sketch the design on paper first. Think about the available space, preferred colors, and whether the decoration needs to be purely decorative or functional.
Step 2: Gather Your Materials
Collect clean cardboard boxes, a pencil, ruler, scissors, suitable craft glue, paint, brushes, and colored paper. A craft knife can help with precise cuts, but an adult should handle it. Choose cardboard that is thick enough to support the shape you want to make.
Step 3: Draw and Cut the Shapes
Trace your design onto the cardboard before cutting. For matching pieces, use one finished shape as a template. Keep your cuts controlled and work on a safe cutting surface. If you are making layered artwork, prepare the larger backing piece first and then cut the smaller decorative elements.
Step 4: Assemble the Layers
Arrange the pieces without glue first so you can check spacing and balance. Glue the layers together gradually, pressing each piece firmly and allowing it to dry. For a shelf or a structure that needs to stand, reinforce joints and corners with additional cardboard supports.
Step 5: Paint and Decorate
Apply paint in thin, even coats and allow each coat to dry before adding another. You can use colored paper, folded paper shapes, or small cardboard accents to add detail. Keep the color palette coordinated so the finished project looks intentional and polished.
Step 6: Display Your Finished Decoration
Place your completed artwork on a suitable wall, shelf, desk, or table. Use secure mounting hardware appropriate for the wall and the item’s weight. Avoid placing cardboard near water, high humidity, heaters, or open flames. If your project is intended for a celebration, LED lights are a safer option than real candles.
Helpful Tips for Better Cardboard Decorations
- Choose the right thickness: Use sturdy corrugated cardboard for larger backing panels and lightweight cardboard for small decorative details.
- Plan your colors: Select two to four coordinating shades before painting. This helps your wall art and room decor look professionally styled.
- Create depth: Layer shapes at different heights to make simple designs more interesting through shadows and texture.
- Keep edges neat: Use a ruler for straight lines and templates for repeated shapes. Cover rough edges with paint or decorative paper where appropriate.
- Reinforce functional pieces: Shelves, clock frames, and standing decorations may need extra layers and internal supports. Do not use cardboard for heavy loads.
- Match your room: Consider the colors of your walls, furniture, bedding, and existing accessories before choosing a design.
- Make seasonal decorations reusable: Store Diwali, Ganpati, and Christmas decorations in a dry place after each celebration.
- Work safely: Keep sharp cutting tools and hot glue away from children. Supervise younger crafters and keep small pieces away from toddlers.
Final Thoughts
You do not need expensive supplies to make your home feel more personal and creative. With a little planning, recycled cardboard can become geometric wall art, layered flowers, decorative frames, colorful classroom displays, attractive storage boxes, and festive ornaments. The best cardboard crafts decoration projects are the ones that fit your room, reflect your personality, and are enjoyable to create. Start with one simple design, experiment with colors and layers, and gradually build a coordinated collection of handmade decor. Whether you prefer a clean minimalist look, bold grunge-inspired art, ocean colors, or festive Diwali and Christmas decorations, cardboard gives you plenty of room to express your creativity.