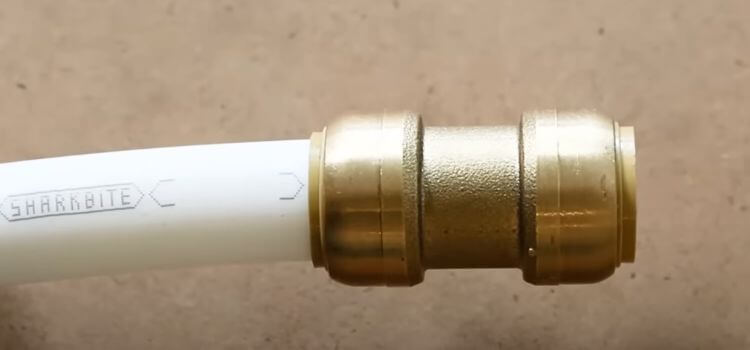
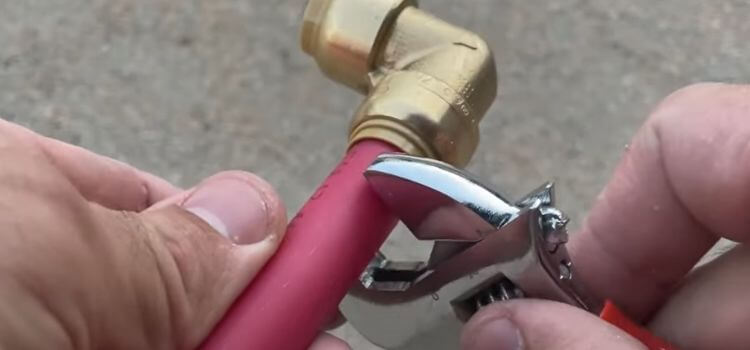
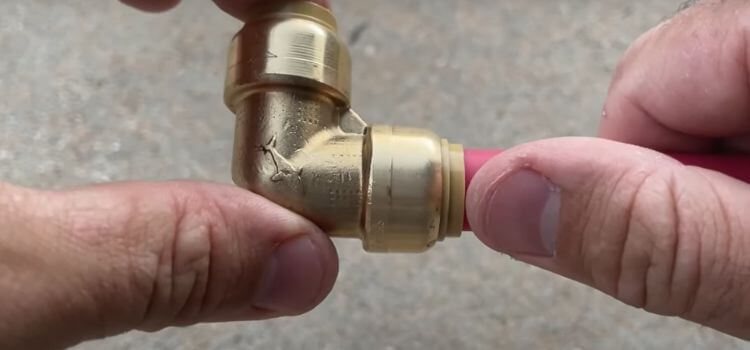
To remove PEX pipe from a SharkBite fitting, use a SharkBite disconnection clip or tongs. Just a simple way Slide the tool and pull the pipe out.
Removing PEX pipe from SharkBite fittings is a straightforward task. SharkBite fittings are designed for quick and secure connections, often used in plumbing projects. Sometimes, you may need to disconnect the pipe for repairs or modifications. Using a SharkBite disconnect clip or tongs simplifies this process, allowing you to detach the PEX pipe without any hassle.
Eventually I have figured out the steps to ensure a smooth and efficient removal. Remember to have the right tools on hand to make the job easier and prevent any potential damage to your plumbing system.
Sharkbite Fittings
SharkBite fittings are popular in plumbing for their ease of use and versatility. These fittings allow for quick connections without the need for soldering, clamps, or glue. They work by using a push-to-connect mechanism, making them ideal for both professional plumbers and DIY enthusiasts.

The fittings are compatible with various types of pipes, including PEX, copper, CPVC, PE-RT, and HDPE. The stainless steel teeth inside the fitting grip the pipe securely, while an O-ring creates a watertight seal.
Tools Needed
To successfully remove a Pex pipe from a Sharkbite fitting, gather the necessary tools and materials beforehand. Below is a list of tools you will need:
- Disconnect Clip or Disconnect Tongs: These tools are designed to release the Sharkbite fitting. They are affordable and easy to use.
- Pex Cutter: A cutter will help you cut the Pex pipe cleanly.
- Deburring Tool: This tool is used to smooth the edges of the pipe after cutting.
- Bucket: To catch any water that might spill during the process.
- Safety Glasses: Protect your eyes from any debris or water splashes.
- Gloves: Wear gloves to protect your hands from sharp edges or hot water.
- Protective Clothing: Wear long sleeves and pants to protect your skin.
Step-by-Step Pex Pipe Removal Process From Sharkbite Fitting
PEX pipes are popular for plumbing due to their flexibility and durability. Sharkbite fittings are used to connect these pipes easily. But sometimes, you may need to remove a PEX pipe from a Sharkbite fitting. This guide provides a step-by-step process for this task.
Step 1. Safety First
Safety is always important. Before starting, ensure you have all the necessary tools. Wear protective gloves to safeguard your hands. Use safety goggles to protect your eyes from debris.
- Turn off the main water supply.
- Drain the water from the pipes.
- Ensure the area is dry and well-lit.
These steps will help you avoid accidents and injuries. Always work in a safe environment. Keep your tools organized and within reach.
Step 2. Identify The Release Collar
The release collar is a small part of the Sharkbite fitting. It helps in disconnecting the PEX pipe. Look for a ring near the end of the fitting. This is the release collar.
Check the collar for any damage before proceeding. A damaged collar may make the removal process difficult. Make sure you can easily access the collar with your tool.
- Locate the release collar on the fitting.
- Ensure it is not damaged.
- Prepare to use the disconnect tool.
Step 3. Insert The Disconnect Tool
The disconnect tool is essential for this task. It is a small, circular tool that fits around the pipe. Place the tool around the pipe, near the release collar.
Slide the tool towards the fitting until it touches the collar. Ensure the tool is properly aligned with the collar. This will help in an easy disconnection.
- Place the disconnect tool around the pipe.
- Slide it towards the release collar.
- Ensure proper alignment for smooth operation.
Press And Hold
Pressing the disconnect tool is the next step. Apply firm pressure on the tool. This will compress the release collar.
Hold the tool tightly while pressing. The pressure will release the grip on the PEX pipe. This step is crucial for a successful removal.
- Apply firm pressure on the disconnect tool.
- Hold the tool tightly.
- Ensure the release collar is compressed.
Pull The Fitting Away
With the release collar compressed, you can now remove the fitting. Use your other hand to pull the fitting away from the pipe. Do this gently to avoid damaging the pipe.

Pull slowly to ensure a clean removal. The fitting should slide off the pipe easily. If it does not, check the release collar again.
- Use one hand to pull the fitting.
- Do this gently to avoid damage.
- Ensure the fitting slides off easily.
Remove The Release Tool
Once the fitting is off, remove the disconnect tool. Slide it away from the release collar. This step is simple but important.
Keep the tool for future use. It is reusable and handy for other fittings. Store it in a safe place.
- Slide the disconnect tool away.
- Store the tool safely.
- Keep it for future use.
Inspect The Pex Pipe
Finally, inspect the PEX pipe for any damage. Check for scratches or cracks. These can affect the pipe’s performance. Inspect the end of the pipe where the fitting was attached. Ensure it is clean and smooth. If you find any damage, consider replacing the pipe.
- Check the pipe for scratches or cracks.
- Ensure the end is clean and smooth.
- Replace the pipe if necessary.
I followed these steps above and successfully to remove PEX pipe from sharkbite fitting.
Read Also: When to Remove Plastic Insert in Sharkbite Fittings?
Reinstalling A Sharkbite Fitting
Removing a PEX pipe from a SharkBite fitting can seem tricky, but it’s quite simple. SharkBite fittings are designed for ease of use and flexibility. These fittings allow for a quick, secure connection without tools. After removing the pipe, reinstalling it is just as straightforward. With the right steps, anyone can do it.

Choosing The Right Fitting
Choosing the right fitting is crucial for a successful PEX pipe connection. SharkBite fittings come in various types and sizes. Knowing which one to use is vital. First, measure the diameter of your PEX pipe. This ensures you select the correct fitting size.
Consider the following factors when selecting a fitting:
- Pipe Diameter: Ensure the fitting matches the pipe size.
- Material Compatibility: SharkBite fittings work with PEX, copper, and CPVC pipes.
- Type of Fitting: Choose between couplings, elbows, tees, etc.
- Pressure Rating: Check if the fitting can handle your system’s pressure.
Using the right fitting ensures a leak-free connection and long-lasting performance.
Proper Connection Steps
Proper connection steps are essential for a reliable PEX pipe installation. Follow these steps for a secure connection:
- Cut the PEX pipe to the desired length. Use a PEX pipe cutter for a clean cut.
- Deburr the pipe end to remove any rough edges.
- Mark the pipe at the insertion depth using a marker. This helps ensure the pipe is fully inserted.
- Push the pipe into the SharkBite fitting. Insert it until it reaches the mark made earlier.
- Check the connection by pulling on the pipe gently. It should not come out easily.
These steps guarantee a strong and durable connection. Regular checks and maintenance can prolong the system’s life. Always ensure the pipe is clean and free from debris before connecting.

FAQ
What Are The Advantages Of Using Sharkbite Fittings?
SharkBite fittings offer several advantages, including ease of installation, versatility, and reusability. They can be quickly installed without the need for special tools, making them ideal for both professional plumbers and DIY enthusiasts.
Can I Reuse A Sharkbite Fitting After Removal?
Yes, SharkBite fittings can be reused after removal, provided they are in good condition. To reuse a fitting, ensure that the O-ring is intact and free from damage or debris.
How Do I Install Pex Pipe With Sharkbite Fittings?
Installing PEX pipe with SharkBite fittings is a straightforward process. First, cut the PEX pipe to the desired length using a pipe cutter, ensuring that the cut is straight and clean. Next, insert the pipe into the SharkBite fitting, pushing it firmly until it reaches the depth mark on the fitting. It is advisable to give the pipe a slight twist to ensure a secure fit. Finally, check for leaks by turning on the water supply and inspecting the connection. If there are no leaks, the installation is complete.
Are Sharkbite Fittings Suitable For Both Hot And Cold Water Applications?
Yes, SharkBite fittings are suitable for both hot and cold water applications. They are designed to withstand a wide range of temperatures and pressures, making them versatile for various plumbing systems.
Do Sharkbite Fittings Require Any Special Maintenance?
No special maintenance is required for SharkBite fittings, which is one of their many advantages. However, it is essential to periodically inspect the fittings for any signs of wear or damage, especially in high-pressure or high-temperature applications. If any issues are detected, the fittings should be replaced promptly to avoid leaks or plumbing failures. Regular checks can help ensure the longevity and reliability of the plumbing system.
Conclusion
Removing PEX pipe from a SharkBite fitting is straightforward with the right tools and steps. Always ensure you follow safety guidelines. Proper technique prevents damage and ensures a secure future connection. Practice these methods to maintain your plumbing system effectively.
Happy plumbing!
