





This post may contain affiliate links. Please read my disclosure policy.
In This Article Show
One big Santa on the mantel beats a dozen tiny decorations. A large crochet Santa is a statement piece, a weekend or two of happy stitching, and the kind of handmade figure families bring out every December for decades.
This guide is built around a single hero project: one big standing Santa, worked from the boots up with original pattern notes for the body, the beard, the hat and the toy sack. Around him sit nine more free crochet santa claus ideas, from a Mrs Claus partner to a chunky quick version and a Santa head ornament.
Every pattern note here is written fresh for this guide in plain words, so you can size the big Santa up or down by changing your yarn and hook. Work the body in firm rounds, stuff as you go, and add a weighted base or a little extra stuffing in the boots so a tall figure stands without leaning.
One safety note before you start: plastic safety eyes are not suitable for children under three, who can worry them loose. For a Santa destined for little hands, embroider the eyes with yarn instead, and sew every small part on with extra passes of thread.
Quick Picks
- The hero project: The Big Standing Santa, idea 1
- Sweetest set: Santa and Mrs Claus Pair, idea 2
- Fastest finish: Santa Head Ornament, idea 10
1. The Big Standing Santa
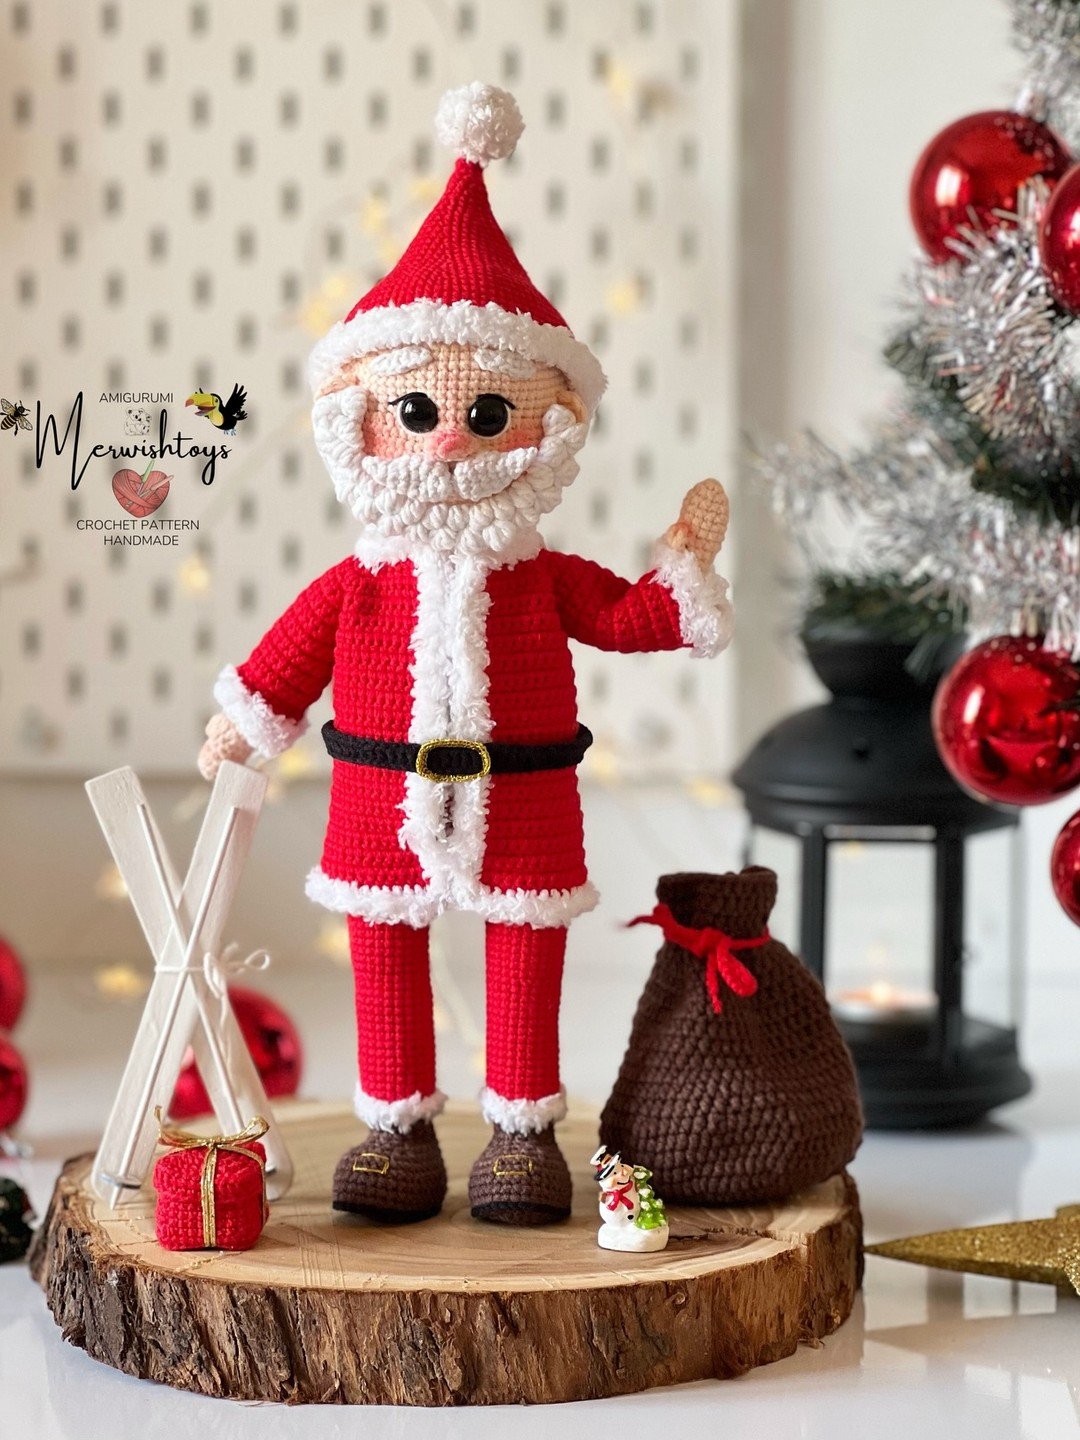
⏱ 2 weekends🛠 IntermediateYarn: Worsted acrylicSize: About 14 to 16 inches tall
Materials Needed
- Worsted acrylic yarn in red, white, skin tone, black and a touch of gold
- 3.5 mm crochet hook for firm stitches
- Fiber fill stuffing, about 200 g
- One pair of 12 mm safety eyes, or black yarn for embroidered eyes
- Yarn needle, scissors and stitch markers
- A flat circle of cardboard or plastic canvas for the base
Pattern Notes
Work from the boots up in continuous rounds of single crochet. Start each boot in black: a magic ring of 6, increase to 18, work 5 rounds, then shape a simple foot by working a few extra stitches at the front. Join the legs with a short chain bridge and continue into the body in red, increasing gently over 4 rounds to give Santa his round belly, then work even for about 14 rounds. Place the safety eyes before you close the head; a set like the Buylorco safety eyes and noses set gives you matching pairs for the whole season. Stuff the body firmly, add the cardboard circle inside the base so he stands flat, then work the head in skin tone as one piece with the body. The beard is a separate white piece: crochet a rounded triangle of rows, work a row of loop stitches or long strands along the top edge, and sew it under the nose. Finish with a red hat worked as a long cone with a white brim, a black belt with a gold buckle square, and two mitten arms sewn at a friendly angle. A softly flecked red such as Caron Speckle yarn in Lipstick gives the suit a warm, tweedy depth.
Tip: Weigh the base, not the belly. A tall Santa topples because the stuffing settles upward; pack the boots and lower body extra firmly, keep the head stuffing lighter, and he will stand straight all season.
2. Santa and Mrs Claus Pair

⏱ 2 to 3 weekends🛠 IntermediateYarn: DK or worstedSize: Matched pair, about 12 inches
Materials Needed
- Yarn in red, green, white, skin tone and black
- 3 mm or 3.5 mm crochet hook
- Fiber fill stuffing
- Two pairs of small safety eyes, or yarn for embroidery
- Tiny spectacles made from craft wire, optional
- Yarn needle and scissors
Pattern Notes
A pair doubles the charm, and the smart way to build it is to work both bodies from the same base notes so the heights match exactly. Santa follows the standing construction from idea 1, in overalls or a classic suit. Mrs Claus uses the same head and body, then swaps the trousers for a skirt: at the waist, work one round of increases into every stitch and continue in double crochet for a flared dress, edged with white. Her apron is a small white rectangle with a scalloped edge, tied at the back. A soft off white such as Caron Simply Soft Tweeds in Off White makes lovely aprons, bonnets and beard texture across both figures. Finish the pair with matching holly leaves, two tiny green leaf shapes with a red berry, pinned to his hat and her bonnet.
Tip: Make the heads on the same day with the same tension. Faces are where pairs stop matching; working them back to back keeps the stitch size, eye spacing and smile style identical.
3. Santa With His Toy Sack
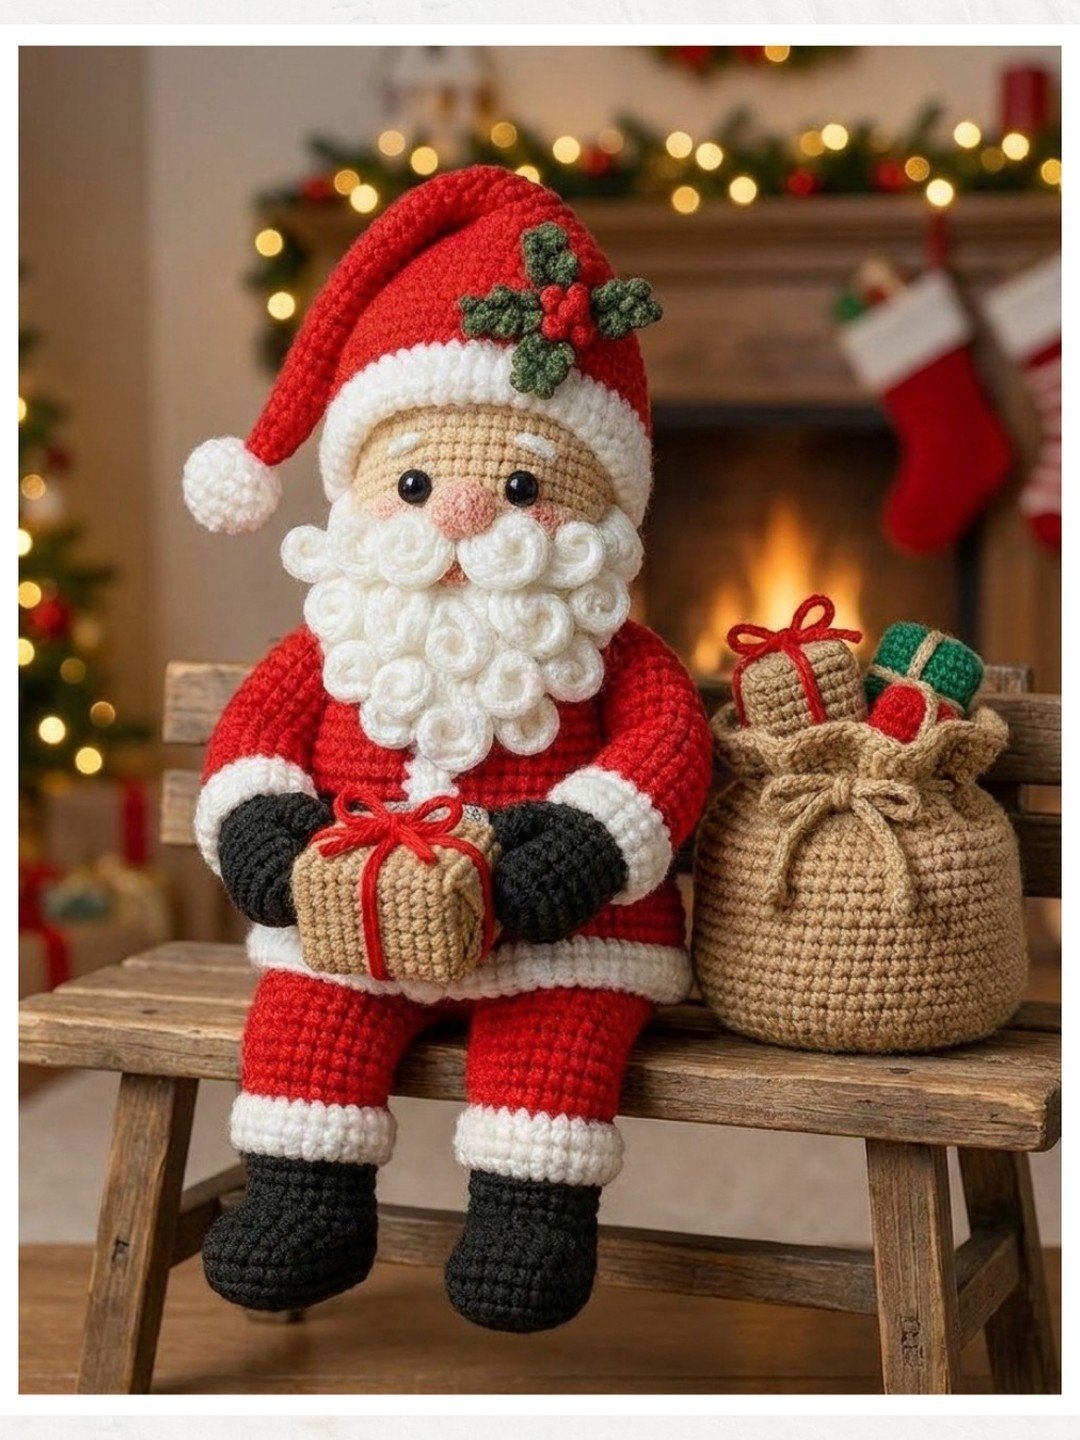
⏱ 2 weekends🛠 IntermediateYarn: Worsted acrylicSize: Seated figure, about 11 inches
Materials Needed
- Worsted yarn in red, white, skin tone, black and burlap brown
- 3.5 mm crochet hook
- Fiber fill stuffing
- Safety eyes or embroidery yarn
- Twine for the sack tie
- One or two tiny wrapped gift boxes for styling, optional
Pattern Notes
A seated Santa is easier to balance than a standing one, and the toy sack gives him his story. Work the body as a rounded cone in red, wider at the base, with the legs worked as two short tubes sewn on crossed or stretched out in front. The sack is a simple brown pouch: a circle base, even rounds upward, stuffed lightly so it slumps like real burlap, then gathered at the neck and tied with garden twine such as Nutscene green twine. Crochet one tiny gift box in green with a white ribbon cross and rest it in Santa’s lap, and add one small gold bell from a set like these gold liberty bells to the sack tie, sewn through twice so it stays put.
Tip: Style him on a small wooden bench or a stack of Christmas books. A seated figure at mantel height, with the sack beside him, reads as a whole scene rather than a single toy.
4. Santa Flat Lay on a Wooden Board
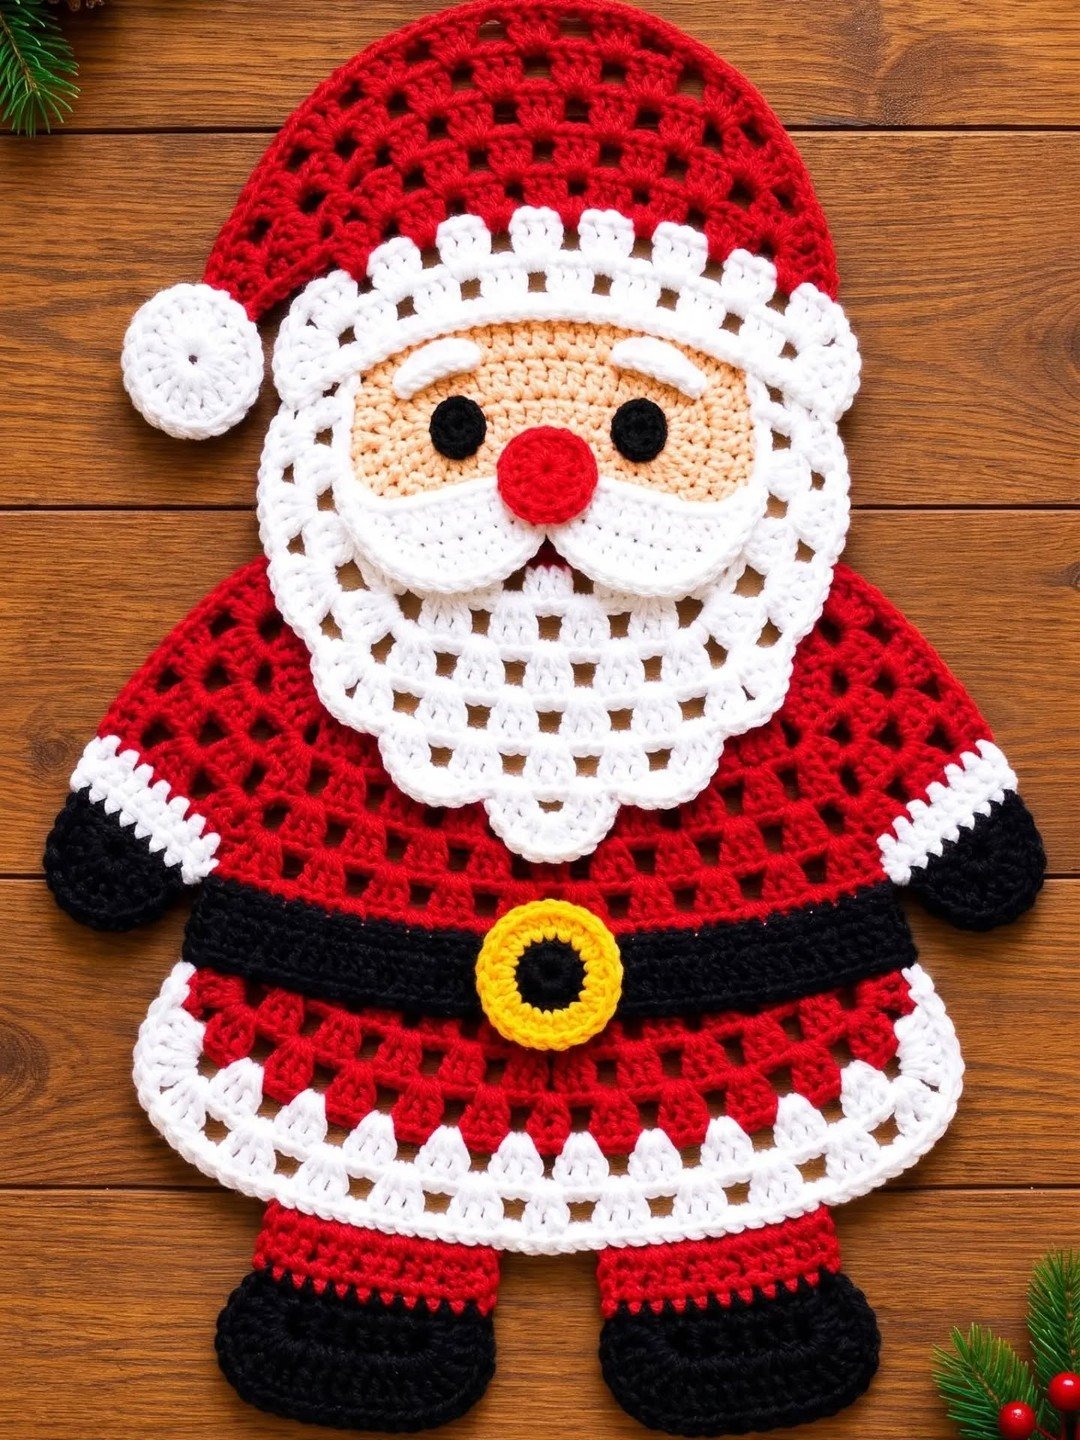
A finished Santa photographed flat on a warm wooden board, every part visible at a glance: hat, beard, belt and boots. Flat lay photos like this are worth studying before you start your own big Santa, because they show the true proportions, roughly one third head and beard, one third belly, one third legs and boots. The face details on a figure this size are usually embroidered, and a floss set like ThreadNanny embroidery floss in 100 colors covers smiles, brows and rosy cheeks.
You’ll need: Red, white, skin and black worsted yarn, 3.5 mm hook, embroidery floss for the face
Best for: Checking proportions before you begin
5. Classic Santa Decoration in Close Up
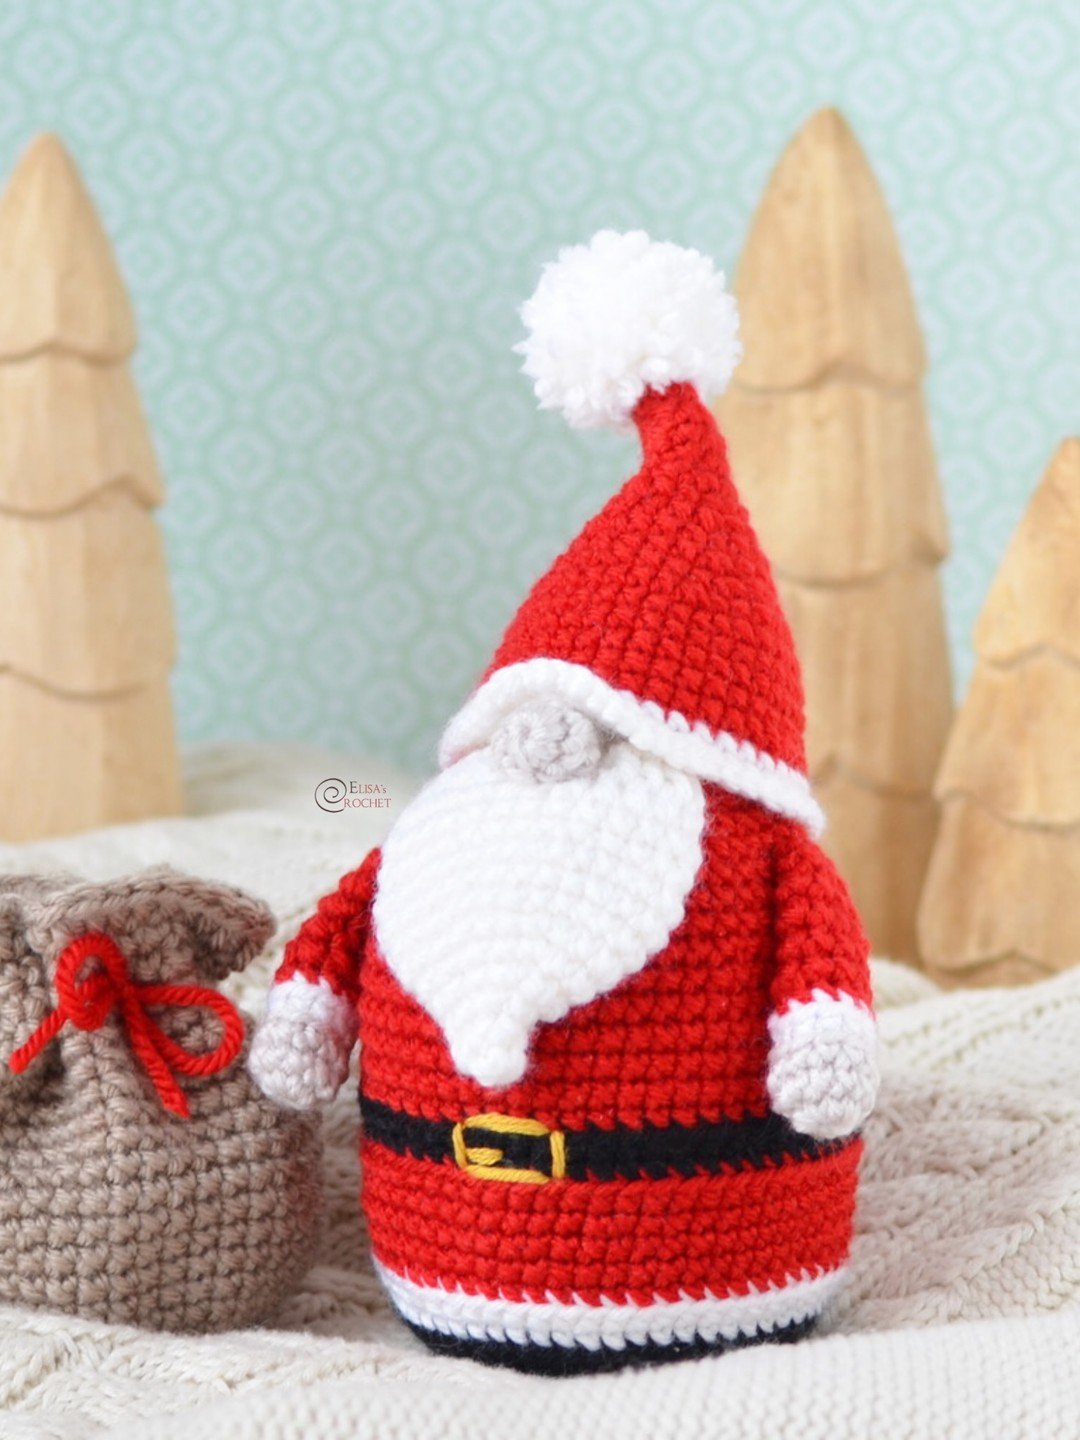
A traditional red and white Santa photographed close against a soft knitted backdrop, where the finish does the talking: tight even stitches, a fluffy brushed beard and a hat that sits at a cheerful tilt. Brushing the beard is the pro move; work it in a fuzzy white yarn or tease the strands gently with a clean pet brush after sewing. Crisp spare eyes from a set like the VERACT safety eyes and noses set keep the face symmetrical.
You’ll need: Worsted yarn in red, white and skin tone, 3.5 mm hook, safety eyes, a soft brush for the beard
Best for: Makers who love a polished, traditional finish
6. Simple Santa Doll on a Plain Background
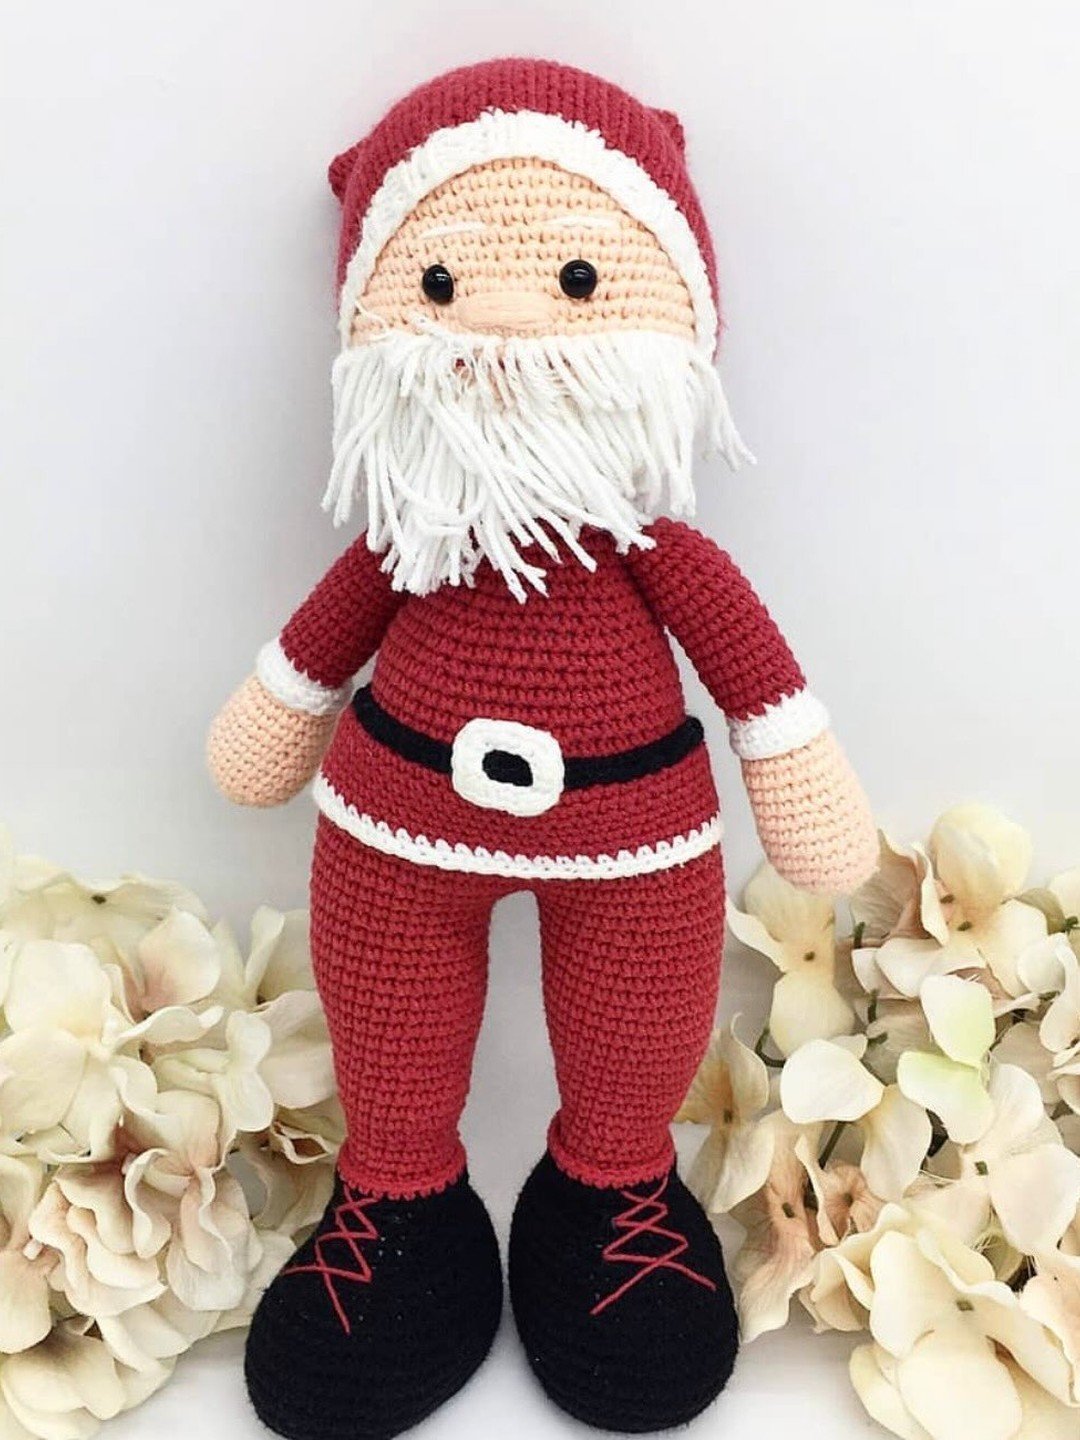
One sweet Santa doll photographed plainly, peach face, button eyes and a simple round shape that a beginner can genuinely finish. This is the big Santa idea at its most forgiving: one body shape, one head, minimal parts, and all the character carried by the beard and the hat. A good hook set such as the Hobekoee crochet hooks set gives you the small hook sizes that keep amigurumi stitches tight.
You’ll need: Red, white and skin tone yarn, 3 mm hook, stuffing, button or safety eyes
Best for: A first ever Santa project
7. Santa Doll on a Rustic Table

A finished Santa standing on a rustic wooden table, styled simply and shot in warm light. Rustic styling suits a handmade Santa perfectly: wood, twine and a sprig of greenery are all he needs. A loop of twine like MorningVale jute twine around the neck of a small gift sack or parcel completes the tabletop scene.
You’ll need: Classic Santa colors in worsted yarn, 3.5 mm hook, twine and greenery for styling
Best for: Farmhouse and rustic Christmas decor
8. Deep Maroon Santa
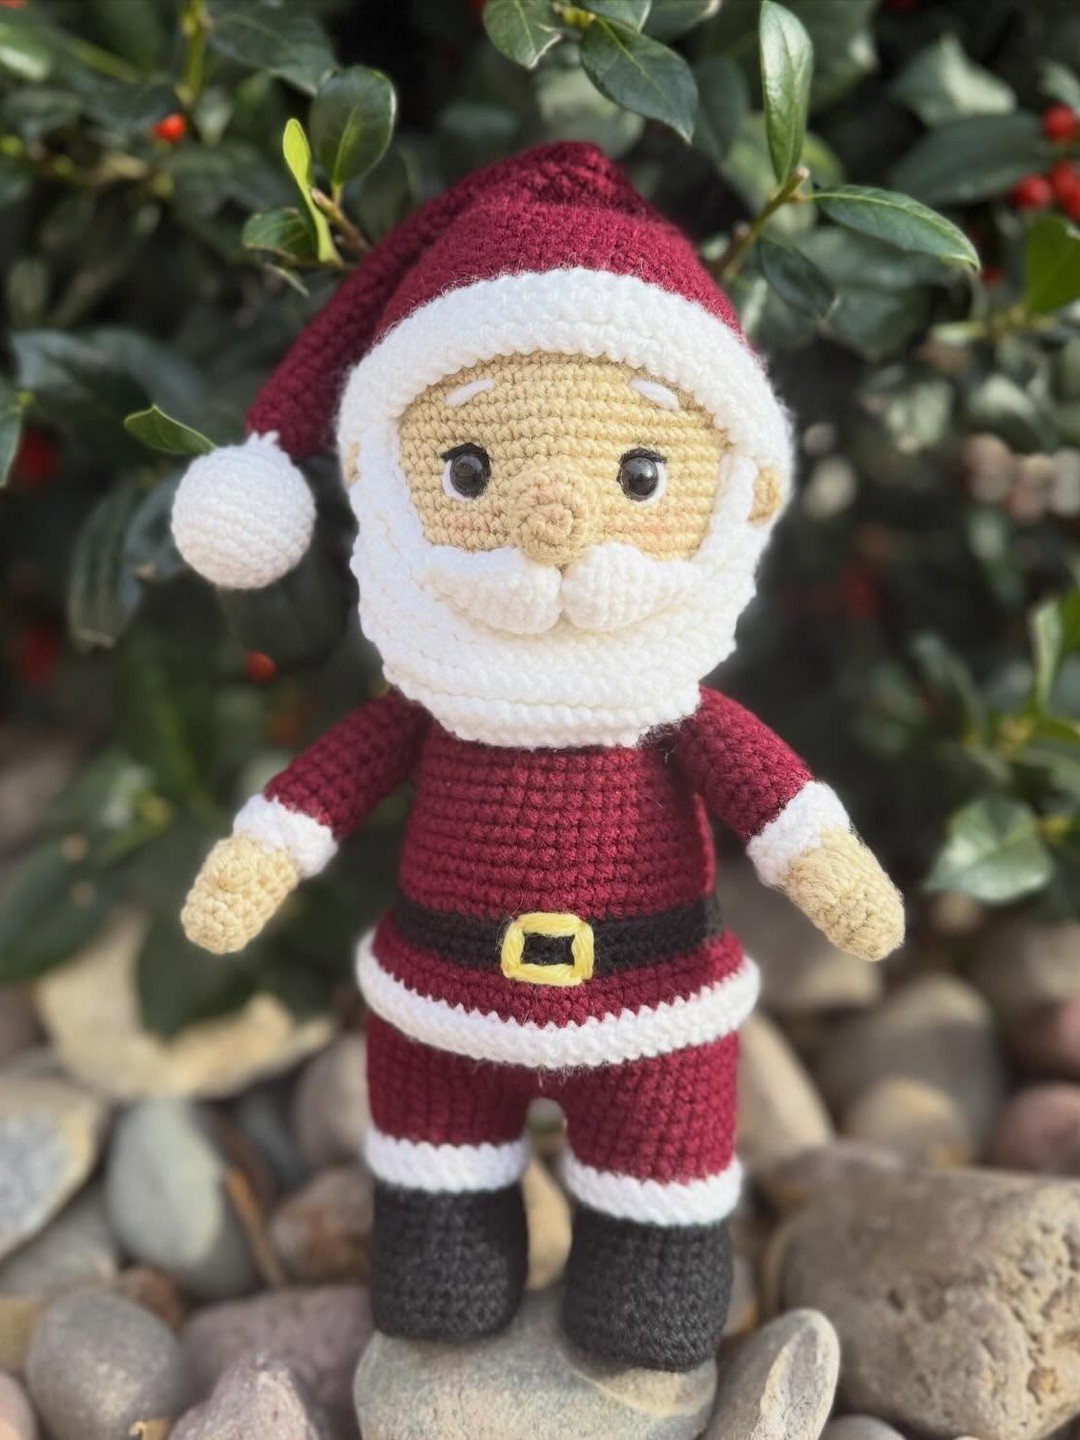
A Santa worked in deep maroon instead of bright red, photographed outdoors on smooth stones. The darker suit reads elegant and vintage, and it hides the dust a mantel figure gathers over a long season. Deep flecked yarns such as Caron Speckle yarn in Abyss sit in that same moody family for hats, boots or a whole alternative suit.
You’ll need: Maroon or burgundy worsted yarn, cream for trim, 3.5 mm hook, stuffing
Best for: A grown up, vintage style mantel
9. Big Detailed Santa by the Tree

A larger, ambitious Santa with detailed faces and careful finishing, photographed in front of a lit Christmas tree, which is exactly where a big Santa belongs. Detail at this scale means individual fingers are skipped but expression is everything: placed eyes, a shaped nose, blush low on the cheeks. Spare eye sets like the XKDOUS safety eyes set let you test sizes against the face before committing.
You’ll need: Worsted yarn in Santa colors, 3.5 mm hook, several eye sizes to test, plenty of stuffing
Best for: An heirloom piece for the tree corner
10. Santa Head Ornament
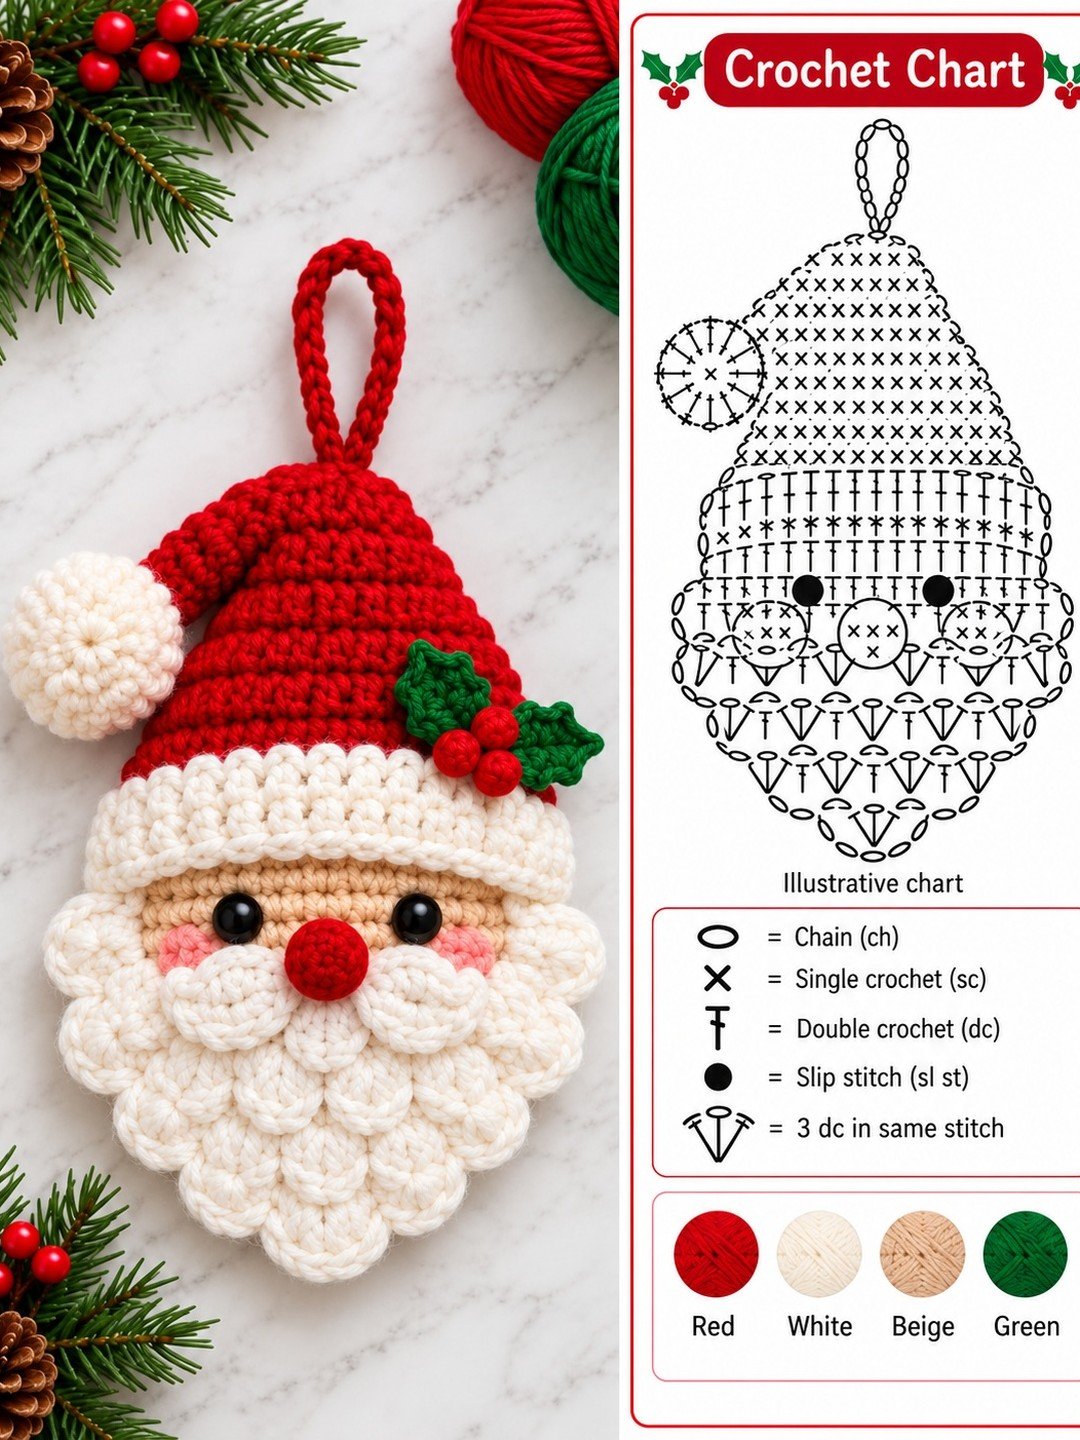
Just the head, and what a head: curly moustache, rosy cheeks, a holly sprig on the hat and a beard full of texture, made to hang on the tree or finish a gift. Work a squashed sphere in skin tone, add a white beard cap worked in bobble or loop stitch, a red hat band and cone folded over, then embroider the moustache in white curls. A hanging loop of twine such as La Cordeline jute twine keeps the rustic look.
You’ll need: Skin, white and red yarn scraps, 3 mm hook, a little stuffing, twine for hanging
Best for: A one evening make and gift topper
Frequently Asked Questions
How big should a crochet Santa be?
For a mantel statement piece, aim for 12 to 16 inches tall in worsted yarn with a 3.5 mm hook. The same notes worked in chunky yarn with a 6 mm hook grow to around 20 inches, and in DK yarn they shrink to about 9 inches. Choose the size by where he will live, then pick the yarn to match.
How do I make a tall Santa stand up?
Three tricks work together: a flat base circle of cardboard or plastic canvas inside the bottom round, extra firm stuffing in the boots and lower body, and a slightly back tilted sew line for the head so the weight centers over the feet. If he still leans, rest him against the wall or sit him down like idea 3.
Are safety eyes safe for toddlers?
No. Safety eyes can work loose under determined chewing and are not recommended for children under three. For any Santa a toddler will hold, embroider the eyes and nose with yarn, skip bells and buttons, and sew the hat and beard on with extra thread passes.
How long does the big Santa take to crochet?
Plan on two weekends of relaxed evening sessions for the standing Santa: one for boots, body and head, one for beard, hat, arms and assembly. The Mrs Claus pair and the toy sack version take a little longer, while the head ornament is a single evening.
What yarn works best for a big Santa?
Worsted acrylic is the reliable choice: firm stitches, bright red that does not fade, and a figure that keeps its shape year after year. Cotton gives a crisper, heavier doll. Chunky blanket yarn makes the fastest, softest giant, but sew the parts on with extra care because the stitches are large.
How do I make Santa’s beard look full?
Work the beard as a separate piece with loop stitches, or crochet a plain beard shape and sew on rows of cut yarn strands, then brush them gently and trim into a point. A little blush on the cheeks and a round nose placed high on the beard complete the classic face.
Final Thoughts on Free Crochet Santa Claus
One big Santa, built slowly and stuffed firmly, becomes the decoration your family looks for first every December. Start with the standing Santa, add Mrs Claus or the toy sack when you are ready, and let this free crochet santa claus guide carry you from the first boot to the final bell.