A plumbing vent pipe is crucial for a smooth system and keeping harmful sewer gases out of your home. It regulates air pressure, allowing wastewater to flow freely and preventing clogs or slow drainage. Installing a vent pipe is straightforward with the right tools: a pipe cutter, vent pipe, fittings, sealant, and safety gear.
Start by planning the pipe’s route, connecting it to the main plumbing line and extending it outside, usually through the roof. Cut and fit the pipe and sealing joints to prevent leaks. Secure the vent, test for leaks or clogs, and enjoy a safe, efficient plumbing system!
Importance Of Vent Pipes
Installing a plumbing vent pipe is crucial for a healthy drainage system. Vent pipes are essential components in any plumbing system. They ensure proper airflow and prevent sewer gases from entering your home.

Role In Plumbing
Vent pipes play a vital role in the plumbing system. Their primary function is to regulate air pressure within the pipes. This is essential for the proper flow of water and waste. The Plumbing Ventilation System prevents vacuums and siphoning, ensuring smooth drainage.
Here are some key roles of vent pipes:
- Vent Pipe Function: Allows air to enter the drainage system.
- Plumbing Air Vent: Helps to equalize pressure in the pipes.
- Sewer Gas Prevention: Blocks harmful gases from entering living spaces.
The Plumbing Vent Installation must follow specific guidelines. Proper Vent Stack Placement is crucial. It should be positioned vertically and above the roofline to allow gases to escape safely. Adhering to Plumbing Code Requirements ensures safety and functionality.
Benefits Of Proper Ventilation
Proper ventilation in the plumbing system offers numerous benefits. It ensures Proper Airflow In Plumbing, which is essential for efficient drainage. Without proper ventilation, water flow can be disrupted. This can lead to clogs and slow drainage.
Other benefits include:
- Drain System Ventilation: Reduces the risk of blockages.
- Sewer Gas Prevention: Protects from exposure to harmful gases.
- Benefits Of Venting: Extends the lifespan of the plumbing system.
Proper ventilation also helps maintain a clean and odour-free home. It prevents the buildup of sewer gases, which can be hazardous to health. Ensuring a well-ventilated plumbing system is essential for a safe and comfortable living environment.
Tools And Materials Needed
Installing a plumbing vent pipe is a vital part of any plumbing system. It helps to keep water flowing smoothly and prevents sewer gases from entering your home. To do this job right, you need specific tools and materials.
Essential Tools
Having the right tools is crucial for installing a plumbing vent pipe. Here are the essential tools you’ll need:
- Pipe cutter: This tool helps you cut pipes to the right length.
- Measuring tape: Use this to measure the lengths of the pipe accurately.
- Pipe wrench: This is used to tighten or loosen the pipes.
- Level: Ensures that the pipes are properly aligned.
- Drill: Needed to make holes in walls or floors for the pipes.
- Hacksaw: Useful for cutting through metal or plastic pipes.
- Deburring tool: Smoothens the edges of cut pipes.
These tools are essential to make the job easier and ensure a proper installation. Without them, the task can become difficult and time-consuming. Make sure to gather all these tools before starting the project.
Required Materials
In addition to tools, you will need specific materials to install a plumbing vent pipe:
- Vent pipe: The main material, usually made of PVC or ABS.
- Pipe fittings: Connect sections of pipe and change directions.
- Pipe cement: Used to glue PVC pipes and fittings together.
- Primer: Prepares the pipe surfaces for cement.
- Pipe clamps: Secures the pipes in place.
- Roof flashing: Seals the pipe where it exits the roof.
- Pipe insulation: Protects the pipes from freezing in cold weather.
Having these materials ready will help you complete the installation smoothly. Always choose materials that are compatible with each other. For example, PVC pipes should be used with PVC cement and primer. This ensures a strong and leak-free connection.
Choosing The Right Location
Installing a plumbing vent pipe is crucial for proper drainage and air circulation in your home. The right location ensures efficient plumbing ventilation. Choosing the right spot can be tricky, but it’s essential for a smooth plumbing vent installation. This guide will help you understand the best placement and how to avoid common obstructions.
Ideal Placement
A plumbing vent pipe placement is vital for an effective drainage system. Here are some key points to consider:
- Close to the fixture: Place the vent pipe as close to the plumbing fixture as possible. This will help with better air circulation and reduce the chances of clogs.
- Roof venting: The vent pipe should extend through the roof to release gases outside, preventing them from entering your home.
- Proper height: Ensure the vent pipe is at least 6 inches above the roofline. This keeps it clear of snow or debris.
Here’s a table for quick reference on ideal vent pipe placement:
| Location | Distance from Fixture | Height Above Roof |
|---|---|---|
| Bathroom Sink | Within 4 feet | 6 inches |
| Kitchen Sink | Within 5 feet | 6 inches |
| Toilet | Within 6 feet | 6 inches |
Avoiding Obstructions
Obstruction-free installation ensures the smooth functioning of your plumbing vent pipe. Here are some tips to avoid common obstructions:
- Check for structural barriers: Avoid placing the vent pipe near beams, walls, or other structural elements. This prevents damage and ensures proper installation.
- Clear of other utilities: Ensure the vent pipe does not interfere with electrical wiring, HVAC systems, or other plumbing lines. This reduces the risk of complications.
- Follow plumbing code requirements: Adhere to local plumbing codes. These codes provide guidelines for safe and efficient vent stack placement.
By following these tips, you can achieve a smooth and effective plumbing vent installation. Proper planning and adherence to guidelines are key to a successful project.
Cutting The Vent Pipe
Installing a plumbing vent pipe is essential for any home plumbing system. The vent pipe helps to balance the air pressure in your drains, preventing sewer gases from entering your home. Cutting the vent pipe accurately is a crucial part of this process.
Measuring Accurately
Before cutting, you need to measure the pipe correctly to ensure a proper fit. Accurate measurements are key to avoiding leaks and other issues.
Here are some steps to measure accurately:
- Use a tape measure. Make sure it’s straight and not bent.
- Measure from the point where the pipe will connect.
- Mark the pipe with a pencil or marker. Mark both the length and angle if needed.
Double-check your measurements to ensure they are correct. A good rule to follow is to measure twice and cut once.
Using a measuring tape with clear markings helps. A small mistake can cause big problems later on.
| Tool | Use |
|---|---|
| Tape Measure | For accurate measurements |
| Marker | To mark the cutting points |
Cutting Techniques
Once you have your measurements, it’s time to cut the pipe. The proper technique will give you a clean cut and a good fit.
Here are some common cutting techniques:
- Hand Saw: Good for small jobs. Make sure to use a fine-toothed blade.
- Pipe Cutter: Best for a straight and clean cut. Easy to use and very precise.
- Reciprocating Saw: Good for larger pipes. Use a metal-cutting blade for best results.
Each tool has its advantages. Choose one that fits your needs and skill level. Always wear safety gear when cutting. Safety glasses and gloves are a must.
After cutting, smooth the edges with sandpaper. This ensures a good fit and prevents leaks. Take your time and make sure the cut is straight.
Connecting To The Drainage System
Installing a plumbing vent pipe is crucial for a well-functioning drainage system. This process ensures that your home’s plumbing system is safe and efficient. Proper installation helps prevent unwanted odours and maintains steady water flow.
Proper Fittings
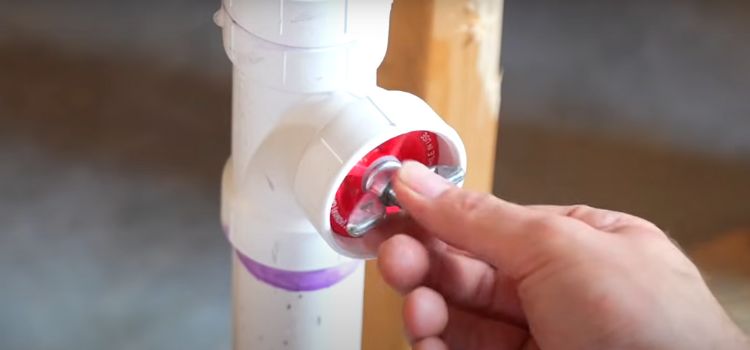
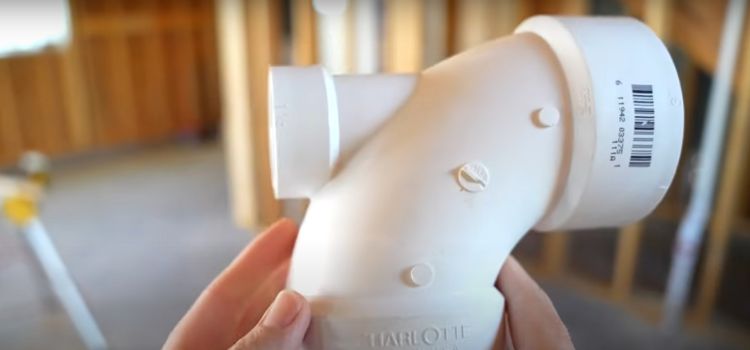
Using the right fittings is key to a successful installation. Proper fittings ensure a secure connection and prevent leaks. Here’s what you need to know about the different types of fittings:
- Elbow fittings: These are used to change the direction of the pipe. They come in different angles such as 45 degrees and 90 degrees.
- Tee fittings: These are used to connect three pipes. They help to branch off the main pipe.
- Couplings: These are used to join two pipes of the same diameter. They provide a secure connection.
- Reducers: These fittings are used to connect pipes of different sizes.
It’s important to choose fittings that match the pipe material. Common materials include PVC, ABS, and cast iron. Make sure to measure the pipe diameter accurately before purchasing fittings.
Sealing Connections
Sealing connections properly is essential to avoid leaks. A good seal ensures that the vent pipe operates efficiently. Here are some steps to ensure a proper seal:
- Clean the pipe ends: Dirt and debris can prevent a good seal. Before connecting the pipes, use a cloth to clean the ends.
- Apply pipe primer: Use a primer for PVC and ABS pipes. This helps prepare the pipe surface for a strong bond.
- Use pipe cement: Apply a generous amount of pipe cement to the pipe ends and fittings. This creates a watertight seal.
- Join the pipes: Press the pipes and fittings together firmly. Hold them for a few seconds to allow the cement to set.
- Check for leaks: Once the cement has dried, check the connections for leaks. Run water through the system to ensure there are no issues.
A well-sealed connection prevents future problems. It also ensures that your plumbing system remains efficient and safe.
Installing The Vent Stack
Installing a plumbing vent pipe is crucial for any plumbing system. It helps eliminate gases from your pipes and ensures proper water flow. One essential part of this process is installing the vent stack. This component helps maintain the balance of pressure in your plumbing system.
Vertical Installation
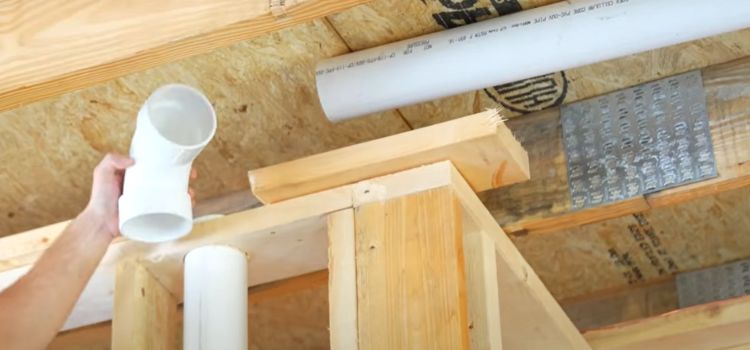
The first step is to install the vent stack vertically. This ensures that gases can escape easily. Start by identifying the correct location for the vent stack. It should be near your main drain line. This makes it easier to connect the pipes.
Follow these steps for a successful vertical installation:
- Measure the length of the vent pipe needed.
- Cut the pipe to the desired length using a saw.
- Clean the edges of the pipe to remove any burrs.
- Apply primer to the ends of the pipe and fittings.
- Apply cement to the primed areas and quickly join the pieces.
Make sure the pipe is straight and vertical. Use a level to check the alignment. Adjust as needed to maintain verticality. Proper vertical installation ensures efficient venting.
Securing The Stack
Securing the vent stack is the next critical step. This prevents any movement or damage. You will need brackets or clamps for this process.
Here are the steps to secure the stack:
| Step | Action |
|---|---|
| 1 | Place brackets around the pipe at regular intervals. |
| 2 | Drill holes into the wall or support structure. |
| 3 | Insert anchors into the drilled holes. |
| 4 | Screw the brackets into the anchors to secure the pipe. |
Ensure the pipe is firmly attached to prevent any movement. Recheck the alignment with a level. A secure vent stack will provide long-lasting performance.
Testing The Vent Pipe
Installing a plumbing vent pipe is crucial for effective drainage and for maintaining proper airflow in your plumbing system. Testing the vent pipe is an important step. This ensures there are no leaks and that airflow is smooth.
Checking For Leaks
Leak detection is a key part of plumbing maintenance. It’s important to check for any leaks in your vent pipe. Here are some steps to follow:
- Inspect the vent pipe materials for any visible damage.
- Use a flashlight to look for cracks or holes.
- Check the connections and joints to ensure they are tight.
Sometimes, leaks are not visible. In such cases, you can perform a smoke test. This involves introducing smoke into the system and checking for smoke escaping from any part of the vent pipe. Another method is using a soapy water solution. Apply the solution to the joints and connections. If bubbles form, it indicates a leak.
| Leak Detection Method | Description |
|---|---|
| Visual Inspection | Look for visible damage or cracks. |
| Smoke Test | Introduce smoke to find escaping leaks. |
| Soapy Water Solution | Apply solution; bubbles indicate leaks. |
Ensuring Airflow
Ensuring proper plumbing air flow is essential for your drainage system. Here are some steps to ensure your vent stack is functioning correctly:
- Make sure the vent pipe placement follows plumbing code requirements.
- Ensure there is no blockage in the vent stack.
- Check for any debris or obstructions.
Roof venting plays a crucial role. It allows the air to move freely. This prevents the buildup of sewer gases in your home. Regularly inspect the roof vent for any blockages. Birds or debris can sometimes block it. Using a long brush can help in cleaning the vent stack.

Maintenance Tips
Installing a plumbing vent pipe is essential for any home plumbing system. It helps air flow through the pipes, preventing clogs and ensuring smooth drainage. Proper maintenance of your plumbing vent pipe is crucial to keep your system working well.
Regular Inspections
Performing regular inspections on your plumbing vent pipe is essential. This helps identify potential issues before they become serious problems.
Here are some steps to follow:
- Check for any visible damage or cracks in the vent pipe.
- Ensure no blockages or debris are obstructing the vent pipe.
- Inspect the roof where the vent pipe exits for any signs of leaks.
A thorough inspection should be done at least once a year. This can help catch issues early and prevent costly repairs.
A table of common inspection tasks:
| Task | Frequency |
|---|---|
| Check for visible damage | Annually |
| Ensure no blockages | Annually |
| Inspect roof for leaks | Annually |
Troubleshooting Common Issues
Troubleshooting common issues with your plumbing vent pipe can save time and money. Some common problems include clogs, leaks, and improper installation.
For clogs, use a plumber’s snake to remove debris. Be gentle to avoid damaging the pipe. If leaks are present, inspect the joints and connections for any signs of wear. Replace any damaged parts as needed.
Improper installation can cause serious issues. Ensure the vent pipe is installed according to local building codes. If unsure, consult a professional plumber.
Here are some troubleshooting tips:
- Use a plumber’s snake to clear clogs.
- Inspect and replace damaged joints and connections.
- Consult a professional for installation issues.
Regular maintenance and prompt troubleshooting can keep your plumbing vent pipe functioning properly.
Frequently Asked Questions
What Tools Are Needed To Install A Vent Pipe?
To install a plumbing vent pipe, you need a saw, drill, pipe wrench, pipe cutter, and measuring tape.
How Do You Choose The Right Vent Pipe Size?
Choose a vent pipe that matches your plumbing system’s requirements. Common sizes are 1. 5 to 4 inches.
Can I Install A Vent Pipe Myself?
You can install a vent pipe yourself if you follow proper guidelines and safety precautions.
Why Is A Plumbing Vent Pipe Important?
A plumbing vent pipe prevents sewer gases from entering your home and ensures proper drainage.
Conclusion
Installing a plumbing vent pipe might seem complex, but it’s manageable. Follow each step carefully. Gather all necessary tools before starting. Ensure all connections are secure to prevent leaks. Always check local building codes. Safety should be your top priority.
If unsure, consult a professional plumber. Proper installation ensures your plumbing system works efficiently. Don’t rush the process. A well-vented plumbing system prevents sewer gases from entering your home. Keep your home safe and odor-free. With patience and attention, you can complete this project.
Happy plumbing!

